"Handycam" User Guide
Operation Search
Before use
Getting started
Recording
Playback
Saving images with an external device
Customizing your camcorder
Troubleshooting
Maintenance and precautions
 Contents list
Search | |
|
|
Top page > Playback > Using the
Using the built-in projector (HDR-PJ200)
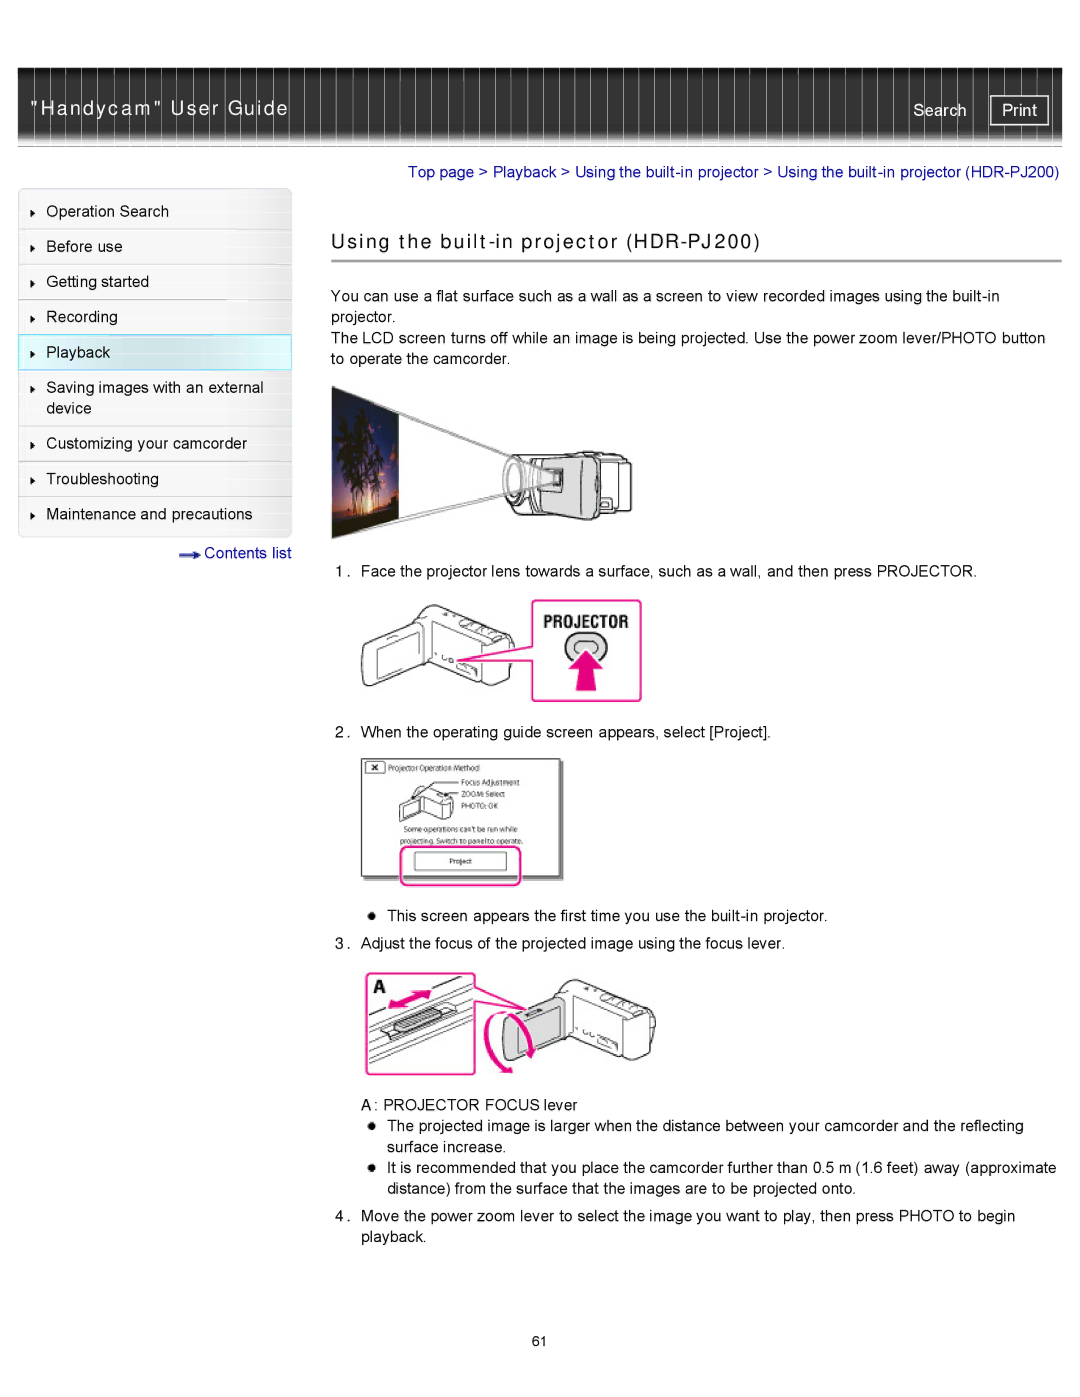
You can use a flat surface such as a wall as a screen to view recorded images using the
The LCD screen turns off while an image is being projected. Use the power zoom lever/PHOTO button to operate the camcorder.
1.Face the projector lens towards a surface, such as a wall, and then press PROJECTOR.
2.When the operating guide screen appears, select [Project].
![]() This screen appears the first time you use the
This screen appears the first time you use the
3.Adjust the focus of the projected image using the focus lever.
A: PROJECTOR FOCUS lever
The projected image is larger when the distance between your camcorder and the reflecting surface increase.
It is recommended that you place the camcorder further than 0.5 m (1.6 feet) away (approximate distance) from the surface that the images are to be projected onto.
4.Move the power zoom lever to select the image you want to play, then press PHOTO to begin playback.
61