Using The Viewfinder
As with most astronomical telescopes, the ETX model telescopes present a fairly narrow field of view to the observer. As a result it is sometimes difficult to locate and center objects in the telescope’s field of view. The viewfinder, by contrast, is a
1 |
2 |
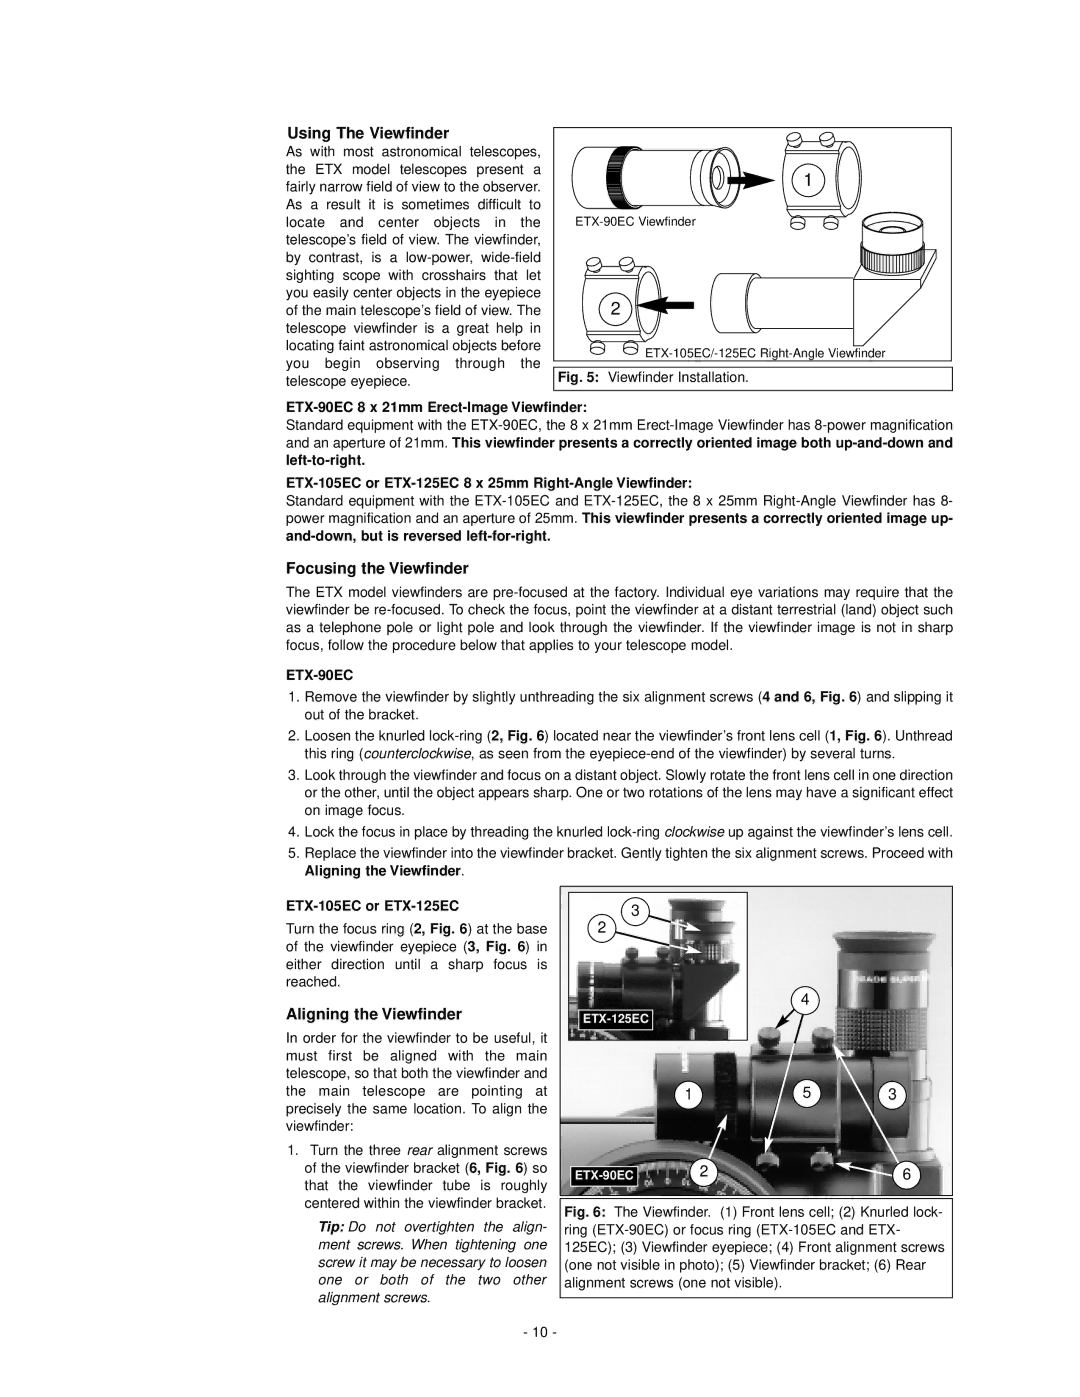
Fig. 5: Viewfinder Installation.
ETX-90EC 8 x 21mm Erect-Image Viewfinder:
Standard equipment with the
and an aperture of 21mm. This viewfinder presents a correctly oriented image both
Standard equipment with the
power magnification and an aperture of 25mm. This viewfinder presents a correctly oriented image up-
Focusing the Viewfinder
The ETX model viewfinders are
ETX-90EC
1.Remove the viewfinder by slightly unthreading the six alignment screws (4 and 6, Fig. 6) and slipping it out of the bracket.
2.Loosen the knurled
3.Look through the viewfinder and focus on a distant object. Slowly rotate the front lens cell in one direction or the other, until the object appears sharp. One or two rotations of the lens may have a significant effect on image focus.
4.Lock the focus in place by threading the knurled
5.Replace the viewfinder into the viewfinder bracket. Gently tighten the six alignment screws. Proceed with Aligning the Viewfinder.
ETX-105EC or ETX-125EC
Turn the focus ring (2, Fig. 6) at the base of the viewfinder eyepiece (3, Fig. 6) in either direction until a sharp focus is reached.
Aligning the Viewfinder
In order for the viewfinder to be useful, it must first be aligned with the main telescope, so that both the viewfinder and the main telescope are pointing at precisely the same location. To align the viewfinder:
1.Turn the three rear alignment screws of the viewfinder bracket (6, Fig. 6) so that the viewfinder tube is roughly centered within the viewfinder bracket.
Tip: Do not overtighten the align- ment screws. When tightening one screw it may be necessary to loosen one or both of the two other alignment screws.
3 |
|
|
|
2 |
|
|
|
|
| 4 |
|
|
|
| |
| 1 | 5 | 3 |
2 |
| 6 |
Fig. 6: The Viewfinder. (1) Front lens cell; (2) Knurled lock- ring (ETX-90EC) or focus ring (ETX-105EC and ETX- 125EC); (3) Viewfinder eyepiece; (4) Front alignment screws (one not visible in photo); (5) Viewfinder bracket; (6) Rear alignment screws (one not visible).
- 10 -