GETTING STARTED
Parts List
ETX telescopes are assembled virtually complete at the Meade factory. Getting the telescope ready for first observations requires only a few minutes. When first opening the packing box, note carefully the following parts:
•The ETX Astro Telescope with fork- mount system.
•Electronic Controller with attached coil cord.
•Viewfinder.
•Super Plössl (SP) 26mm eyepiece, packed in a plastic storage container.
•
The viewfinder is packed separately from the main telescope to avoid the possibility of the viewfinder slipping in its bracket and scratching during shipment.
Assembly Instructions
Assembly of your telescope requires the following procedures: install batteries, insert an eyepiece, attach the viewfinder, and plug in the handbox.
1
2
3
6
4
5
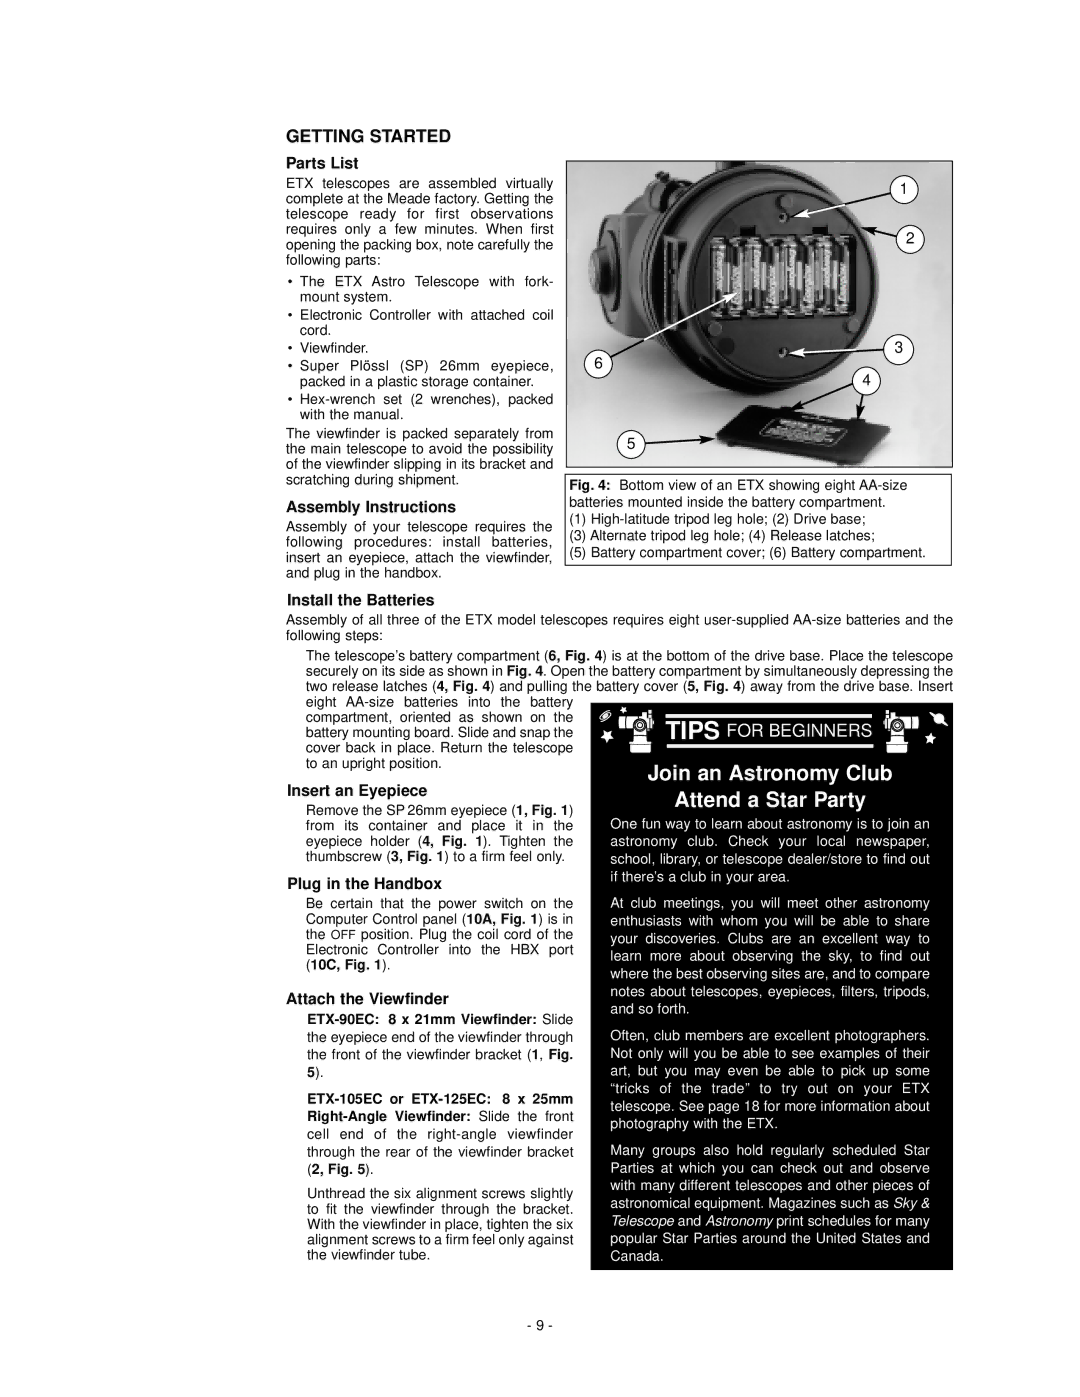
Fig. 4: Bottom view of an ETX showing eight AA-size batteries mounted inside the battery compartment.
(1)High-latitude tripod leg hole; (2) Drive base;
(3)Alternate tripod leg hole; (4) Release latches;
(5)Battery compartment cover; (6) Battery compartment.
Install the Batteries
Assembly of all three of the ETX model telescopes requires eight
The telescope’s battery compartment (6, Fig. 4) is at the bottom of the drive base. Place the telescope securely on its side as shown in Fig. 4. Open the battery compartment by simultaneously depressing the two release latches (4, Fig. 4) and pulling the battery cover (5, Fig. 4) away from the drive base. Insert eight
compartment, oriented as shown on the battery mounting board. Slide and snap the cover back in place. Return the telescope
to an upright position.
Insert an Eyepiece
Remove the SP 26mm eyepiece (1, Fig. 1) from its container and place it in the eyepiece holder (4, Fig. 1). Tighten the thumbscrew (3, Fig. 1) to a firm feel only.
Plug in the Handbox
Be certain that the power switch on the Computer Control panel (10A, Fig. 1) is in the OFF position. Plug the coil cord of the Electronic Controller into the HBX port (10C, Fig. 1).
Attach the Viewfinder
cell end of the
(2, Fig. 5).
Unthread the six alignment screws slightly to fit the viewfinder through the bracket. With the viewfinder in place, tighten the six alignment screws to a firm feel only against the viewfinder tube.
- 9 -