into the electrical receptacle. Now you will see the LED of Port 1 lights up, and hear a beep sound.
yRecommended Power On sequence: Monitor, KVM then PC.
2.6Daisy Chain Connection
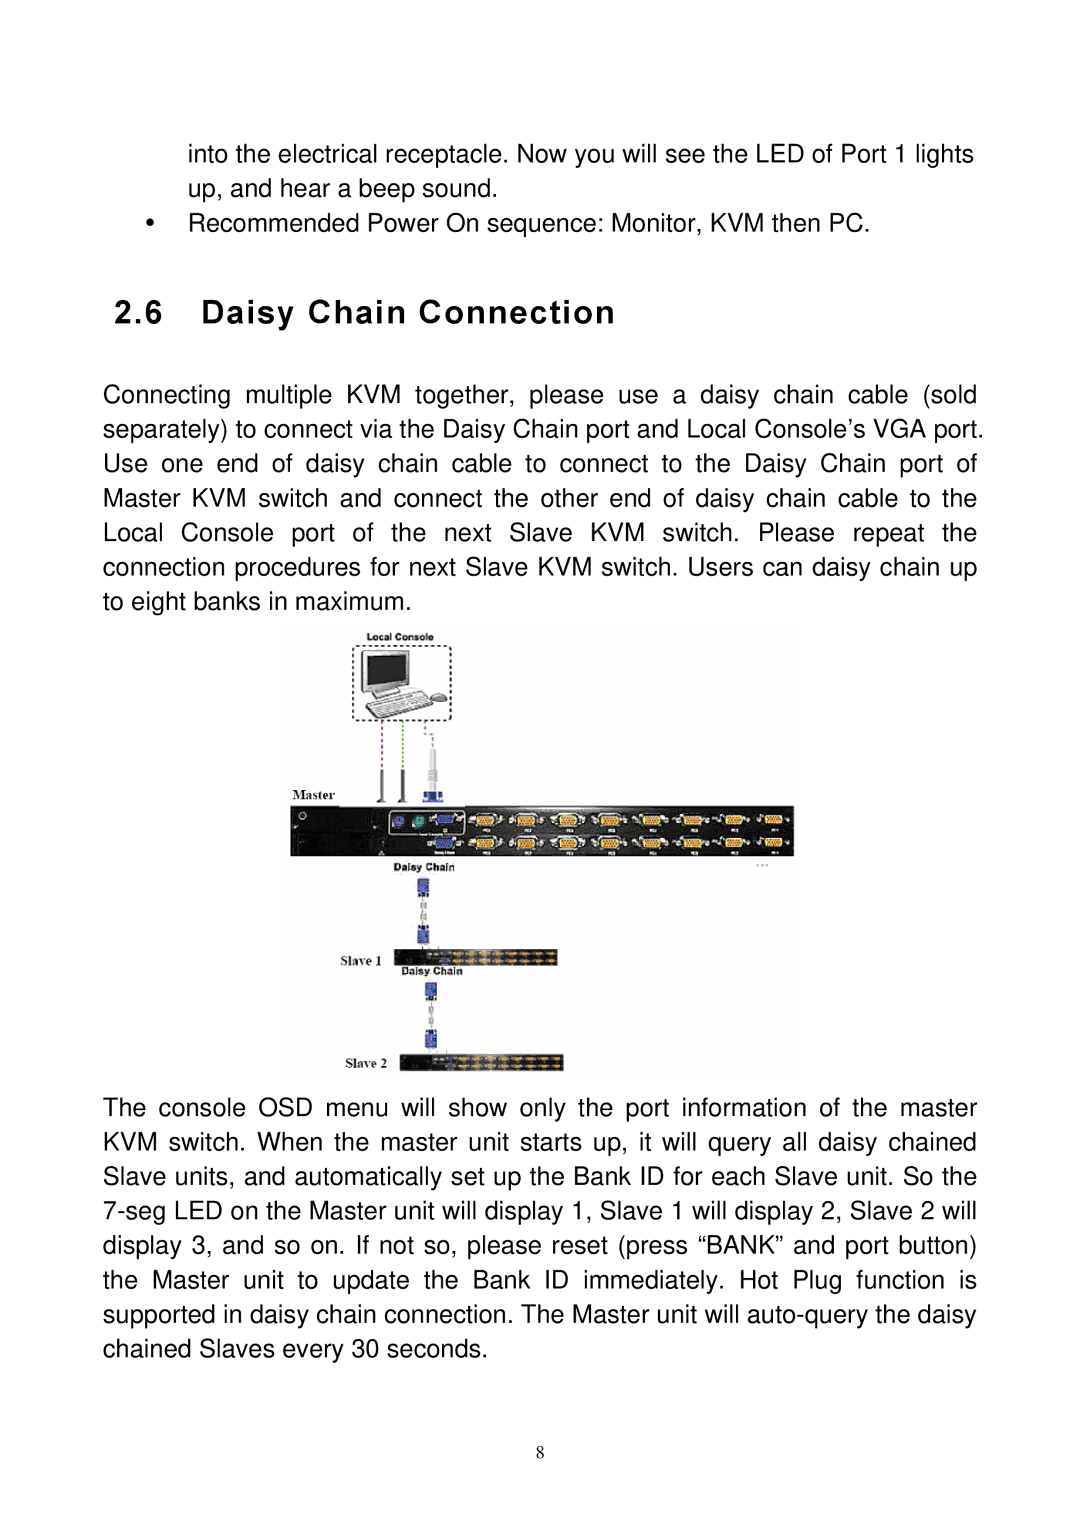
Connecting multiple KVM together, please use a daisy chain cable (sold separately) to connect via the Daisy Chain port and Local Console’s VGA port. Use one end of daisy chain cable to connect to the Daisy Chain port of Master KVM switch and connect the other end of daisy chain cable to the Local Console port of the next Slave KVM switch. Please repeat the connection procedures for next Slave KVM switch. Users can daisy chain up to eight banks in maximum.
The console OSD menu will show only the port information of the master KVM switch. When the master unit starts up, it will query all daisy chained Slave units, and automatically set up the Bank ID for each Slave unit. So the
8
