Installation instructions
|
| Depth | Width * |
|
| in | (= Dimen- |
|
| inch | sion B) |
|
|
| in inch |
|
|
| |
2 zone Combiset |
|
| |
1 | Combiset |
|
|
2 | Combisets | 22" | |
3 | Combisets |
| |
4 | Combisets |
| |
5 | Combisets |
| |
|
|
| |
4 zone Combiset |
|
| |
1 | Combiset | 22" | |
2 | Combisets | 45" | |
3 | Combisets | 68" | |
Combination |
|
| |
One 2 zone |
|
| |
+ one 4 zone | |||
Two 2 zone |
|
| |
+ one 4 zone | 45" | ||
Three 2 zone |
|
| |
+ one 4 zone | |||
One 2 zone |
|
| |
+ two 4 zone | |||
Two 2 zone |
|
| |
+ two 4 zone | |||
|
|
|
|
Extractor (e.g. DA
Place the provided seal f under the edge of the grill.
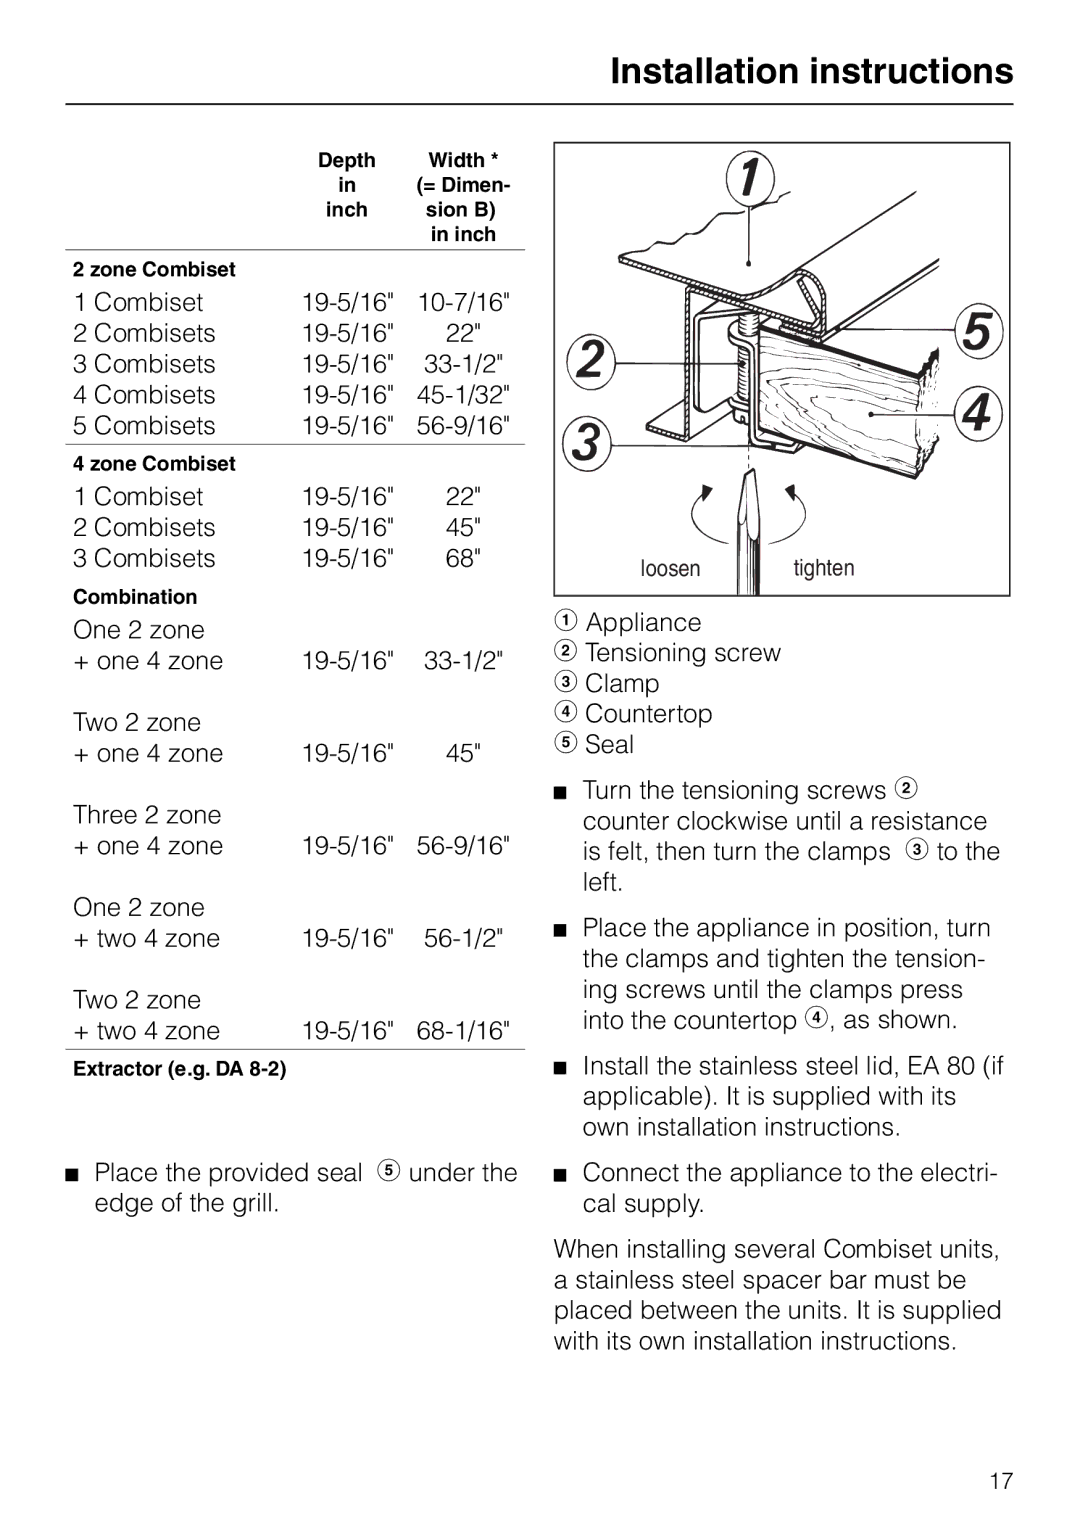
loosen | tighten |
bAppliance
cTensioning screw d Clamp
e Countertop f Seal
Turn the tensioning screws c counter clockwise until a resistance is felt, then turn the clamps d to the left.
Place the appliance in position, turn the clamps and tighten the tension- ing screws until the clamps press into the countertop e, as shown.
Install the stainless steel lid, EA 80 (if applicable). It is supplied with its own installation instructions.
Connect the appliance to the electri- cal supply.
When installing several Combiset units, a stainless steel spacer bar must be placed between the units. It is supplied with its own installation instructions.
17
