Installation |
|
|
| When performing any work on the | |
| custom door, always observe the | |
| following: | |
| – | Always select the best |
|
| surface of the custom door as the |
|
| location for screws. |
| – | Select a screw length that is shorter |
|
| than the thickness of the door front. |
| Attaching and aligning the | |
^ Mark the distance X on the | custom door front | |
of the custom door. | ^ Fit the door handle to the custom | |
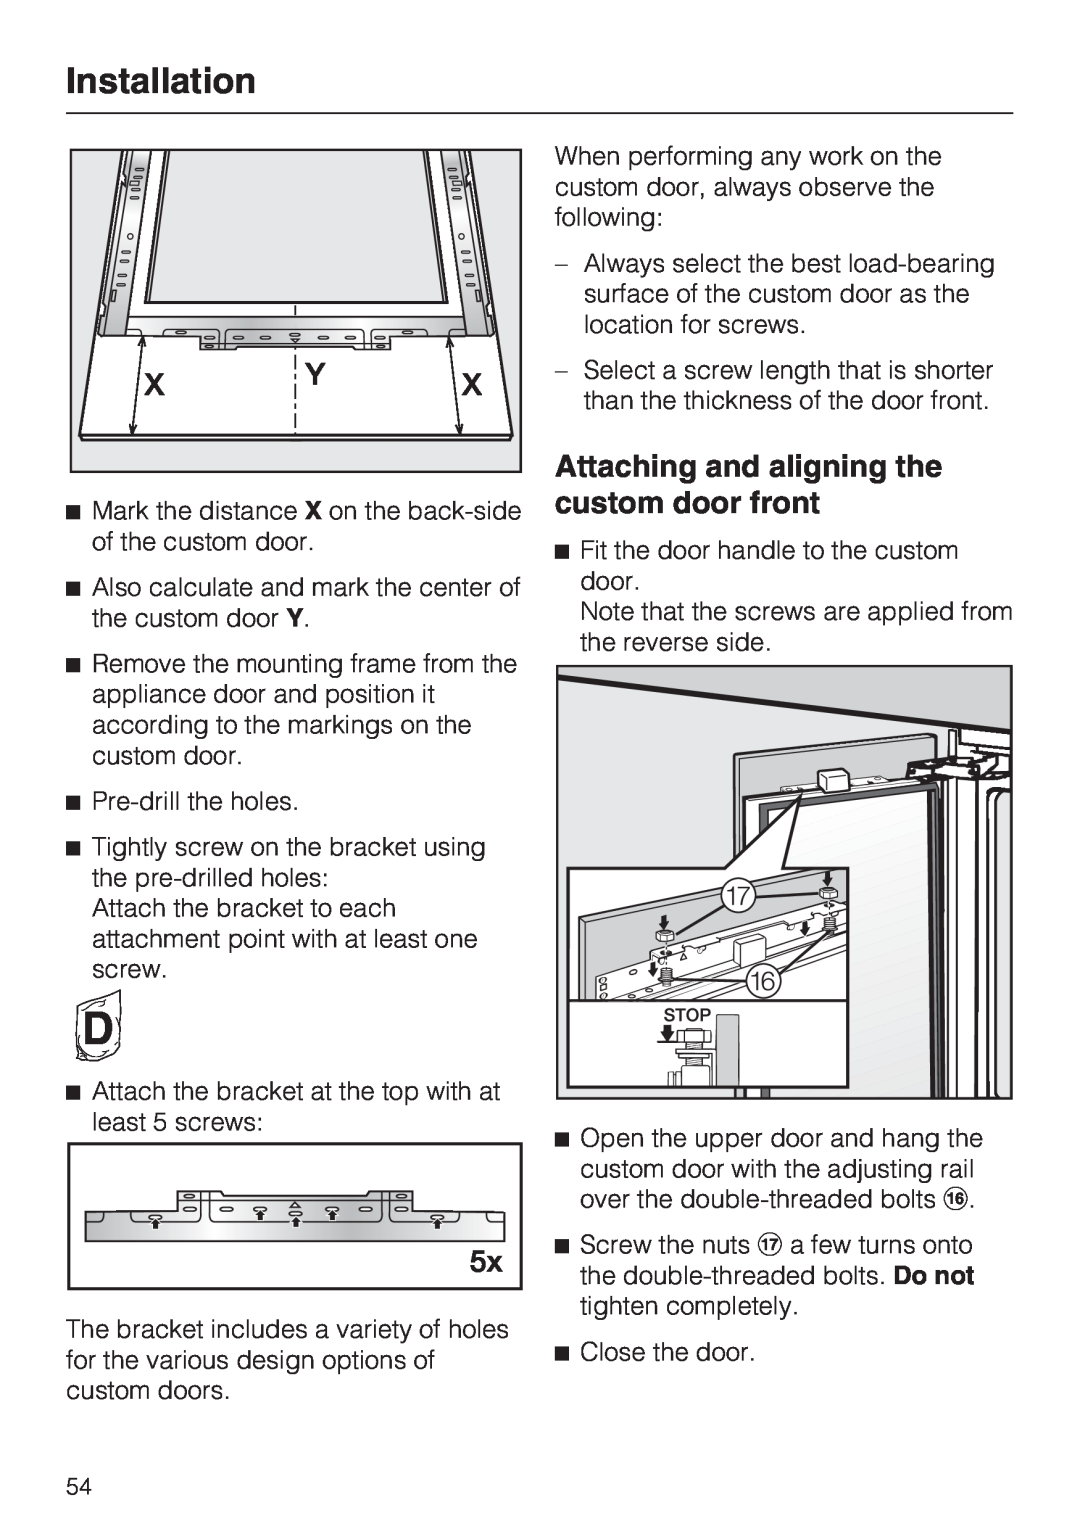
^ Also calculate and mark the center of |
| door. |
the custom door Y. |
| Note that the screws are applied from |
|
| |
|
| the reverse side. |
^Remove the mounting frame from the appliance door and position it
according to the markings on the custom door.
^
^ Tightly screw on the bracket using the
Attach the bracket to each attachment point with at least one screw.
^ Attach the bracket at the top with at
least 5 screws:
^ Open the upper door and hang the custom door with the adjusting rail over the
^ Screw the nuts q a few turns onto the
tighten completely.
The bracket includes a variety of holes
for the various design options of^ Close the door. custom doors.
54