
145 DX specifications
Miller Electric has established itself as a leading name in the welding industry, and the Miller Electric 145 DX and 145 are notable additions to its lineup of innovative welding machines. Designed to offer versatility and efficiency, these units cater to both novice welders and seasoned professionals seeking reliable equipment for various welding applications.One of the key features of the Miller Electric 145 DX and 145 is their advanced welding technology. Both models utilize inverter technology, which allows for a compact design while delivering exceptional power. This inverter design not only increases efficiency but also reduces energy consumption, making it an environmentally friendly choice. The lightweight nature of these units makes them highly portable, allowing users to easily transport them to job sites or move them around the workshop.
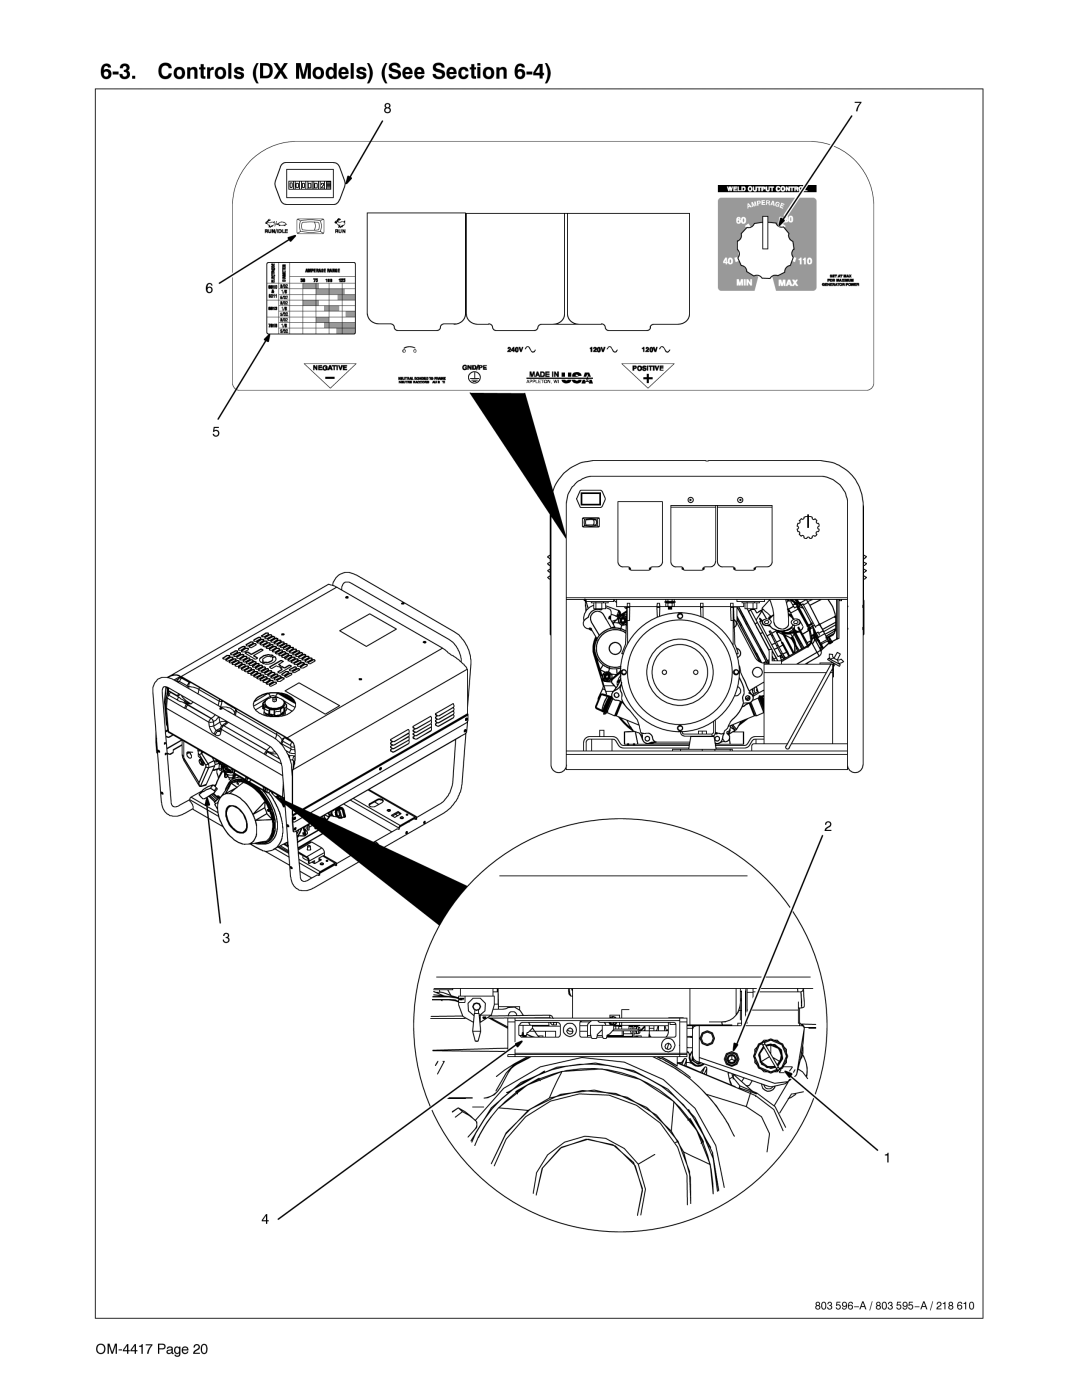
The Miller Electric 145 DX model incorporates a digital interface that simplifies set-up and operation. This user-friendly digital display shows critical parameters such as voltage and amperage, helping the operator make quick adjustments on-the-fly for optimal results. The advanced Auto-Set feature adjusts the machine settings automatically based on the material thickness and type, significantly reducing the learning curve for inexperienced welders.
Both the 145 DX and 145 models can handle a variety of welding processes, including MIG and TIG welding. This versatility makes them suitable for a wide range of applications, from automotive repair and fabrication to metal sculpture and DIY projects. The machines are capable of welding aluminum, stainless steel, and mild steel with ease, providing excellent penetration and bead appearance.
Another noteworthy characteristic of the Miller Electric 145 series is their reliability and durability. Designed with robust components that can withstand challenging working environments, these machines are built to last. The thermal overload protection feature ensures the units do not overheat, safeguarding the internal components and ensuring a longer operational life.
In summary, the Miller Electric 145 DX and 145 stand out in the welding equipment market due to their advanced inverter technology, user-friendly digital interfaces, versatile capabilities, and durability. They are ideal choices for anyone looking to elevate their welding experience, delivering consistent and reliable performance across a variety of projects.