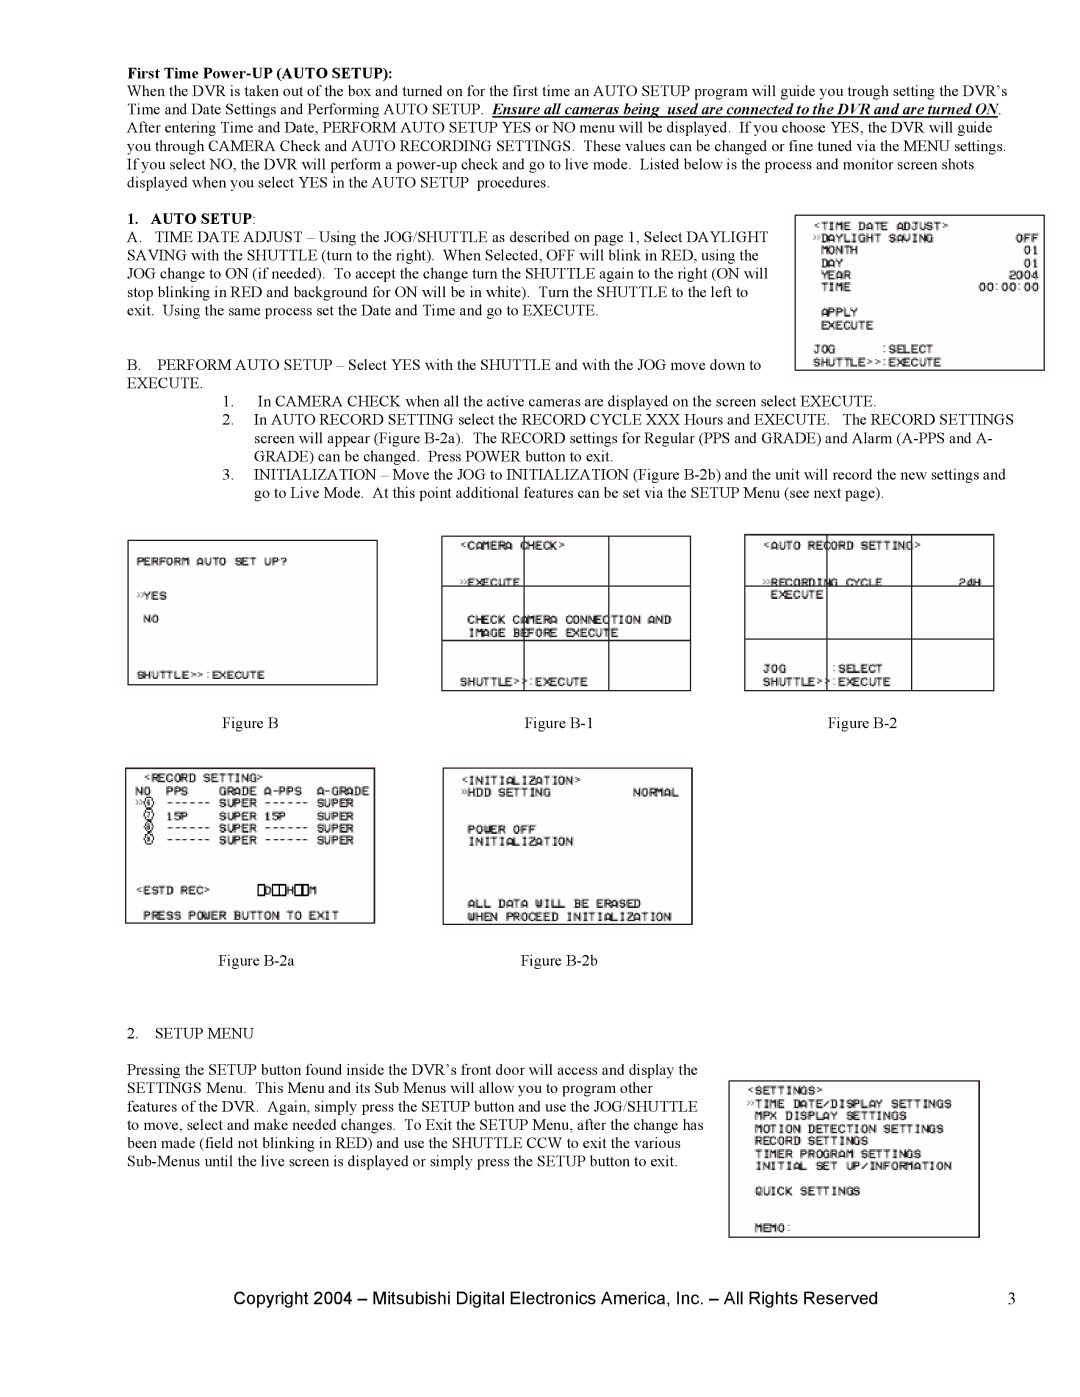
First Time Power-UP (AUTO SETUP):
When the DVR is taken out of the box and turned on for the first time an AUTO SETUP program will guide you trough setting the DVR’s Time and Date Settings and Performing AUTO SETUP. Ensure all cameras being used are connected to the DVR and are turned ON. After entering Time and Date, PERFORM AUTO SETUP YES or NO menu will be displayed. If you choose YES, the DVR will guide you through CAMERA Check and AUTO RECORDING SETTINGS. These values can be changed or fine tuned via the MENU settings. If you select NO, the DVR will perform a
1. AUTO SETUP:
A.TIME DATE ADJUST – Using the JOG/SHUTTLE as described on page 1, Select DAYLIGHT SAVING with the SHUTTLE (turn to the right). When Selected, OFF will blink in RED, using the JOG change to ON (if needed). To accept the change turn the SHUTTLE again to the right (ON will stop blinking in RED and background for ON will be in white). Turn the SHUTTLE to the left to exit. Using the same process set the Date and Time and go to EXECUTE.
B.PERFORM AUTO SETUP – Select YES with the SHUTTLE and with the JOG move down to
EXECUTE.
1.In CAMERA CHECK when all the active cameras are displayed on the screen select EXECUTE.
2.In AUTO RECORD SETTING select the RECORD CYCLE XXX Hours and EXECUTE. The RECORD SETTINGS screen will appear (Figure
3.INITIALIZATION – Move the JOG to INITIALIZATION (Figure
Figure B | Figure | Figure |
Figure | Figure |
2.SETUP MENU
Pressing the SETUP button found inside the DVR’s front door will access and display the SETTINGS Menu. This Menu and its Sub Menus will allow you to program other features of the DVR. Again, simply press the SETUP button and use the JOG/SHUTTLE to move, select and make needed changes. To Exit the SETUP Menu, after the change has been made (field not blinking in RED) and use the SHUTTLE CCW to exit the various
Copyright 2004 – Mitsubishi Digital Electronics America, Inc. – All Rights Reserved | 3 |