I.Timer Record Setting (if being used):
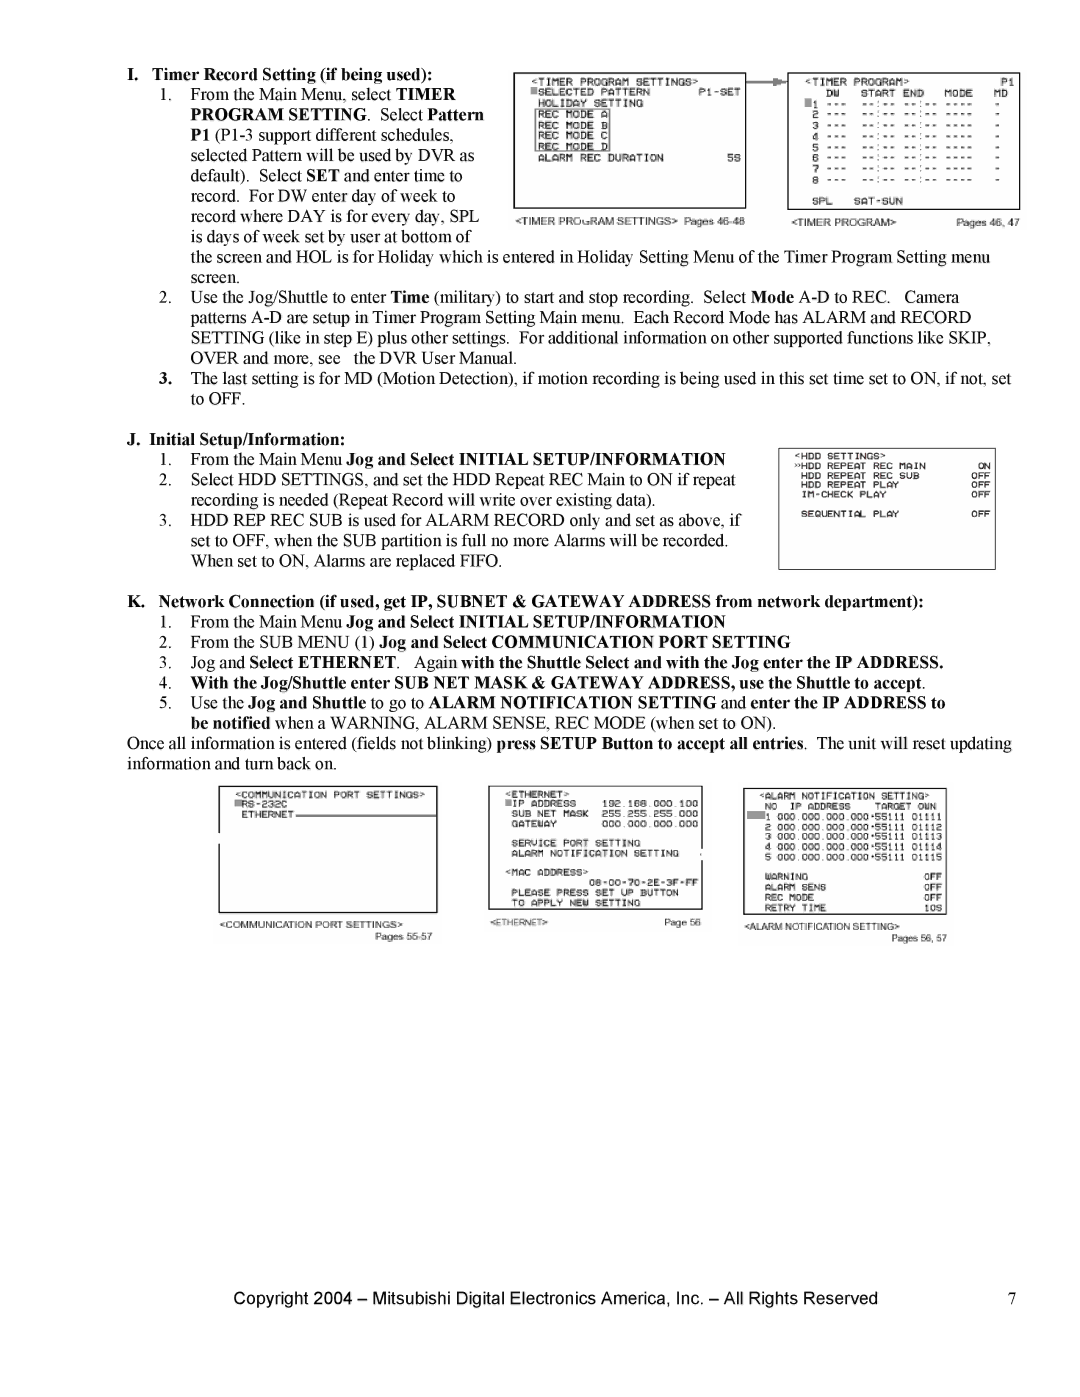
1.From the Main Menu, select TIMER PROGRAM SETTING. Select Pattern P1
the screen and HOL is for Holiday which is entered in Holiday Setting Menu of the Timer Program Setting menu screen.
2.Use the Jog/Shuttle to enter Time (military) to start and stop recording. Select Mode
3.The last setting is for MD (Motion Detection), if motion recording is being used in this set time set to ON, if not, set to OFF.
J.Initial Setup/Information:
1.From the Main Menu Jog and Select INITIAL SETUP/INFORMATION
2.Select HDD SETTINGS, and set the HDD Repeat REC Main to ON if repeat recording is needed (Repeat Record will write over existing data).
3.HDD REP REC SUB is used for ALARM RECORD only and set as above, if set to OFF, when the SUB partition is full no more Alarms will be recorded. When set to ON, Alarms are replaced FIFO.
K.Network Connection (if used, get IP, SUBNET & GATEWAY ADDRESS from network department):
1.From the Main Menu Jog and Select INITIAL SETUP/INFORMATION
2.From the SUB MENU (1) Jog and Select COMMUNICATION PORT SETTING
3.Jog and Select ETHERNET. Again with the Shuttle Select and with the Jog enter the IP ADDRESS.
4.With the Jog/Shuttle enter SUB NET MASK & GATEWAY ADDRESS, use the Shuttle to accept.
5.Use the Jog and Shuttle to go to ALARM NOTIFICATION SETTING and enter the IP ADDRESS to
be notified when a WARNING, ALARM SENSE, REC MODE (when set to ON).
Once all information is entered (fields not blinking) press SETUP Button to accept all entries. The unit will reset updating information and turn back on.
Copyright 2004 – Mitsubishi Digital Electronics America, Inc. – All Rights Reserved | 7 |
