How to SECTION:
A.RECORD
B.MONITOR VIEWING
C.PLAYBACK
D.SEARCH
E.COPY
F.ALARM SETTING
G.MOTION SETTING
H.RECORDING & ALARM REC. SETTINGS
I.TIMER REC
J.INITIAL SETUP INFORMTION (HDD REPEAT)
K.NETWORK SETTINGS
L.ESTABLESHING A NETWORK CONNECTION
A. Recording:
1.Once the DVR is installed with all of the cameras connected, and the various settings in the DVR are set (Time and Date, how each camera is to record and other important menu settings),
a.How to Activate RECORD – Simply press the REC/STOP (figure 1 item #5) button and when the button illuminated in RED, the DVR is recording.
•To test recording simply turn the SHUTTLE CW, the monitor screen will black out and go back to live display. At this time press the REV PLAY button and the DVR will playback the latest recording in reverse. To stop playback just press the STOP button (see figure 2, #20).
•If any kind of a “WARNING ” appears on the screen, call your support department.
.
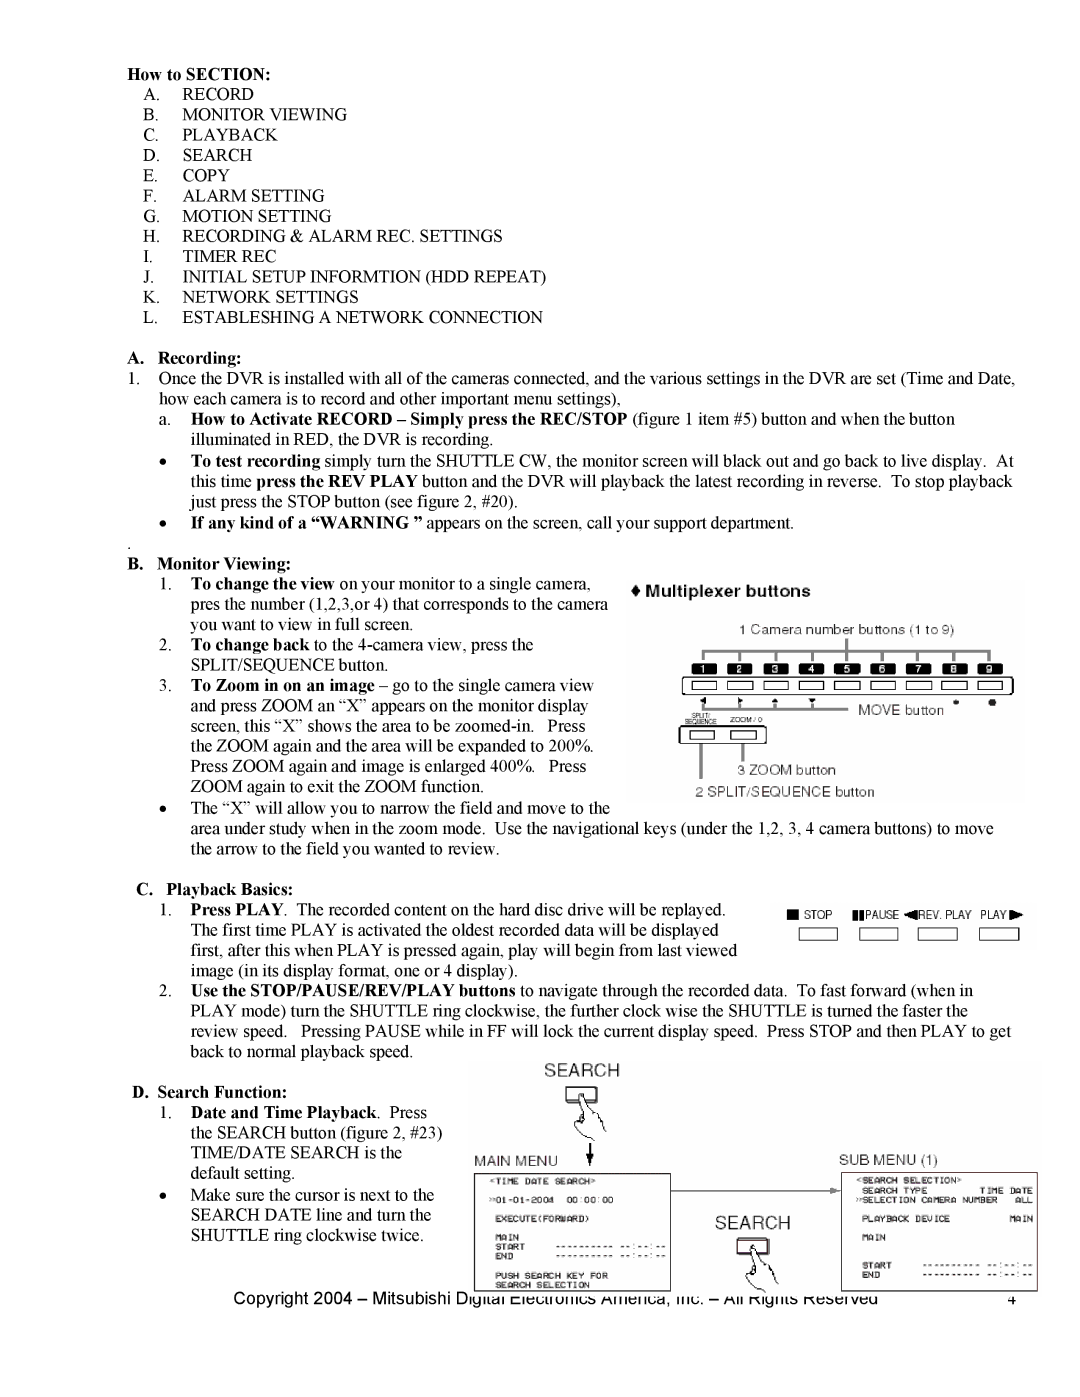
B.Monitor Viewing:
1.To change the view on your monitor to a single camera, pres the number (1,2,3,or 4) that corresponds to the camera you want to view in full screen.
2.To change back to the
3.To Zoom in on an image – go to the single camera view and press ZOOM an “X” appears on the monitor display screen, this “X” shows the area to be
•The “X” will allow you to narrow the field and move to the
area under study when in the zoom mode. Use the navigational keys (under the 1,2, 3, 4 camera buttons) to move the arrow to the field you wanted to review.
C.Playback Basics:
1.Press PLAY. The recorded content on the hard disc drive will be replayed. The first time PLAY is activated the oldest recorded data will be displayed first, after this when PLAY is pressed again, play will begin from last viewed image (in its display format, one or 4 display).
2.Use the STOP/PAUSE/REV/PLAY buttons to navigate through the recorded data. To fast forward (when in PLAY mode) turn the SHUTTLE ring clockwise, the further clock wise the SHUTTLE is turned the faster the review speed. Pressing PAUSE while in FF will lock the current display speed. Press STOP and then PLAY to get back to normal playback speed.
D.Search Function:
1.Date and Time Playback. Press the SEARCH button (figure 2, #23) TIME/DATE SEARCH is the default setting.
•Make sure the cursor is next to the SEARCH DATE line and turn the SHUTTLE ring clockwise twice.
Copyright 2004 – Mitsubishi Digital Electronics America, Inc. – All Rights Reserved | 4 |