•The display will turn red and flash. This indicates the data may be edited.
• The format is YEAR MONTH DAY HOUR MINUTES SECONDS.
2.Turn the JOG dial to select MONTH and turn the SHUTTLE ring clockwise. The background of the setting item changes to red and flashes. With the JOG, change to needed month and accept the change by turning the SHUTTLE CW.
3.Turn the JOG dial to DAY you want to search by. Same as above, use the JOG/SHUTTLE to make changes and accept the changes. Repeat the above steps for HOUR, MINUTE and SECOND.
4.Press SEARCH button to display the SEARCH SELECTION screen.
5.Check to see that the cursor is positioned at the SELECTION CAMERA NUMBER and turn the SHUTTLE ring to make a change. The background of the setting item changes to red and flashes.
6.Turn JOG to select the camera number. You may choose an individual camera or select ALL. Turn the SHUTTLE RING clockwise.
7.Setting is confirmed when all flashing stops.
8.When your settings are complete, turn the SHUTTLE ring counterclockwise. The display returns to the TIME DATE SEARCH screen and the cursor appears on the left of the search date.
9.Turn the JOG dial and select EXECUTE and turn the SHUTTLE ring clockwise.
10.When the search is executed, the video of the requested date/time will appear in still frame. The search result will appear using the split screen when all cameras are selected.
11.To view the selected image, press PLAY. To stop playback, press the STOP button. To cancel the operation at any time during the set up, turn the SHUTTLE ring counterclockwise until you are back at the menu screen.
12.To view playback from the flash device, when in the SEARCH 2nd screen, select (using the JOG dial) PLAYBACK DEVICE. Select CFC. You will normally view from the HDD/MAIN setting
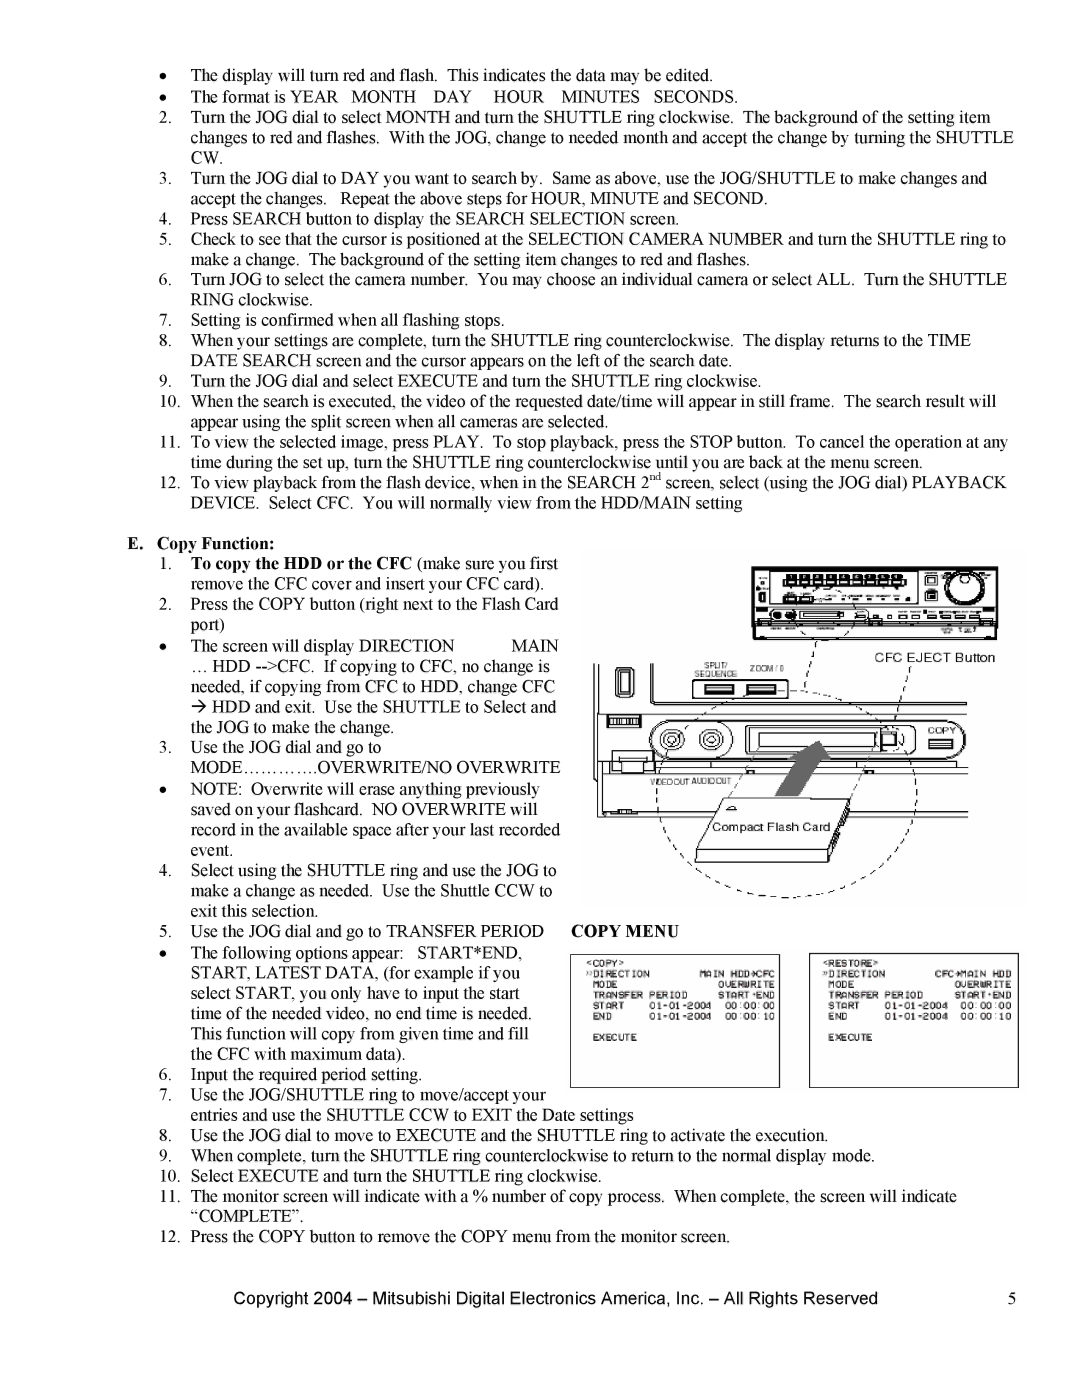
E.Copy Function:
1.To copy the HDD or the CFC (make sure you first remove the CFC cover and insert your CFC card).
2.Press the COPY button (right next to the Flash Card port)
• The screen will display DIRECTION | MAIN |
… HDD
3.Use the JOG dial and go to MODE………….OVERWRITE/NO OVERWRITE
•NOTE: Overwrite will erase anything previously saved on your flashcard. NO OVERWRITE will record in the available space after your last recorded
event.
4.Select using the SHUTTLE ring and use the JOG to make a change as needed. Use the Shuttle CCW to
exit this selection.
5. Use the JOG dial and go to TRANSFER PERIOD COPY MENU
•The following options appear: START*END, START, LATEST DATA, (for example if you select START, you only have to input the start
time of the needed video, no end time is needed. This function will copy from given time and fill the CFC with maximum data).
6.Input the required period setting.
7.Use the JOG/SHUTTLE ring to move/accept your
entries and use the SHUTTLE CCW to EXIT the Date settings
8.Use the JOG dial to move to EXECUTE and the SHUTTLE ring to activate the execution.
9.When complete, turn the SHUTTLE ring counterclockwise to return to the normal display mode.
10.Select EXECUTE and turn the SHUTTLE ring clockwise.
11.The monitor screen will indicate with a % number of copy process. When complete, the screen will indicate “COMPLETE”.
12.Press the COPY button to remove the COPY menu from the monitor screen.
Copyright 2004 – Mitsubishi Digital Electronics America, Inc. – All Rights Reserved | 5 |