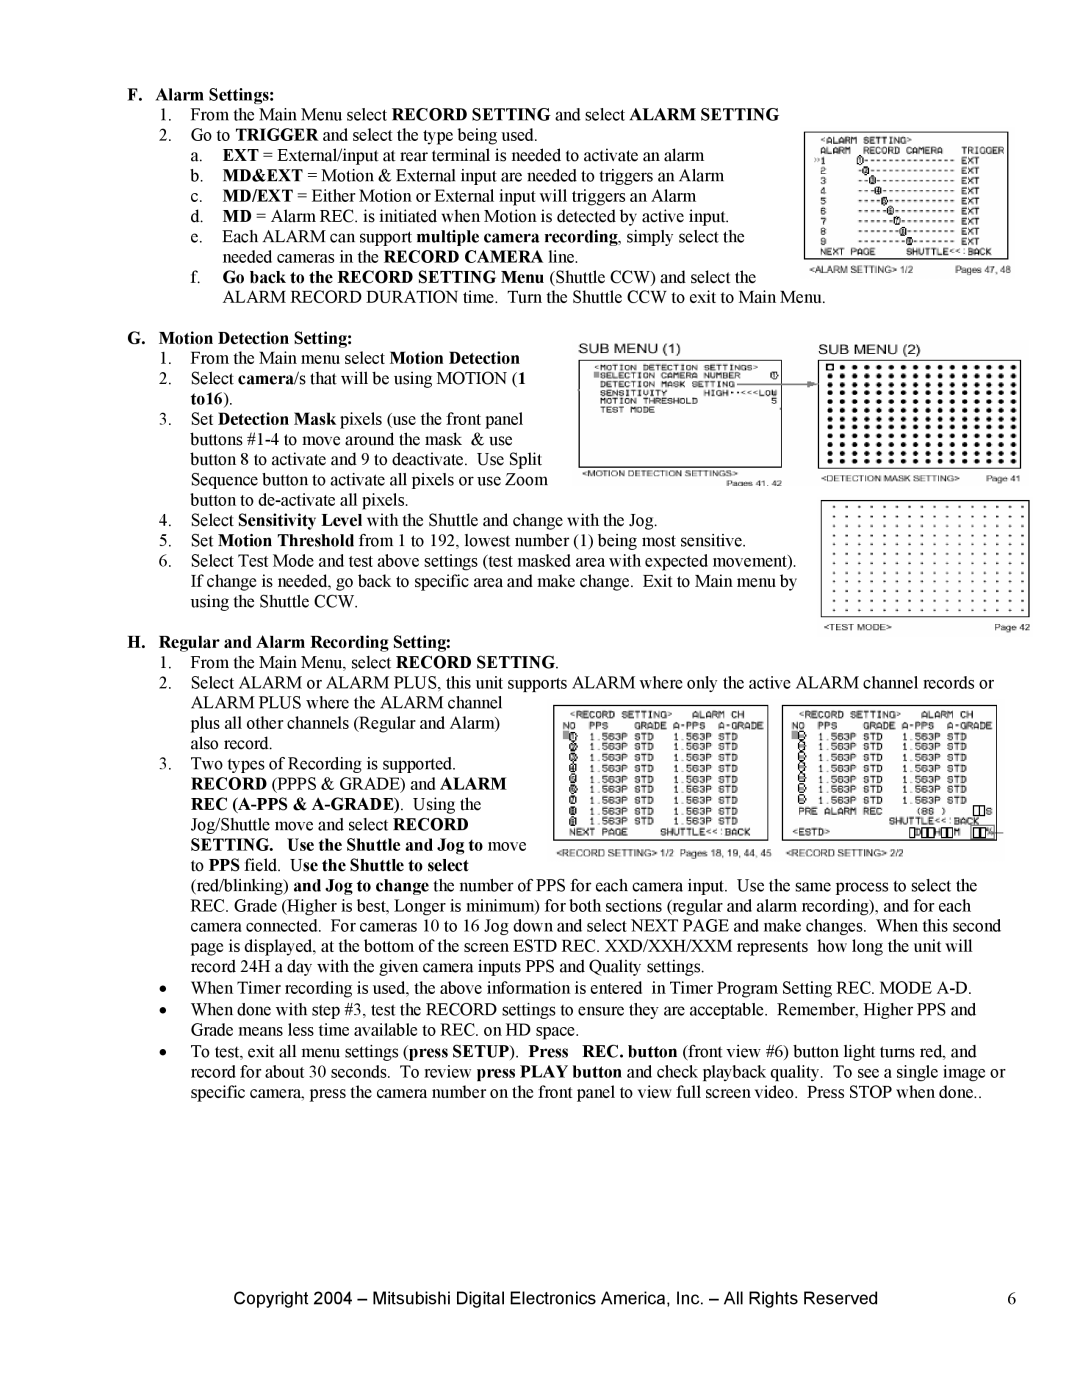
F.Alarm Settings:
1.From the Main Menu select RECORD SETTING and select ALARM SETTING
2.Go to TRIGGER and select the type being used.
a.EXT = External/input at rear terminal is needed to activate an alarm
b.MD&EXT = Motion & External input are needed to triggers an Alarm
c.MD/EXT = Either Motion or External input will triggers an Alarm
d.MD = Alarm REC. is initiated when Motion is detected by active input.
e.Each ALARM can support multiple camera recording, simply select the needed cameras in the RECORD CAMERA line.
f.Go back to the RECORD SETTING Menu (Shuttle CCW) and select the ALARM RECORD DURATION time. Turn the Shuttle CCW to exit to Main Menu.
G.Motion Detection Setting:
1.From the Main menu select Motion Detection
2.Select camera/s that will be using MOTION (1 to16).
3.Set Detection Mask pixels (use the front panel buttons
4.Select Sensitivity Level with the Shuttle and change with the Jog.
5.Set Motion Threshold from 1 to 192, lowest number (1) being most sensitive.
6.Select Test Mode and test above settings (test masked area with expected movement). If change is needed, go back to specific area and make change. Exit to Main menu by using the Shuttle CCW.
H.Regular and Alarm Recording Setting:
1.From the Main Menu, select RECORD SETTING.
2.Select ALARM or ALARM PLUS, this unit supports ALARM where only the active ALARM channel records or ALARM PLUS where the ALARM channel
plus all other channels (Regular and Alarm) also record.
3.Two types of Recording is supported. RECORD (PPPS & GRADE) and ALARM REC
(red/blinking) and Jog to change the number of PPS for each camera input. Use the same process to select the REC. Grade (Higher is best, Longer is minimum) for both sections (regular and alarm recording), and for each camera connected. For cameras 10 to 16 Jog down and select NEXT PAGE and make changes. When this second page is displayed, at the bottom of the screen ESTD REC. XXD/XXH/XXM represents how long the unit will record 24H a day with the given camera inputs PPS and Quality settings.
•When Timer recording is used, the above information is entered in Timer Program Setting REC. MODE
•When done with step #3, test the RECORD settings to ensure they are acceptable. Remember, Higher PPS and Grade means less time available to REC. on HD space.
• To test, exit all menu settings (press SETUP). Press REC. button (front view #6) button light turns red, and record for about 30 seconds. To review press PLAY button and check playback quality. To see a single image or specific camera, press the camera number on the front panel to view full screen video. Press STOP when done..
Copyright 2004 – Mitsubishi Digital Electronics America, Inc. – All Rights Reserved | 6 |