Basic Operations (continued)
3.To pause playback, press the PAUSE button.
•To resume playback, press the PAUSE button again or press the PLAY button.
4.To stop playback, press the STOP button.
•During HDD playback/pause, playback will start the next time from the paused position.
•During CFC playback/pause, playback will start the next time from the oldest recorded video on the media.
■Basic search
This unit displays a menu of most used search functions simply by pressing the SEARCH button.
![]() This unit will not move to search mode when a request for acquisition of live images is communicated while search mode is set. Also, this unit will not search when a request for the acquisition of live images has been communicated.
This unit will not move to search mode when a request for acquisition of live images is communicated while search mode is set. Also, this unit will not search when a request for the acquisition of live images has been communicated.
![]() This unit will not search while a request for the acquisition of live images is being communicated.
This unit will not search while a request for the acquisition of live images is being communicated.
♦TIME DATE SEARCH
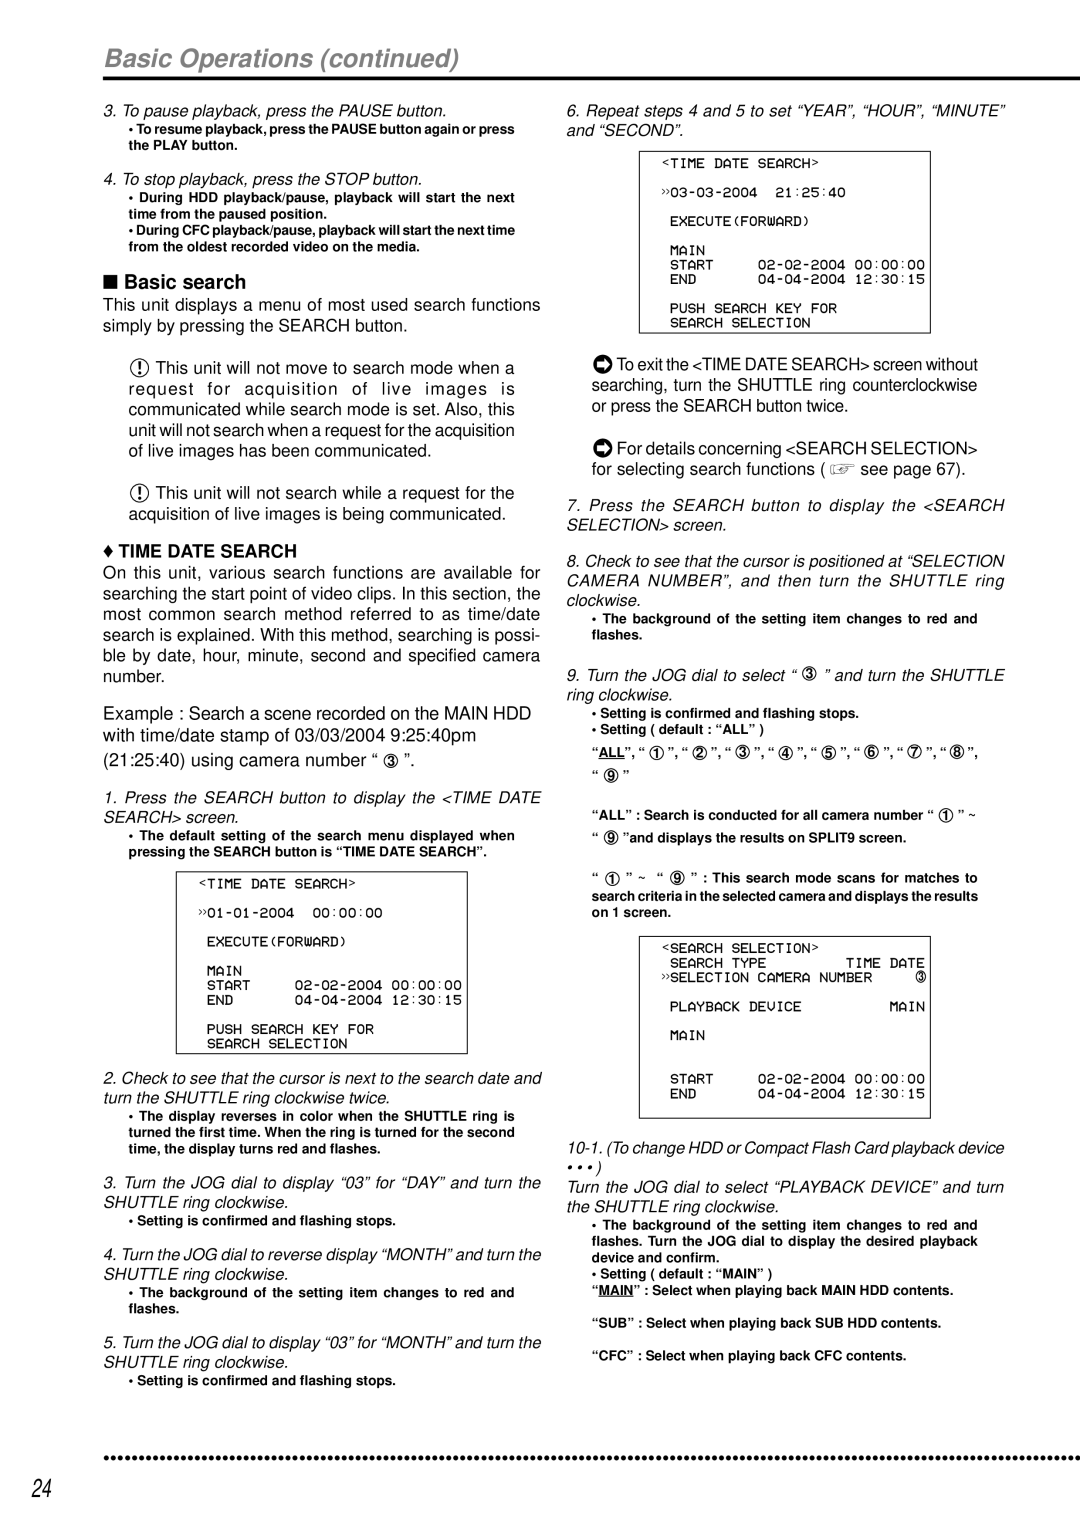
On this unit, various search functions are available for searching the start point of video clips. In this section, the most common search method referred to as time/date search is explained. With this method, searching is possi- ble by date, hour, minute, second and specified camera number.
Example : Search a scene recorded on the MAIN HDD with time/date stamp of 03/03/2004 9:25:40pm (21:25:40) using camera number “3 ”.
1.Press the SEARCH button to display the <TIME DATE SEARCH> screen.
•The default setting of the search menu displayed when pressing the SEARCH button is “TIME DATE SEARCH”.
<TIME DATE SEARCH>
EXECUTE(FORWARD)
MAIN | 00:00:00 | |
START | ||
END | 12:30:15 |
PUSH SEARCH KEY FOR
SEARCH SELECTION
2.Check to see that the cursor is next to the search date and turn the SHUTTLE ring clockwise twice.
•The display reverses in color when the SHUTTLE ring is turned the first time. When the ring is turned for the second time, the display turns red and flashes.
3.Turn the JOG dial to display “03” for “DAY” and turn the SHUTTLE ring clockwise.
•Setting is confirmed and flashing stops.
4.Turn the JOG dial to reverse display “MONTH” and turn the SHUTTLE ring clockwise.
•The background of the setting item changes to red and flashes.
5.Turn the JOG dial to display “03” for “MONTH” and turn the SHUTTLE ring clockwise.
•Setting is confirmed and flashing stops.
6.Repeat steps 4 and 5 to set “YEAR”, “HOUR”, “MINUTE” and “SECOND”.
<TIME DATE SEARCH>
EXECUTE(FORWARD)
MAIN | 00:00:00 | |
START | ||
END | 12:30:15 |
PUSH SEARCH KEY FOR
SEARCH SELECTION
![]() To exit the <TIME DATE SEARCH> screen without searching, turn the SHUTTLE ring counterclockwise or press the SEARCH button twice.
To exit the <TIME DATE SEARCH> screen without searching, turn the SHUTTLE ring counterclockwise or press the SEARCH button twice.
![]() For details concerning <SEARCH SELECTION>
For details concerning <SEARCH SELECTION>
for selecting search functions ( ![]() see page 67).
see page 67).
7.Press the SEARCH button to display the <SEARCH SELECTION> screen.
8.Check to see that the cursor is positioned at “SELECTION CAMERA NUMBER”, and then turn the SHUTTLE ring clockwise.
•The background of the setting item changes to red and flashes.
9.Turn the JOG dial to select “3 ” and turn the SHUTTLE ring clockwise.
•Setting is confirmed and flashing stops.
•Setting ( default : “ALL” )
“ALL”, “ 1 ”, “ 2 ”, “ 3 ”, “ 4 ”, “ 5 ”, “ 6 ”, “ 7 ”, “ 8 ”,
“9 ”
“ALL” : Search is conducted for all camera number “ 1 ” ~
“9 ”and displays the results on SPLIT9 screen.
“1 ” ~ “ 9 ” : This search mode scans for matches to search criteria in the selected camera and displays the results on 1 screen.
<SEARCH SELECTION> | TIME DATE | ||
SEARCH TYPE | |||
>>SELECTION | CAMERA NUMBER | 3 | |
PLAYBACK DEVICE |
| MAIN | |
MAIN |
|
|
|
START | |||
END | |||
|
|
|
|
• • • )
Turn the JOG dial to select “PLAYBACK DEVICE” and turn the SHUTTLE ring clockwise.
•The background of the setting item changes to red and flashes. Turn the JOG dial to display the desired playback device and confirm.
•Setting ( default : “MAIN” )
“MAIN” : Select when playing back MAIN HDD contents.
“SUB” : Select when playing back SUB HDD contents.
“CFC” : Select when playing back CFC contents.
••••••••••••••••••••••••••••••••••••••••••••••••••••••••••••••••••••••••••••••••••••••••••••••••••••••••••••••••••••••••••••••• | ••••••••••••• |
24
