Overview (continued)
Bottom side
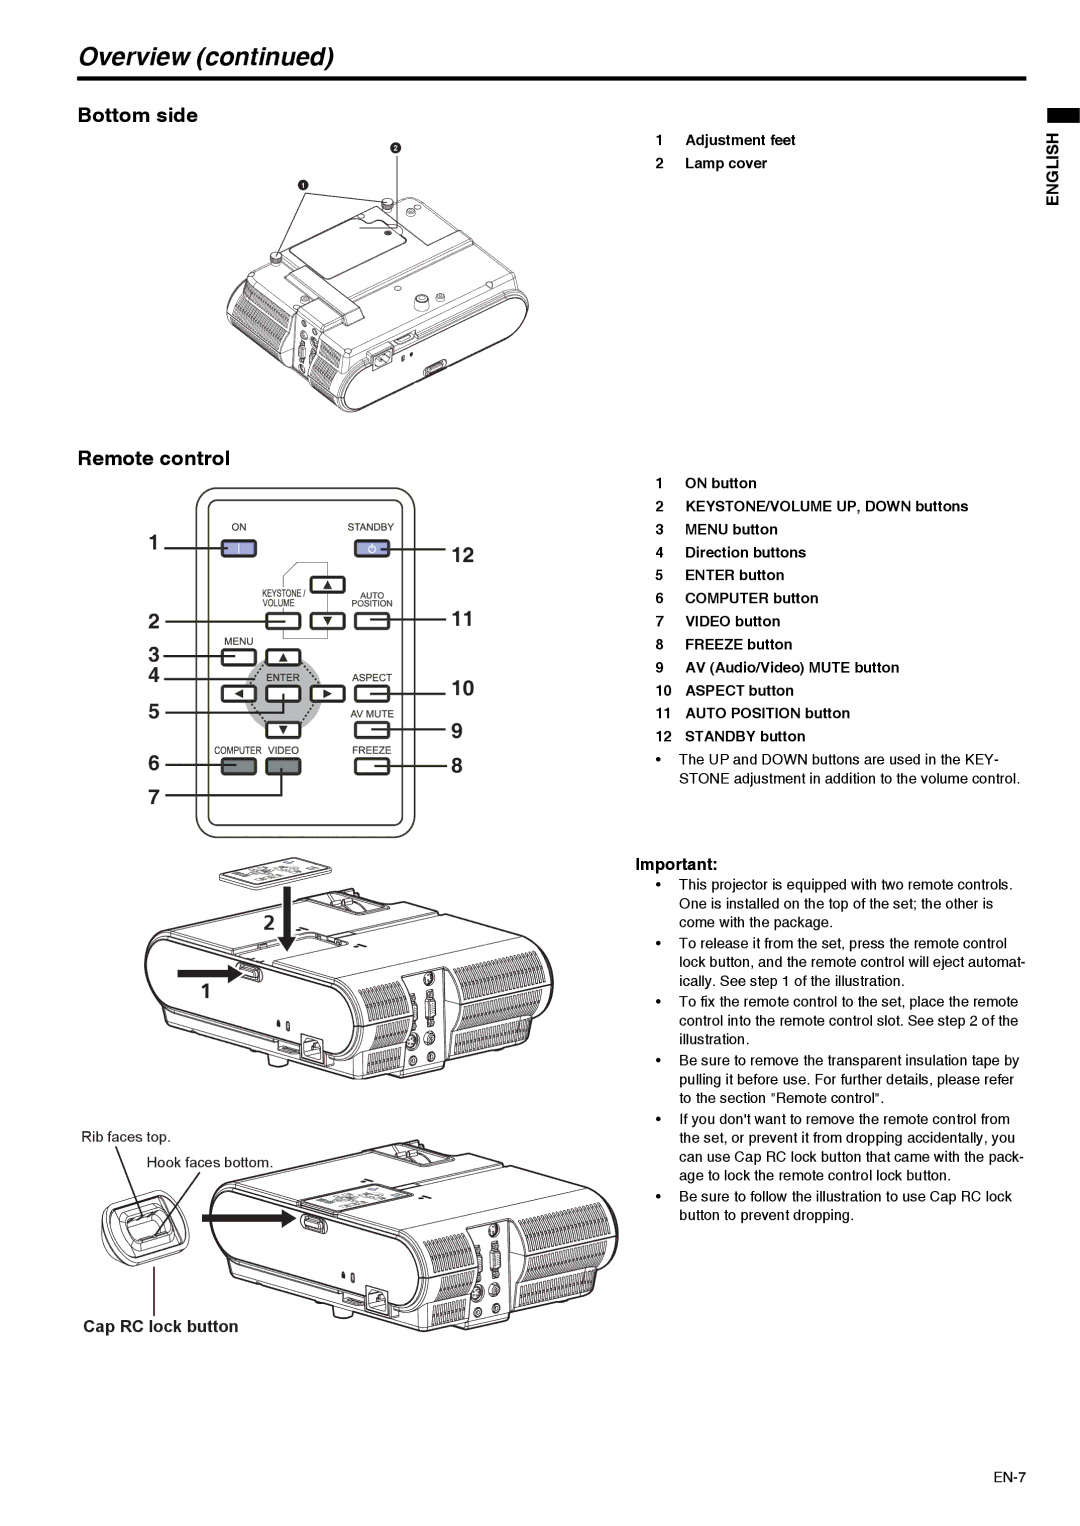
2 | 1 | Adjustment feet |
|
| |
| 2 | Lamp cover |
1 |
|
|
ENGLISH
Remote control
1
2
3
4
5
6
7
2
1
Rib faces top.
Hook faces bottom.
Cap RC lock button
12
11
10
9
8
1ON button
2KEYSTONE/VOLUME UP, DOWN buttons
3MENU button
4Direction buttons
5ENTER button
6COMPUTER button
7VIDEO button
8FREEZE button
9AV (Audio/Video) MUTE button
10ASPECT button
11AUTO POSITION button
12STANDBY button
•The UP and DOWN buttons are used in the KEY- STONE adjustment in addition to the volume control.
Important:
•This projector is equipped with two remote controls. One is installed on the top of the set; the other is come with the package.
•To release it from the set, press the remote control lock button, and the remote control will eject automat- ically. See step 1 of the illustration.
•To fix the remote control to the set, place the remote control into the remote control slot. See step 2 of the illustration.
•Be sure to remove the transparent insulation tape by pulling it before use. For further details, please refer to the section "Remote control".
•If you don't want to remove the remote control from the set, or prevent it from dropping accidentally, you can use Cap RC lock button that came with the pack- age to lock the remote control lock button.
•Be sure to follow the illustration to use Cap RC lock button to prevent dropping.