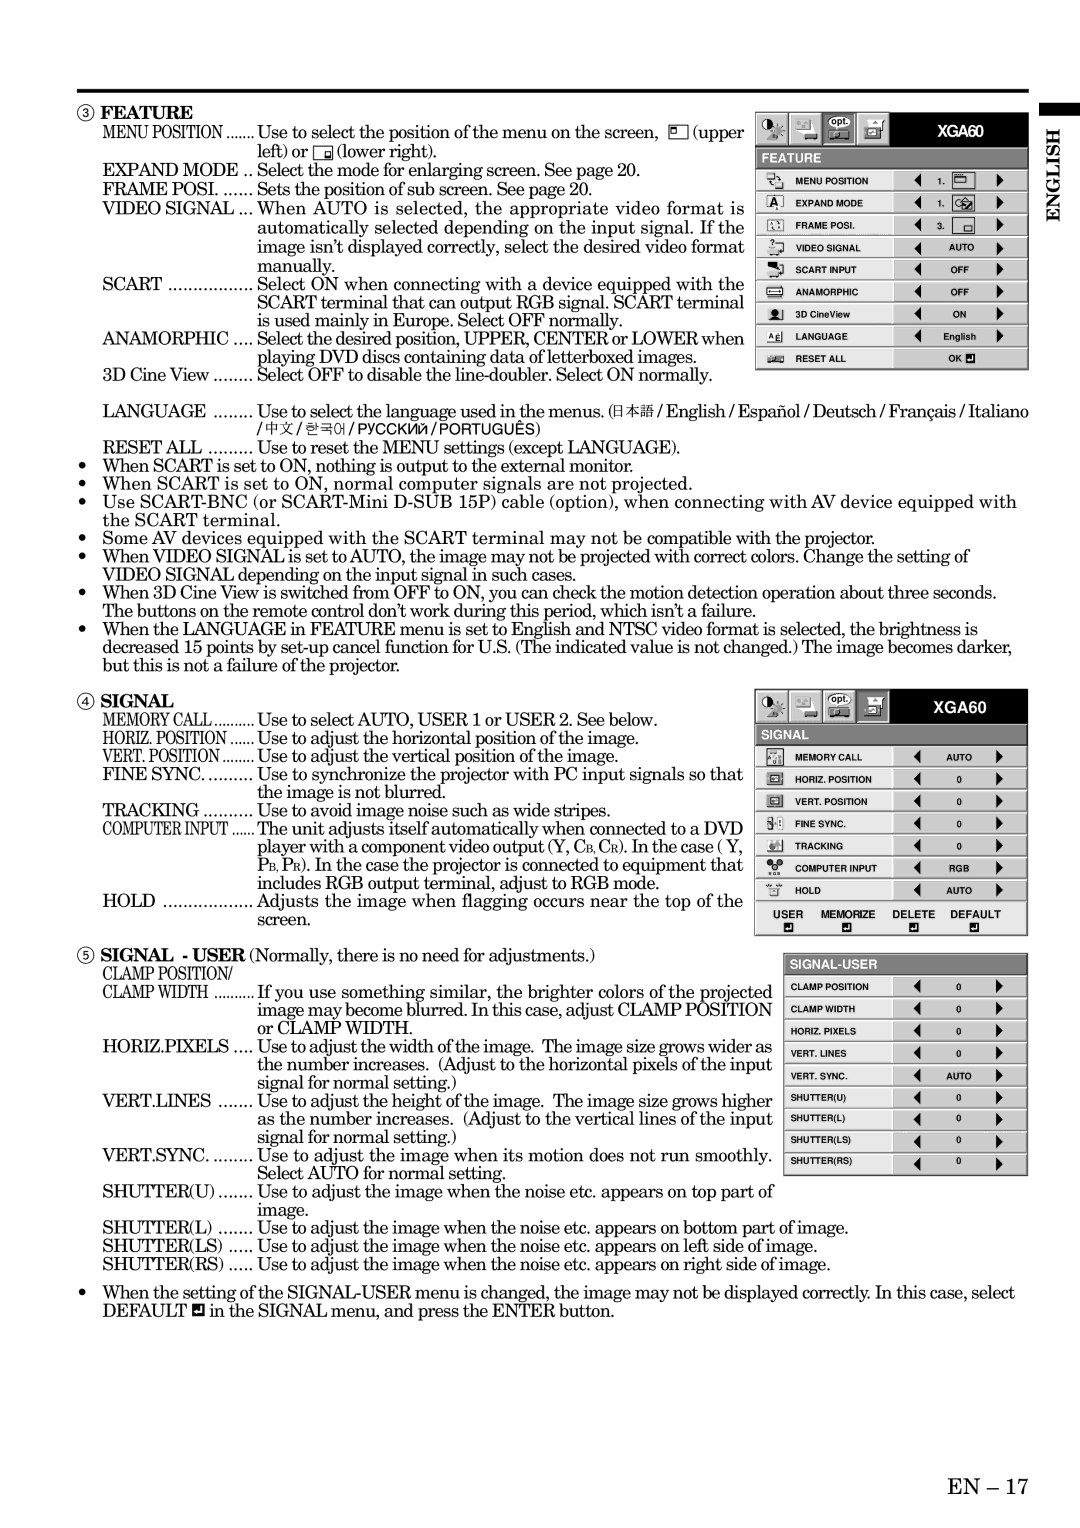
3 FEATURE |
|
MENU POSITION | Use to select the position of the menu on the screen, (upper |
| left) or (lower right). |
EXPAND MODE .. | Select the mode for enlarging screen. See page 20. |
FRAME POSI | Sets the position of sub screen. See page 20. |
VIDEO SIGNAL ... | When AUTO is selected, the appropriate video format is |
| automatically selected depending on the input signal. If the |
| image isn’t displayed correctly, select the desired video format |
| manually. |
SCART | Select ON when connecting with a device equipped with the |
| SCART terminal that can output RGB signal. SCART terminal |
| is used mainly in Europe. Select OFF normally. |
ANAMORPHIC .... | Select the desired position, UPPER, CENTER or LOWER when |
| playing DVD discs containing data of letterboxed images. |
3D Cine View | Select OFF to disable the |
opt.
FEATURE
MENU POSITION
AEXPAND MODE
A |
|
A | FRAME POSI. |
A | |
? | VIDEO SIGNAL |
|
SCART INPUT
ANAMORPHIC
3D CineView
AË ![]() LANGUAGE
LANGUAGE ![]() RESET ALL
RESET ALL
XGA60
1.![]()
![]()
![]()
![]()
1.![]()
![]()
![]()
3.![]()
![]()
![]()
![]()
AUTO OFF OFF
ON
English
OK ![]()
![]()
ENGLISH
LANGUAGE | Use to select the language used in the menus. ( | / English / Español / Deutsch / Français / Italiano | |||
| / / | / | / | ) |
|
RESET ALL | Use to reset the MENU settings (except LANGUAGE). | ||||
•When SCART is set to ON, nothing is output to the external monitor.
•When SCART is set to ON, normal computer signals are not projected.
•Use
•Some AV devices equipped with the SCART terminal may not be compatible with the projector.
•When VIDEO SIGNAL is set to AUTO, the image may not be projected with correct colors. Change the setting of VIDEO SIGNAL depending on the input signal in such cases.
•When 3D Cine View is switched from OFF to ON, you can check the motion detection operation about three seconds. The buttons on the remote control don’t work during this period, which isn’t a failure.
•When the LANGUAGE in FEATURE menu is set to English and NTSC video format is selected, the brightness is decreased 15 points by
4 SIGNAL |
|
MEMORY CALL | Use to select AUTO, USER 1 or USER 2. See below. |
HORIZ. POSITION | Use to adjust the horizontal position of the image. |
VERT. POSITION | Use to adjust the vertical position of the image. |
FINE SYNC | Use to synchronize the projector with PC input signals so that |
| the image is not blurred. |
TRACKING | Use to avoid image noise such as wide stripes. |
COMPUTER INPUT | The unit adjusts itself automatically when connected to a DVD |
| player with a component video output (Y, CB, CR). In the case ( Y, |
| PB, PR). In the case the projector is connected to equipment that |
| includes RGB output terminal, adjust to RGB mode. |
HOLD | Adjusts the image when flagging occurs near the top of the |
| screen. |
SIGNAL
A![]()
U
R G B
R G B
opt.
XGA60
AUTO
0
0
0
0
RGB
AUTO
DELETE DEFAULT
5 SIGNAL - USER (Normally, there is no need for adjustments.) |
|
|
|
| |||
CLAMP POSITION/ |
| ||
|
|
| |
CLAMP WIDTH .......... If you use something similar, the brighter colors of the projected | CLAMP POSITION |
| 0 |
|
|
| |
image may become blurred. In this case, adjust CLAMP POSITION | CLAMP WIDTH |
| 0 |
or CLAMP WIDTH. |
|
| |
HORIZ. PIXELS |
| 0 | |
HORIZ.PIXELS .... Use to adjust the width of the image. The image size grows wider as |
|
| |
VERT. LINES |
| 0 | |
the number increases. (Adjust to the horizontal pixels of the input |
|
|
|
|
|
| |
VERT. SYNC. |
| AUTO | |
signal for normal setting.) |
| ||
|
|
| |
VERT.LINES ....... Use to adjust the height of the image. The image size grows higher | SHUTTER(U) |
| 0 |
as the number increases. (Adjust to the vertical lines of the input | SHUTTER(L) |
| 0 |
signal for normal setting.) |
|
| |
SHUTTER(LS) |
| 0 | |
VERT.SYNC. ........ Use to adjust the image when its motion does not run smoothly. |
|
|
|
|
|
| |
SHUTTER(RS) | 0 | ||
Select AUTO for normal setting. |
|
|
|
|
|
| |
SHUTTER(U) ....... Use to adjust the image when the noise etc. appears on top part of |
|
|
|
image. |
|
|
|
SHUTTER(L) ....... Use to adjust the image when the noise etc. appears on bottom part of image.
SHUTTER(LS) ..... Use to adjust the image when the noise etc. appears on left side of image.
SHUTTER(RS) ..... Use to adjust the image when the noise etc. appears on right side of image.
•When the setting of the ![]() in the SIGNAL menu, and press the ENTER button.
in the SIGNAL menu, and press the ENTER button.
EN – 17