5.Adjust the removable bracket for battery type, if necessary.
6.Insert the radio or battery into the charging pocket.
Notes:
•This
•When cloning, the MUC does not need to be plugged into a power source, but all radios require charged batteries. Further details on MUC’s operation are explained in the Instruc- tions Sheet provided with the MUC. Please refer to the Accessories section in order to identify the part number for ordering the MUC.
Notes:
•This
•When cloning, the MUC does not need to be plugged into a power source, but all radios require charged batteries. Further details on how to clone units are explained in the Instructions Sheet provided with the MUC. Refer to the “Accessories” section in order to identify the part number for ordering the MUC.
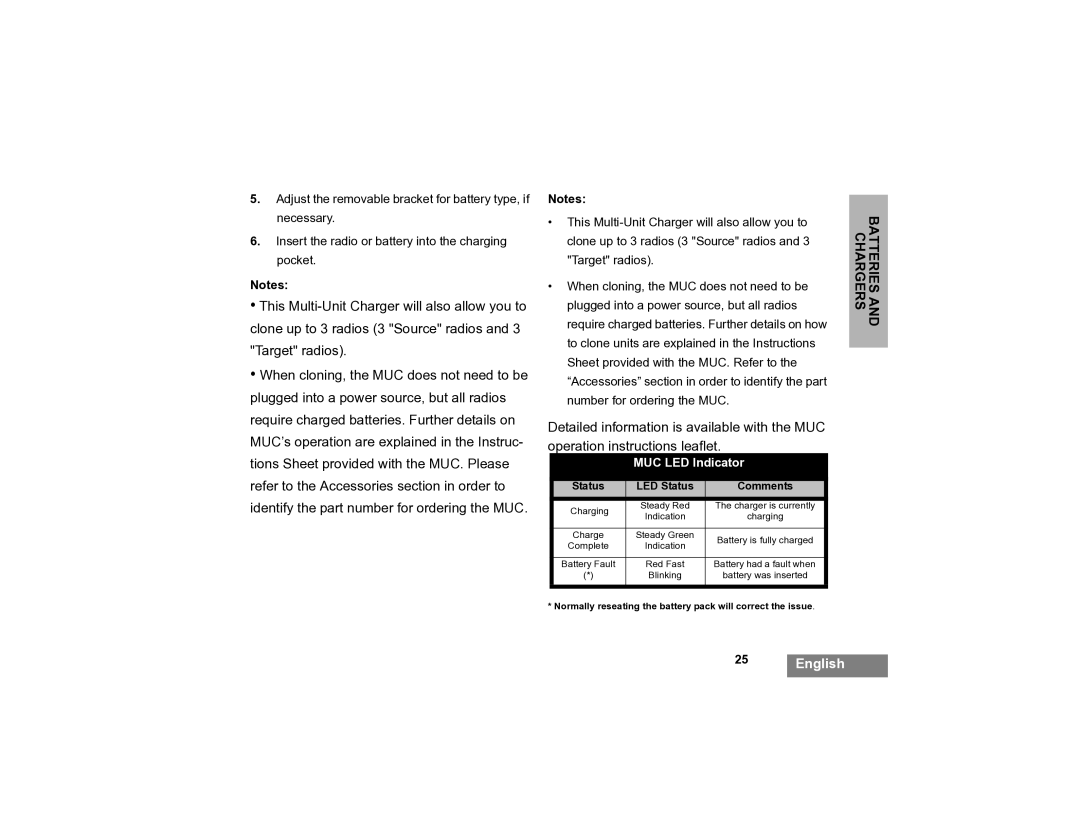
Detailed information is available with the MUC operation instructions leaflet.
MUC LED Indicator
Status | LED Status | Comments | |
|
|
| |
Charging | Steady Red | The charger is currently | |
Indication | charging | ||
| |||
|
|
| |
Charge | Steady Green | Battery is fully charged | |
Complete | Indication | ||
| |||
|
|
| |
Battery Fault | Red Fast | Battery had a fault when | |
(*) | Blinking | battery was inserted | |
|
|
|
* Normally reseating the battery pack will correct the issue.
BATTERIES AND CHARGERS
25English