SHS81A CUT-OFF SAW — MAINTENANCE

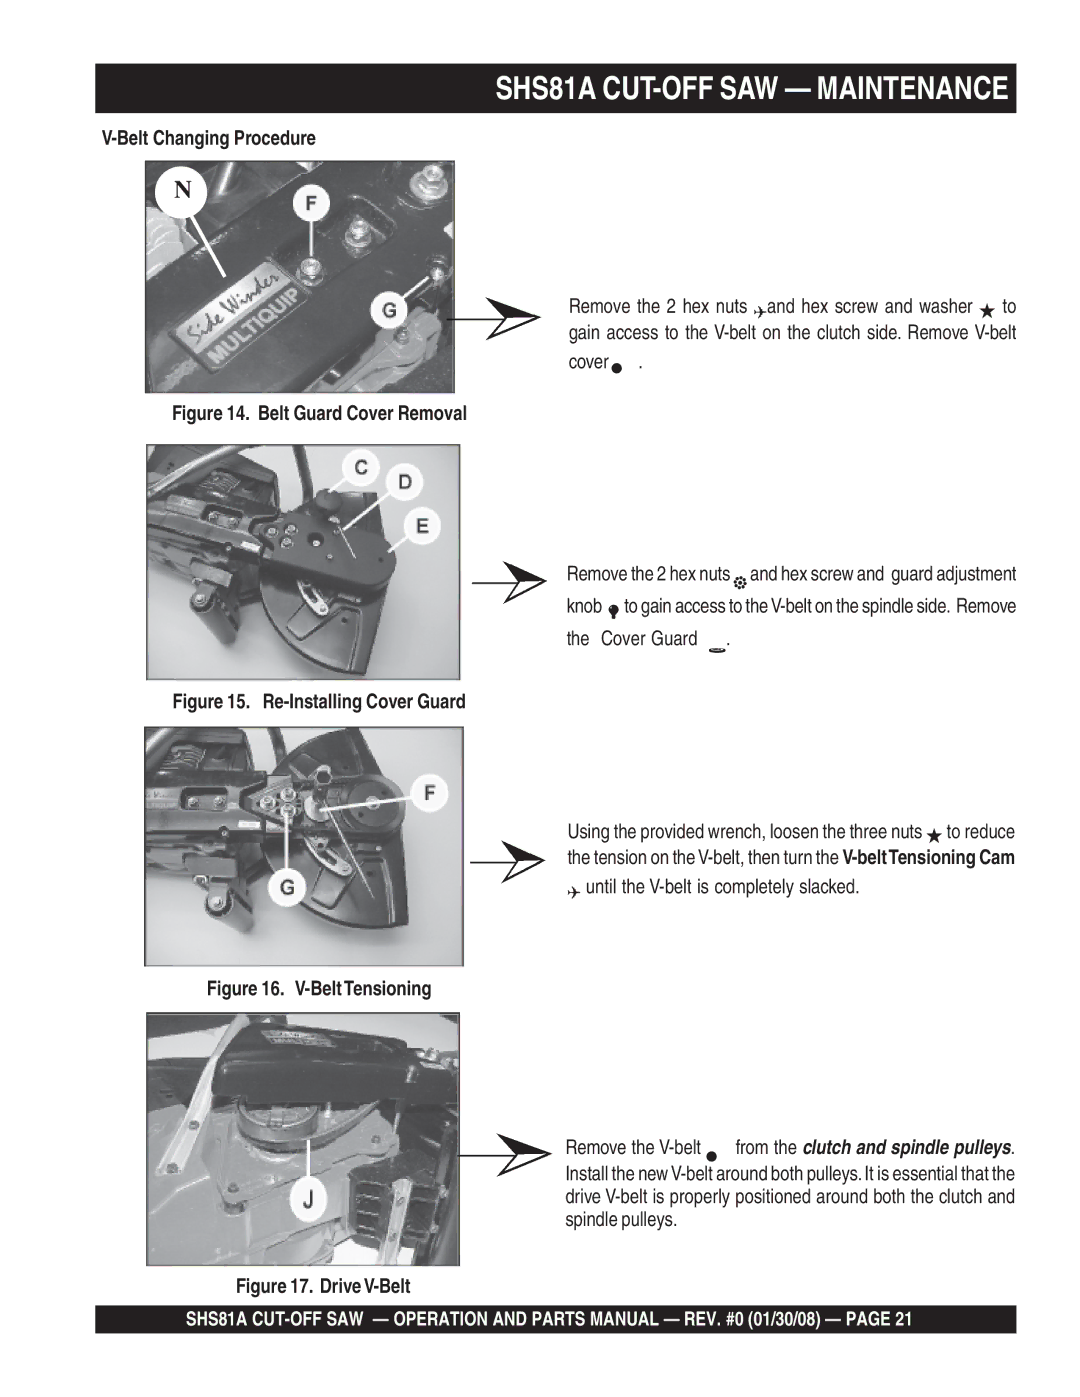
V-Belt Changing Procedure

N

Remove the 2 hex nuts Land hex screw and washer M to gain access to the V-belt on the clutch side. Remove V-belt cover .

Figure 14. Belt Guard Cover Removal

Remove the 2 hex nuts Jand hex screw and guard adjustment knob I to gain access to the V-belt on the spindle side. Remove the Cover Guard K.

Figure 15. Re-Installing Cover Guard

Using the provided wrench, loosen the three nuts M to reduce the tension on the V-belt, then turn the V-beltTensioning Cam L until the V-belt is completely slacked.

Figure 16. V-Belt Tensioning

Remove the V-belt from the clutch and spindle pulleys. Install the new V-belt around both pulleys. It is essential that the drive V-belt is properly positioned around both the clutch and spindle pulleys.

Figure 17. Drive V-Belt

SHS81A CUT-OFF SAW — OPERATION AND PARTS MANUAL — REV. #0 (01/30/08) — PAGE 21

Page 21
Image 21
Multiquip SHS81A manual Belt Changing Procedure, Belt Guard Cover Removal