Chapter 4: Connecting Mvix to a Network
4.2 Wired (via 10/100 LAN, RJ45 port) Network Connections
For Sharing and Accessing media files / folders and drives residing on your PC
NOTE: If using
Use LAN (Ethernet,
Switch / Hub / Router to share the media files residing within
folders or drives on your
Use the left
back to the
From the
Remote.
Once the settings are applied, you can view the shared Folders and Drives on your Display Screen (e.g. TV)
Wired networks are the best way to connect your PC / Network to the Mvix player. While wireless networks offer flexibility, wired networks offer unbeatable performance, reliability, and security.
Specially when streaming high definition video files from your PC or
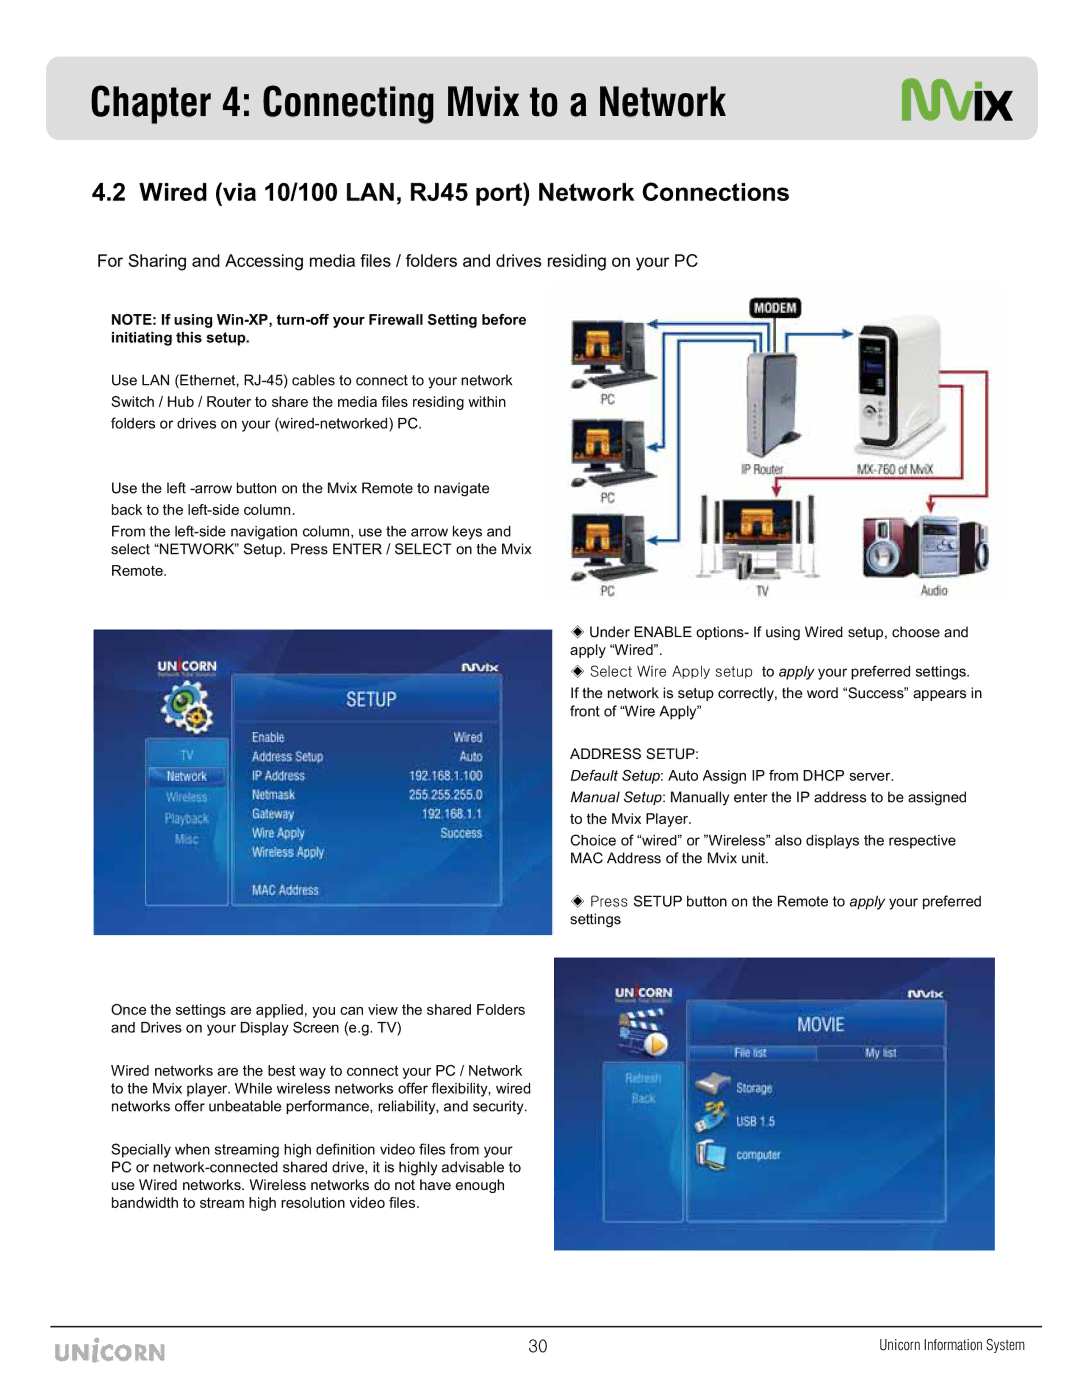
Under ENABLE options- If using Wired setup, choose and apply “Wired”.
zG~Gh GG to apply your preferred settings.
If the network is setup correctly, the word “Success” appears in front of “Wire Apply”
ADDRESS SETUP:
Default Setup: Auto Assign IP from DHCP server.
Manual Setup: Manually enter the IP address to be assigned
to the Mvix Player.
Choice of “wired” or ”Wireless” also displays the respective MAC Address of the Mvix unit.
wGSETUP button on the Remote to apply your preferred settings
ZW | Unicorn Information System |