
GD45-N, GD45-P specifications
The Napoleon Fireplaces GD45-P and GD45-N are two standout models in the realm of contemporary gas fireplaces, beautifully integrating style with advanced technology and functionality. Designed to cater to modern living spaces, both models boast a sleek design that fits seamlessly into various home aesthetics, making them a popular choice among homeowners and designers alike.One of the main features of the GD45-P and GD45-N is their impressive heating capability. With a robust output of up to 40,000 BTUs, these fireplaces are not only visually striking but also efficient in providing warmth during colder months. They are well-suited for large rooms, ensuring that family gatherings can be enjoyed in a cozy environment.
The Napoleon GD45 series employs cutting-edge technology to enhance usability and performance. One such technology is the advanced electronic ignition system, which ensures that starting the fireplace is as simple as pressing a button. The fireplaces also include a variable flame control option, allowing users to adjust the height and intensity of the flames for ambiance as well as heating needs. This feature provides a customizable experience, allowing homeowners to create the perfect atmosphere for any occasion.
Another significant aspect of the GD45-P and GD45-N is their emphasis on efficiency. Operating with an impressive 78% energy efficiency rating, these units are designed to minimize heat loss, keeping energy costs manageable while maximizing comfort. Furthermore, they are equipped with a unique dual burner system, which enhances flame realism and creates a mesmerizing effect that mimics the comfort of traditional wood-burning fireplaces.
Both models feature an extensive selection of decorative options, including a range of fire media like ceramic stones and crystal glass, which allow users to tailor the appearance of the fireplace to their personal taste. The glass front design also maximizes viewing area, ensuring the beauty of the flames can be enjoyed from various angles in the room.
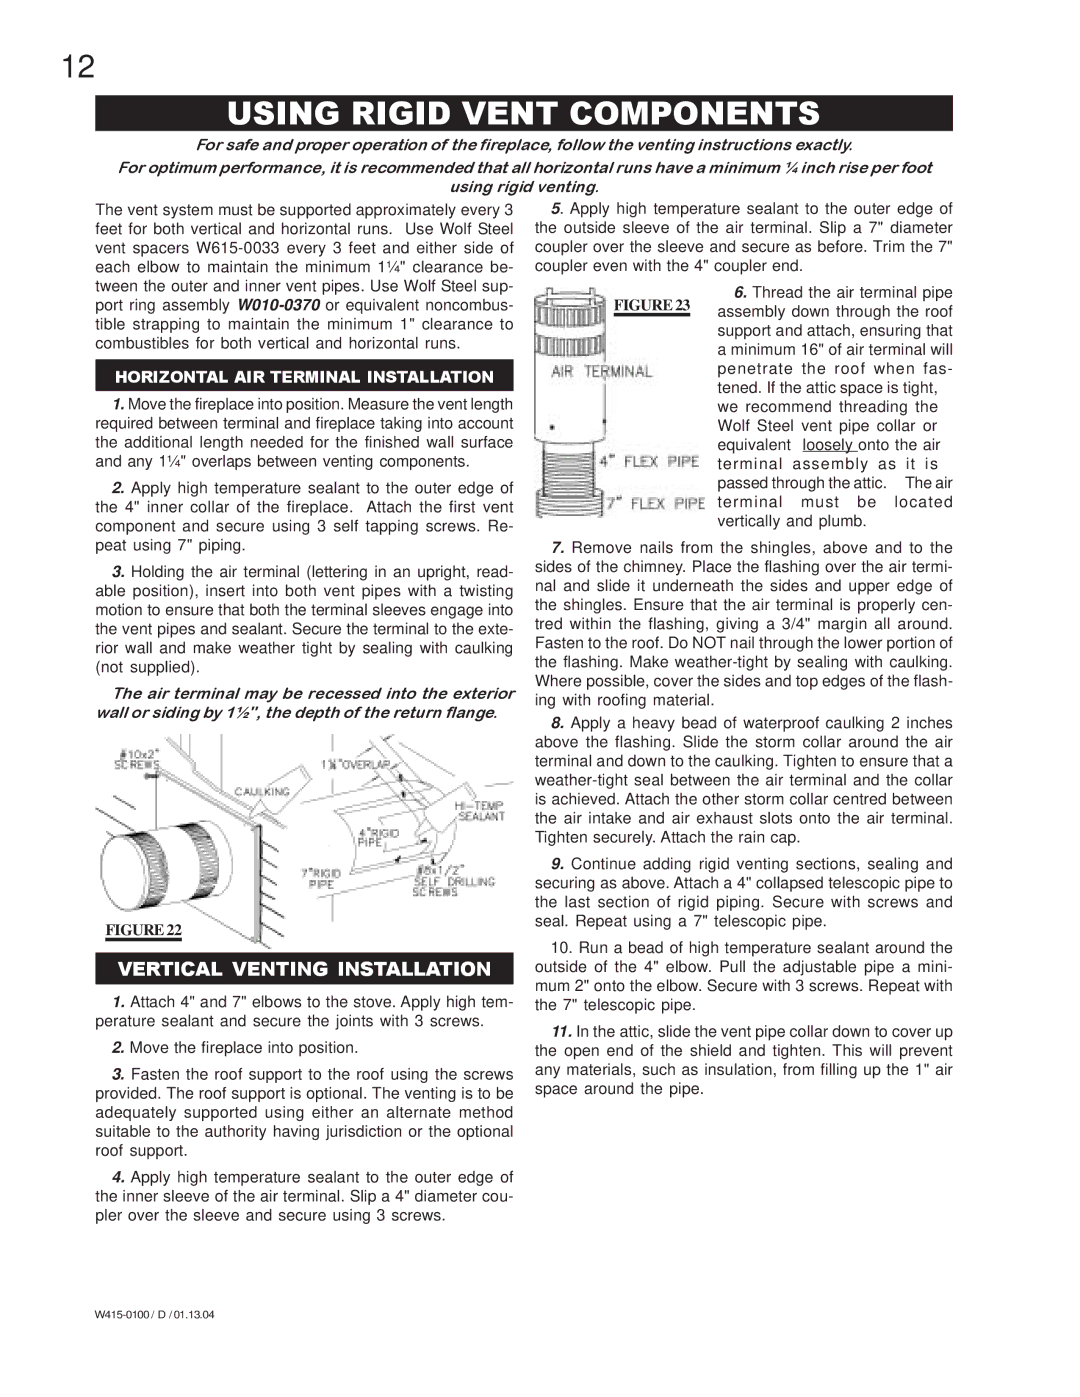
Installation is streamlined with the GD45-P and GD45-N, thanks to their direct venting design. This means that venting can be executed easily through walls or ceilings, providing flexible installation options that accommodate various home layouts.
In summary, Napoleon Fireplaces GD45-P and GD45-N represent the perfect fusion of aesthetics, efficiency, and technological innovation. With exceptional heating capabilities, customizable flame options, and a variety of installation possibilities, these fireplaces are an inviting addition to any modern home. Their striking design paired with functional features ensures they stand out as both a heating solution and a stylish focal point within any living space.