4. Setting the LAN Setting of Projector
4-2. Wireless LAN
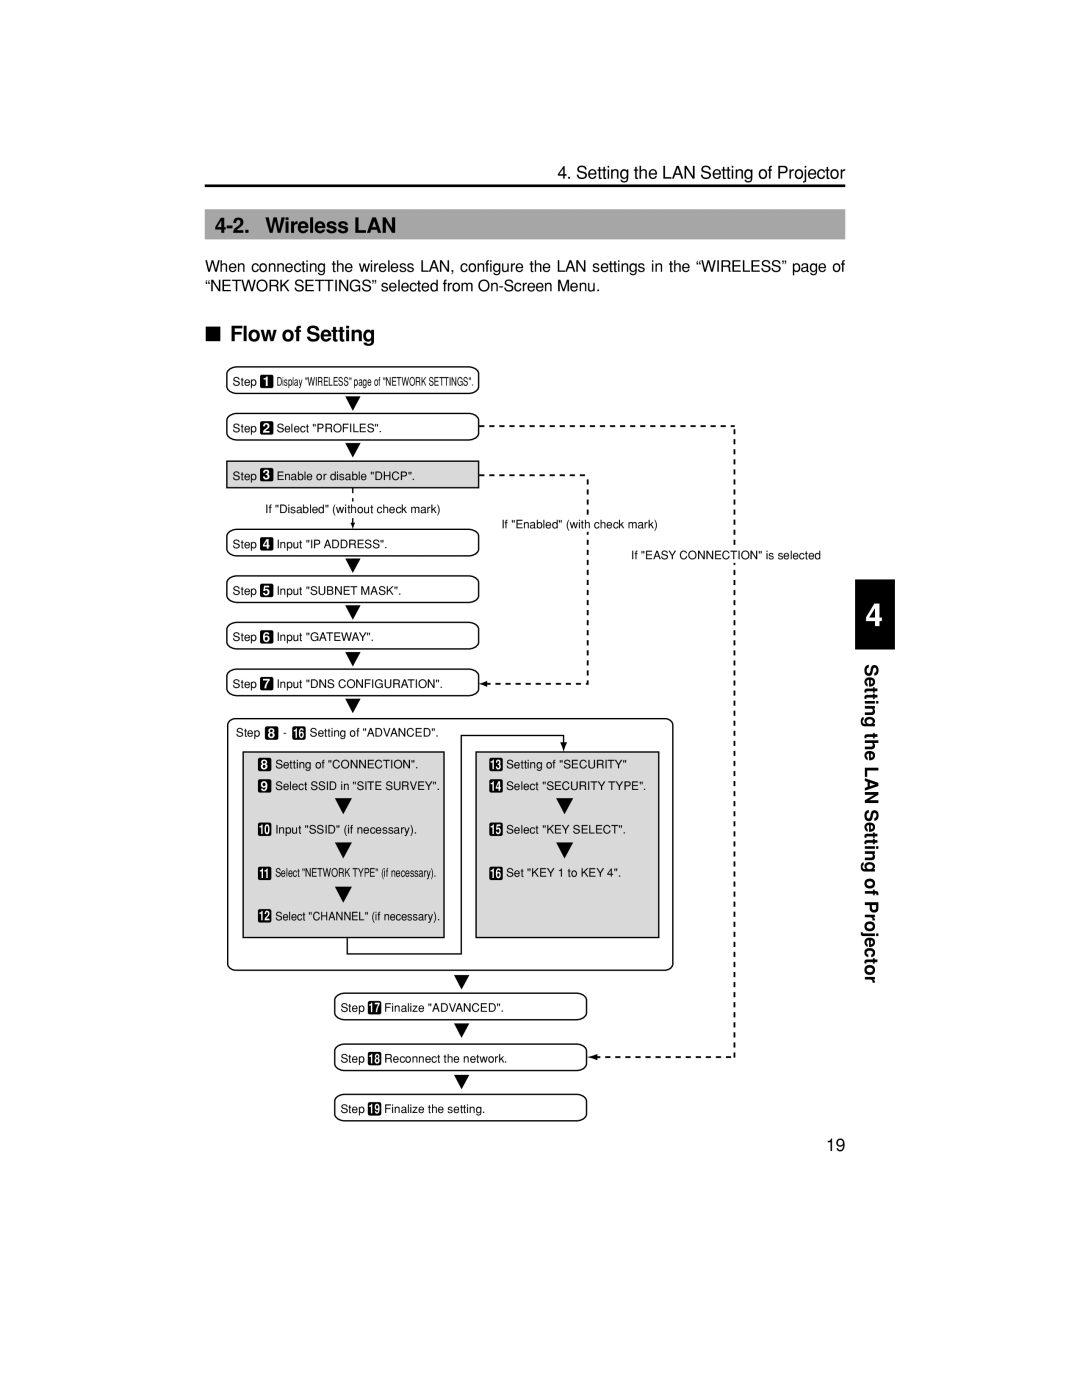
When connecting the wireless LAN, configure the LAN settings in the “WIRELESS” page of “NETWORK SETTINGS” selected from
■Flow of Setting
Step 1 | Display "WIRELESS" page of "NETWORK SETTINGS". |
|
|
|
|
|
|
| |||||
Step 2 | Select "PROFILES". |
|
|
|
|
|
|
| |||||
|
|
|
|
|
|
|
|
|
| ||||
Step 3 | Enable or disable "DHCP". |
|
|
|
|
|
|
| |||||
|
|
|
|
|
|
|
|
|
|
|
|
|
|
| If "Disabled" (wi | tho | ut check mark) |
|
|
|
|
|
|
| |||
|
|
|
|
|
|
|
|
|
|
|
| ||
|
|
|
|
|
|
|
| If "Enabled" (with check mark) | |||||
Step 4 | Input "IP ADDRESS". |
|
|
|
|
|
|
| |||||
|
|
|
|
|
|
|
|
|
|
| If "EASY CONNECTION" is selected | ||
Step 5 | Input "SUBNET MASK". |
|
|
|
|
|
|
| |||||
Step 6 | Input "GATEWAY". |
|
|
|
|
|
|
| |||||
Step 7 | Input "DNS CONFIGURATION". |
|
|
|
|
|
|
| |||||
Step 8 | - 16 Setting of "ADVANCED". |
|
|
|
|
|
|
|
| ||||
|
|
|
|
|
|
|
|
|
|
|
|
|
|
8 | Setting of "CONNECTION". | 13 | Setting of "SECURITY" | ||||||||||
9 | Select SSID in "SITE SURVEY". | 14 | Select "SECURITY TYPE". | ||||||||||
10 | Input "SSID" (if necessary). | 15 | Select "KEY SELECT". | ||||||||||
| 11 Select "NETWORK TYPE" (if necessary). | 16 | Set "KEY 1 to KEY 4". | ||||||||||
12Select "CHANNEL" (if necessary).
Step 17 Finalize "ADVANCED".
Step 18 Reconnect the network.
Step 19 Finalize the setting.
4
Setting the LAN Setting of Projector
19
