USB Gateway (Router) Configuration
Before continuing, ensure you have the following items and information ready:
■A Windows 98SE, ME, 2000 or XP client machine.
■A telephone line with ADSL service enabled.
■User Name, Password, VPI, VCI, encapsulation and DNS server settings for your ADSL account (ask your ISP if unsure).
Note: Please be aware that connection via USB is only supported in Windows 98SE, Windows Me, Windows 2000 and Windows XP. For Windows 95, NT, Linux and Macintosh you should use the Ethernet port of your NB1300.
Step 1: Connecting your computer to the NB1300
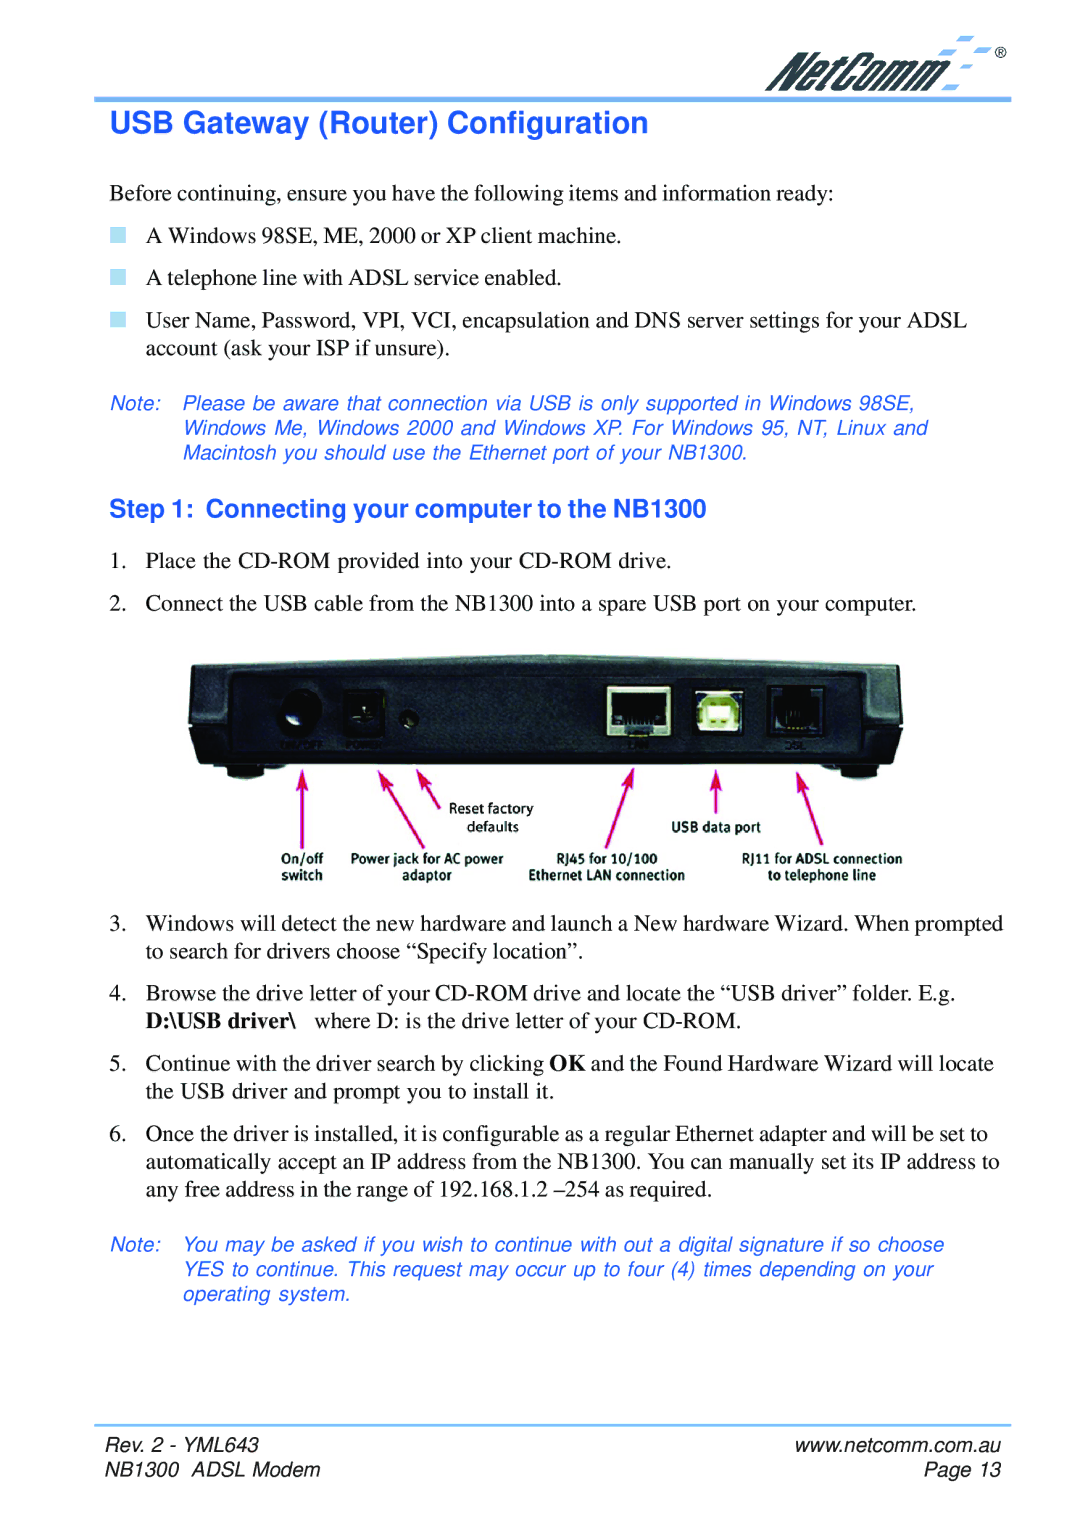
1.Place the
2.Connect the USB cable from the NB1300 into a spare USB port on your computer.
3.Windows will detect the new hardware and launch a New hardware Wizard. When prompted to search for drivers choose “Specify location”.
4.Browse the drive letter of your
5.Continue with the driver search by clicking OK and the Found Hardware Wizard will locate the USB driver and prompt you to install it.
6.Once the driver is installed, it is configurable as a regular Ethernet adapter and will be set to automatically accept an IP address from the NB1300. You can manually set its IP address to any free address in the range of 192.168.1.2
Note: You may be asked if you wish to continue with out a digital signature if so choose YES to continue. This request may occur up to four (4) times depending on your operating system.
Rev. 2 - YML643 | www.netcomm.com.au |
NB1300 ADSL Modem | Page 13 |