Ethernet Gateway Configuration
Before continuing, ensure you have the following items and information ready:
■A Windows 98, ME, NT, 2000 or XP client machine with a Network Interface Card installed.
■Either a Network Hub and two UTP cables OR one Crossover UTP cable.
■A telephone line with ADSL service enabled.
■User Name, Password, VPI, VCI, encapsulation and DNS server settings for your ADSL account (ask your ISP if unsure) .
Note: The following procedure presumes your NB1300 is set to a factory default IP address 192.168.1.1.
Step 1: Connecting your computer to the NB1300
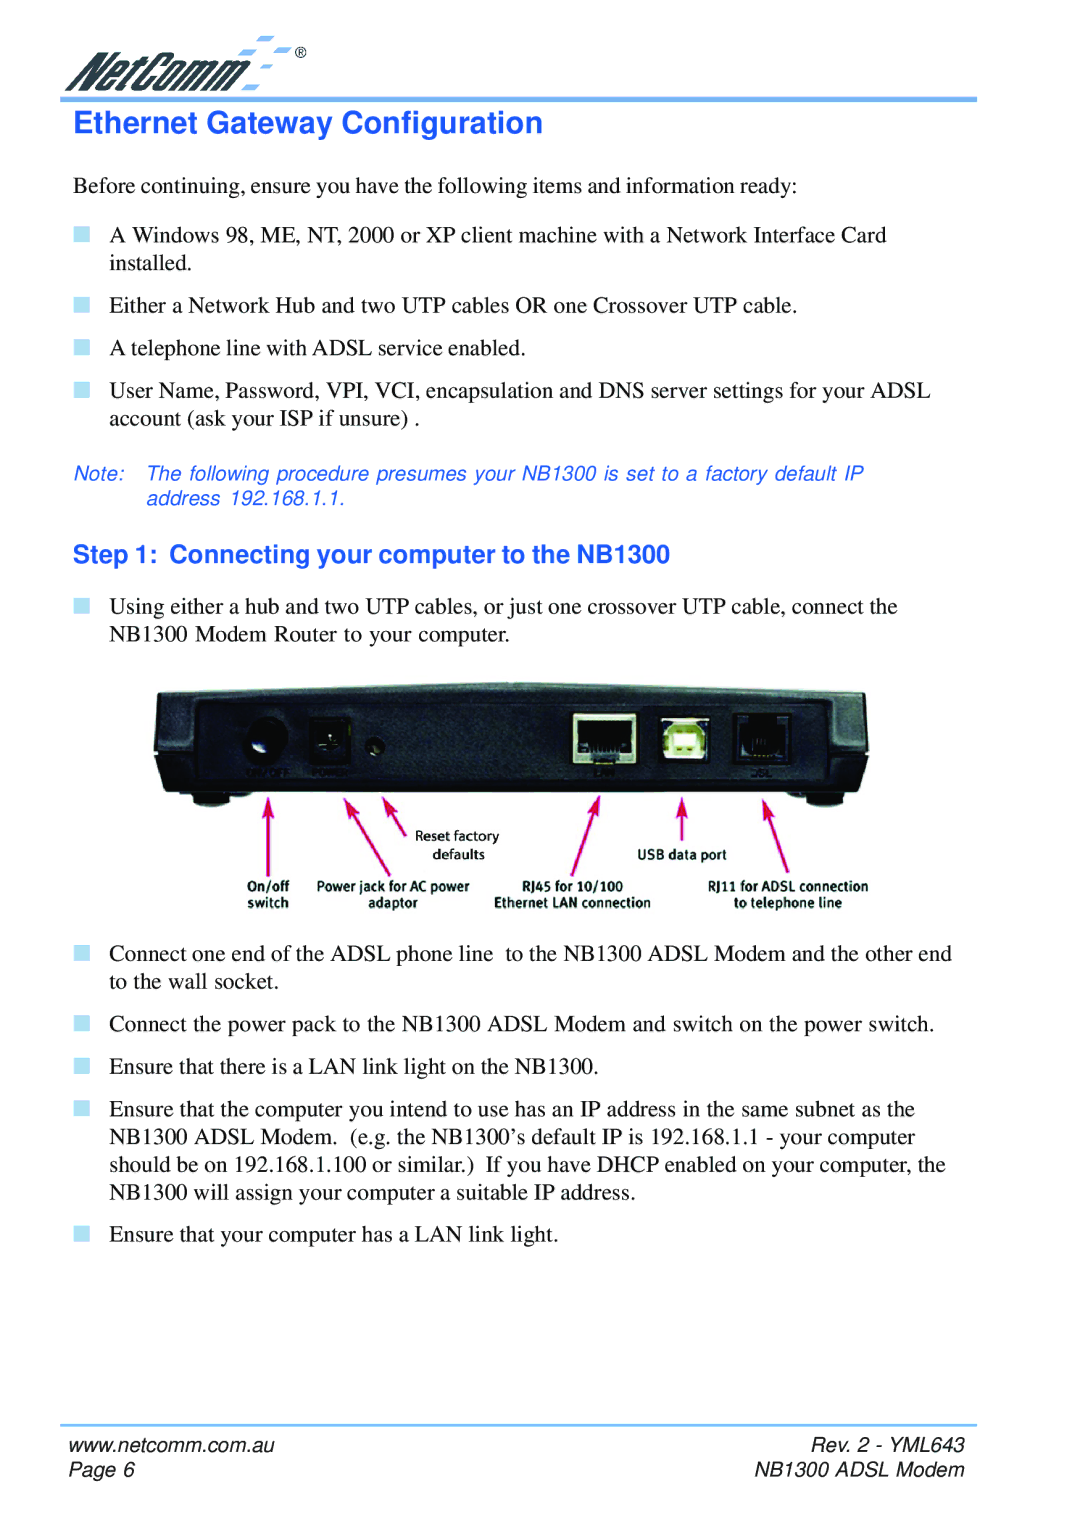
■Using either a hub and two UTP cables, or just one crossover UTP cable, connect the NB1300 Modem Router to your computer.
■Connect one end of the ADSL phone line to the NB1300 ADSL Modem and the other end to the wall socket.
■Connect the power pack to the NB1300 ADSL Modem and switch on the power switch.
■Ensure that there is a LAN link light on the NB1300.
■Ensure that the computer you intend to use has an IP address in the same subnet as the NB1300 ADSL Modem. (e.g. the NB1300’s default IP is 192.168.1.1 - your computer should be on 192.168.1.100 or similar.) If you have DHCP enabled on your computer, the NB1300 will assign your computer a suitable IP address.
■Ensure that your computer has a LAN link light.
www.netcomm.com.au | Rev. 2 - YML643 |
Page 6 | NB1300 ADSL Modem |