2 Install the Firewall
After unpacking the box and locating the configuration information, you’re ready to install the firewall.
Note: You do not have to power down any equipment to do this, but if you need to move your computers (perhaps to get to ports in the back), you may want to shut down the computers before moving them around.
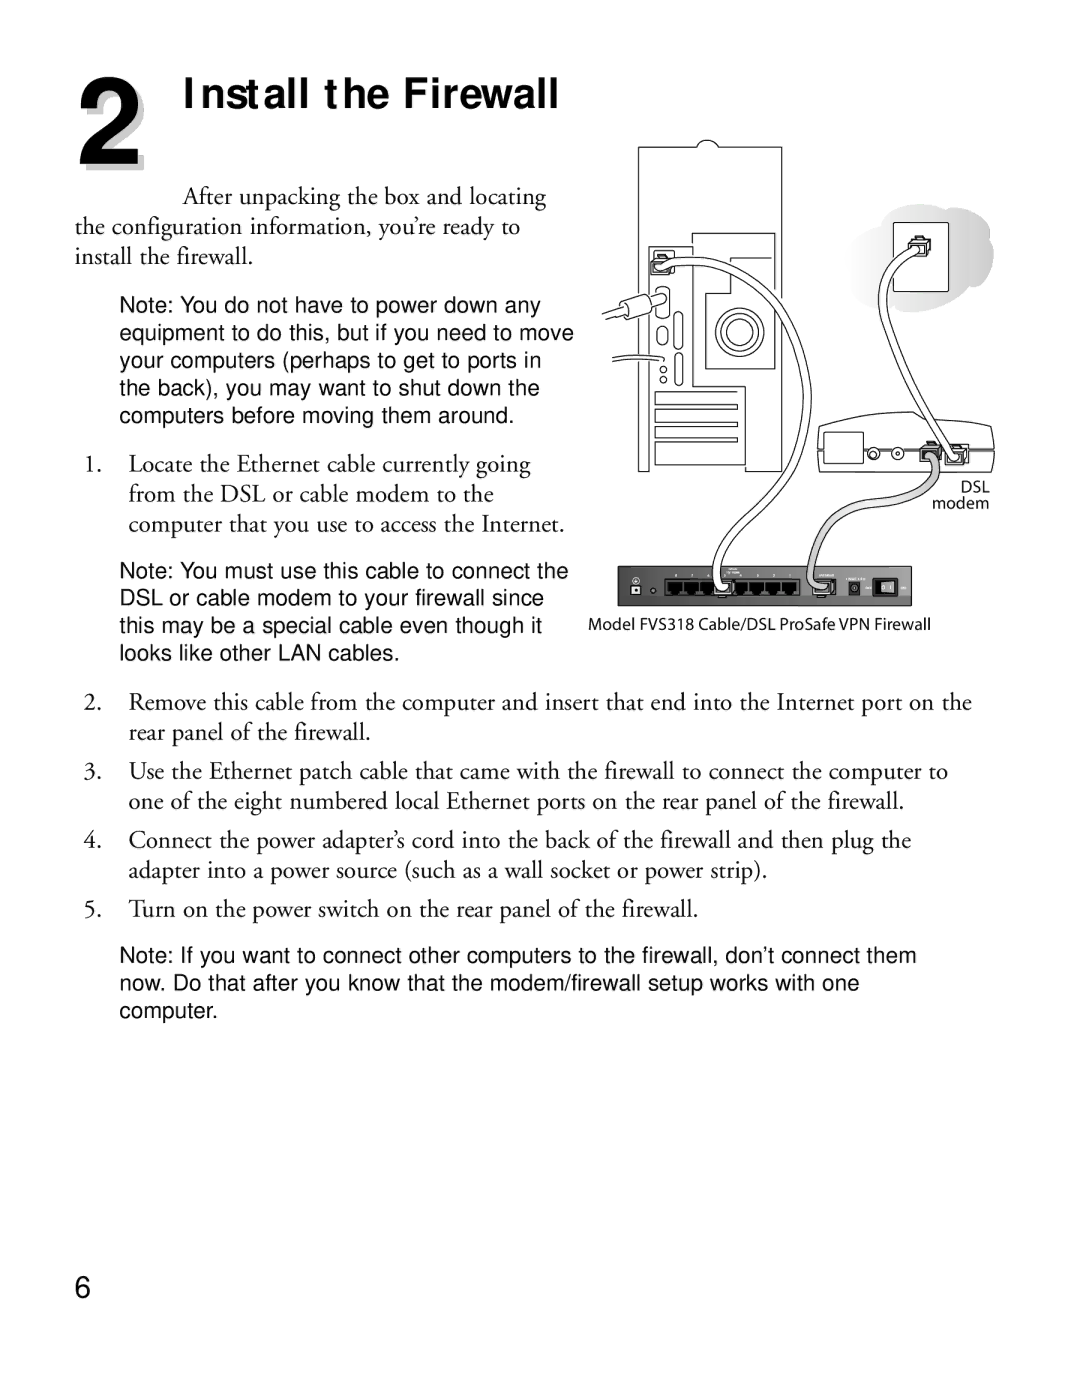
1.Locate the Ethernet cable currently going from the DSL or cable modem to the computer that you use to access the Internet.
Note: You must use this cable to connect the DSL or cable modem to your firewall since this may be a special cable even though it looks like other LAN cables.
DSL modem
|
|
|
| LOCAL |
|
|
|
|
|
|
|
|
| 10/100M |
|
|
|
|
|
8 | 7 | 6 | 5 | 4 | 3 | 2 | 1 | INTERNET |
|
|
|
|
|
|
|
|
| 12VDC 1.2A |
|
|
|
|
|
|
|
|
| OFF | ON |
Model FVS318 Cable/DSL ProSafe VPN Firewall
2.Remove this cable from the computer and insert that end into the Internet port on the rear panel of the firewall.
3.Use the Ethernet patch cable that came with the firewall to connect the computer to one of the eight numbered local Ethernet ports on the rear panel of the firewall.
4.Connect the power adapter’s cord into the back of the firewall and then plug the adapter into a power source (such as a wall socket or power strip).
5.Turn on the power switch on the rear panel of the firewall.
Note: If you want to connect other computers to the firewall, don’t connect them now. Do that after you know that the modem/firewall setup works with one computer.
6