NTI XTENDEX Wall Mount Extenders
Installing The Remote Unit
The Remote Unit can either set on a desk near the monitor and speakers to be connected, or it can be mounted to a vertical surface using the wall mount brackets provided.
Attach Wall Mount Brackets
The two wall mount brackets can be secured to the Remote Unit using the four

4-40X1/4" Flat Head Screw
Wall Mount Bracket
Remote Unit
(Bottom View)
Figure 4- Attach wall mount brackets to Remote Unit
Connect Monitor and Speakers
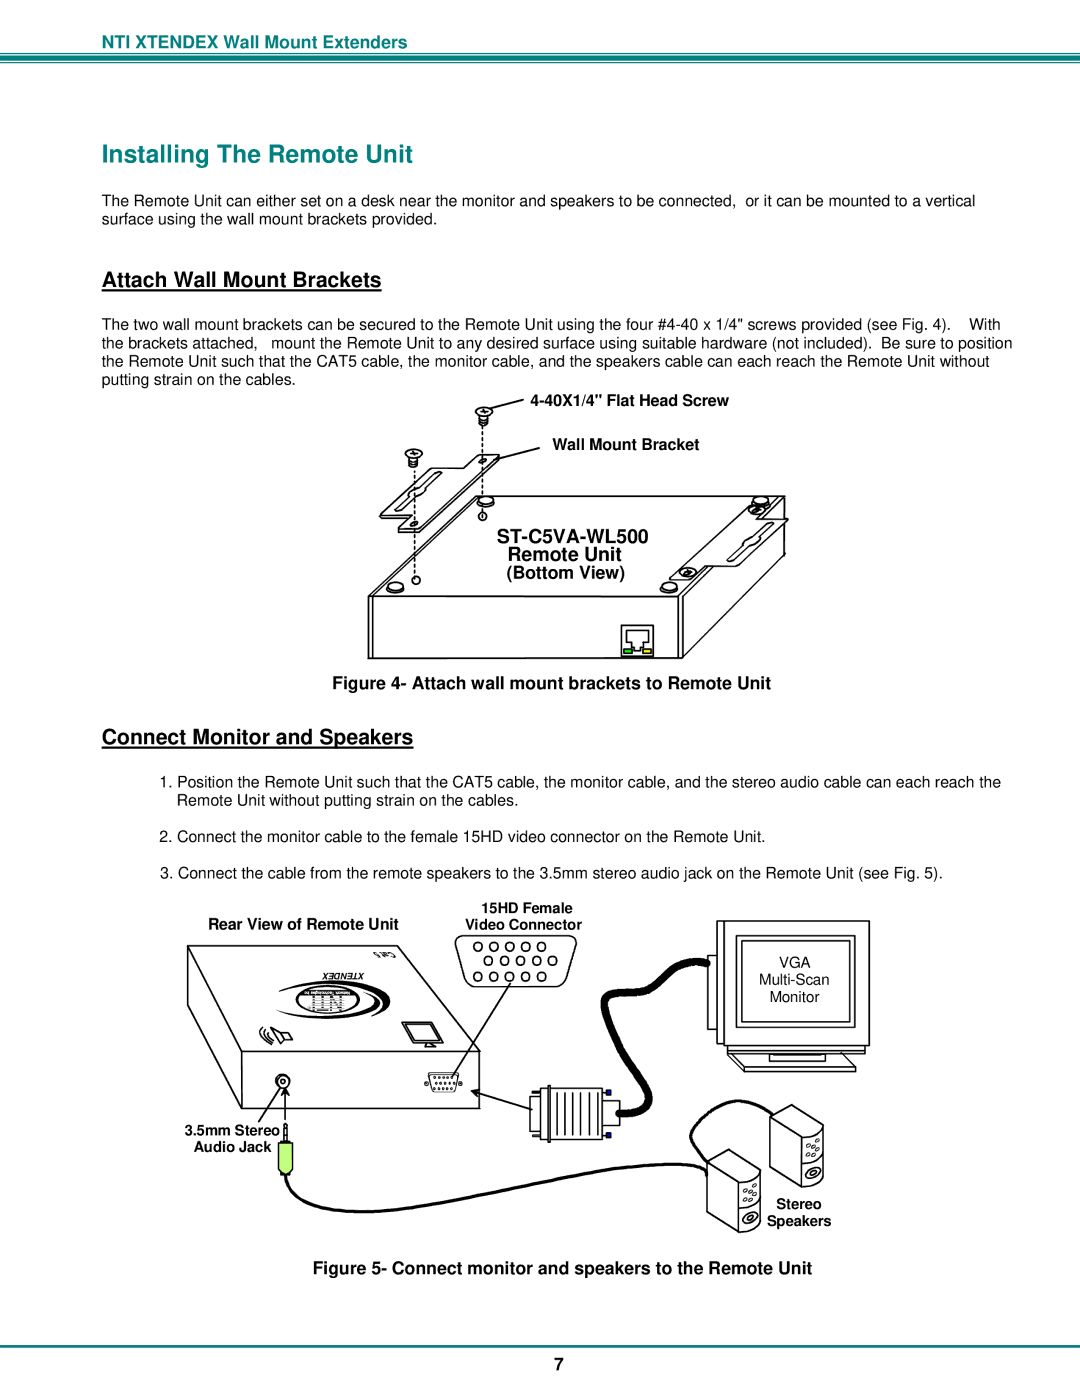
1.Position the Remote Unit such that the CAT5 cable, the monitor cable, and the stereo audio cable can each reach the Remote Unit without putting strain on the cables.
2.Connect the monitor cable to the female 15HD video connector on the Remote Unit.
3.Connect the cable from the remote speakers to the 3.5mm stereo audio jack on the Remote Unit (see Fig. 5).
Rear View of Remote Unit | 15HD Female |
Video Connector | |
XTENDEX |
|
Inc Technologies Network |
|
RNTI
VGA
Monitor
3.5mm Stereo ![]()
Audio Jack ![]()
Stereo
![]()
![]() Speakers
Speakers
Figure 5- Connect monitor and speakers to the Remote Unit
7