Options icon and scroll down using the Navigation Joystick to highlight “Update Firmware”, then hit the Play/Pause button.
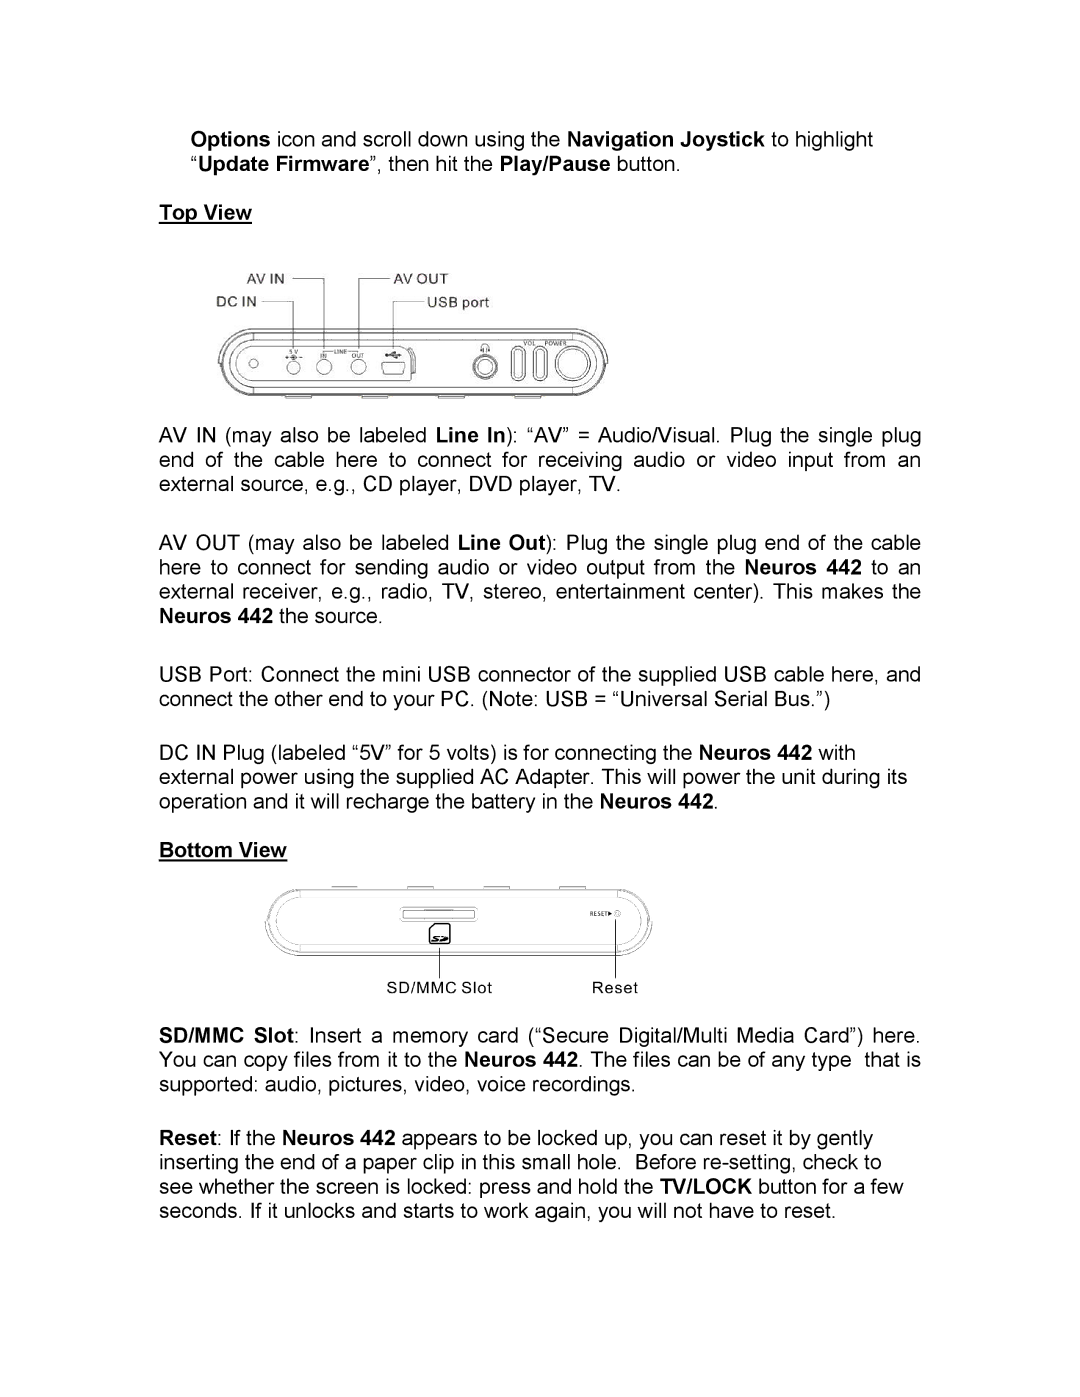
Top View
AV IN (may also be labeled Line In): “AV” = Audio/Visual. Plug the single plug end of the cable here to connect for receiving audio or video input from an external source, e.g., CD player, DVD player, TV.
AV OUT (may also be labeled Line Out): Plug the single plug end of the cable here to connect for sending audio or video output from the Neuros 442 to an external receiver, e.g., radio, TV, stereo, entertainment center). This makes the Neuros 442 the source.
USB Port: Connect the mini USB connector of the supplied USB cable here, and
connect the other end to your PC. (Note: USB = “Universal Serial Bus.”)
DC IN Plug (labeled “5V” for 5 volts) is for connecting the Neuros 442 with external power using the supplied AC Adapter. This will power the unit during its operation and it will recharge the battery in the Neuros 442.
Bottom View
SD/MMC Slot: Insert a memory card (“Secure Digital/Multi Media Card”) here. You can copy files from it to the Neuros 442. The files can be of any type that is supported: audio, pictures, video, voice recordings.
Reset: If the Neuros 442 appears to be locked up, you can reset it by gently inserting the end of a paper clip in this small hole. Before