INSTALLATION
NOTE: This heater may be installed three different ways:
1.Wall Mounted
2.Freestanding heater (with optional pedestal)
3.Freestanding (with optional wooden mantel)
WALL MOUNT INSTALLATION:
1.After determining the location for the heater, unfold the template provided and place the bottom of the template a minimum of 7" from bottom of unit to floor.
NOTE: Be sure to level the template before punching the holes.
2.With the template in place and the four black dots centered on studs, punch the four centers marked in the black dots with a sharp pointed object. Insert the four wood screws provided with the unit into the four punched holes.
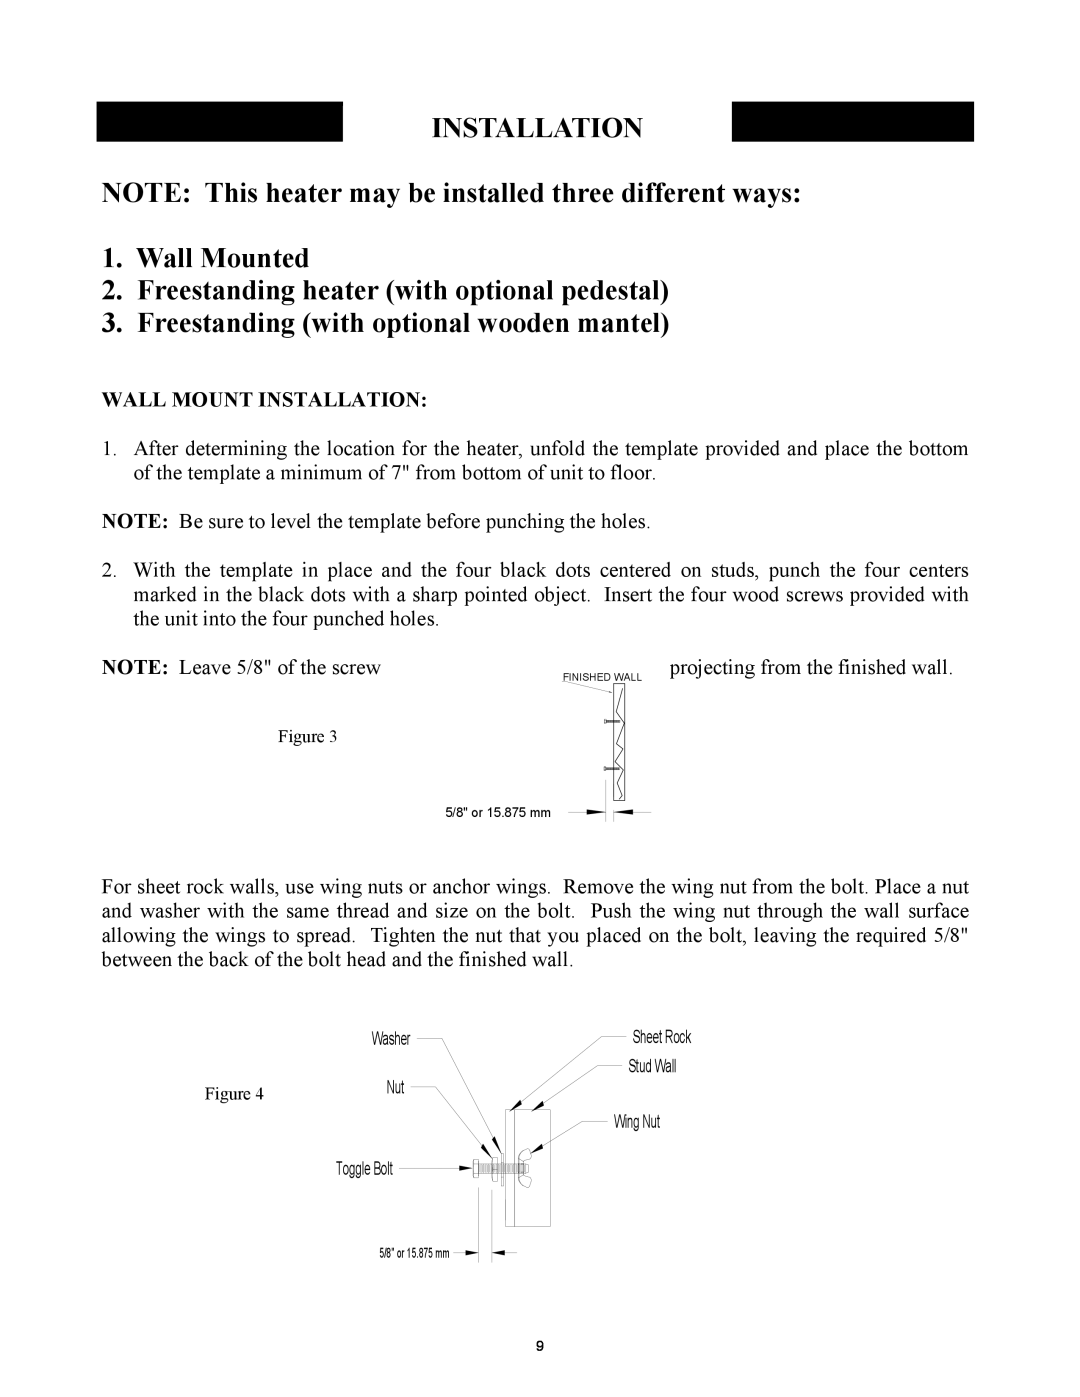
NOTE: Leave 5/8" of the screwprojecting from the finished wall.
FINISHED WALL
Figure 3
5/8" or 15.875 mm
For sheet rock walls, use wing nuts or anchor wings. Remove the wing nut from the bolt. Place a nut and washer with the same thread and size on the bolt. Push the wing nut through the wall surface allowing the wings to spread. Tighten the nut that you placed on the bolt, leaving the required 5/8" between the back of the bolt head and the finished wall.
Washer
Figure 4 | Nut |
Toggle Bolt
Sheet Rock Stud Wall
Wing Nut
5/8" or 15.875 mm ![]()
9