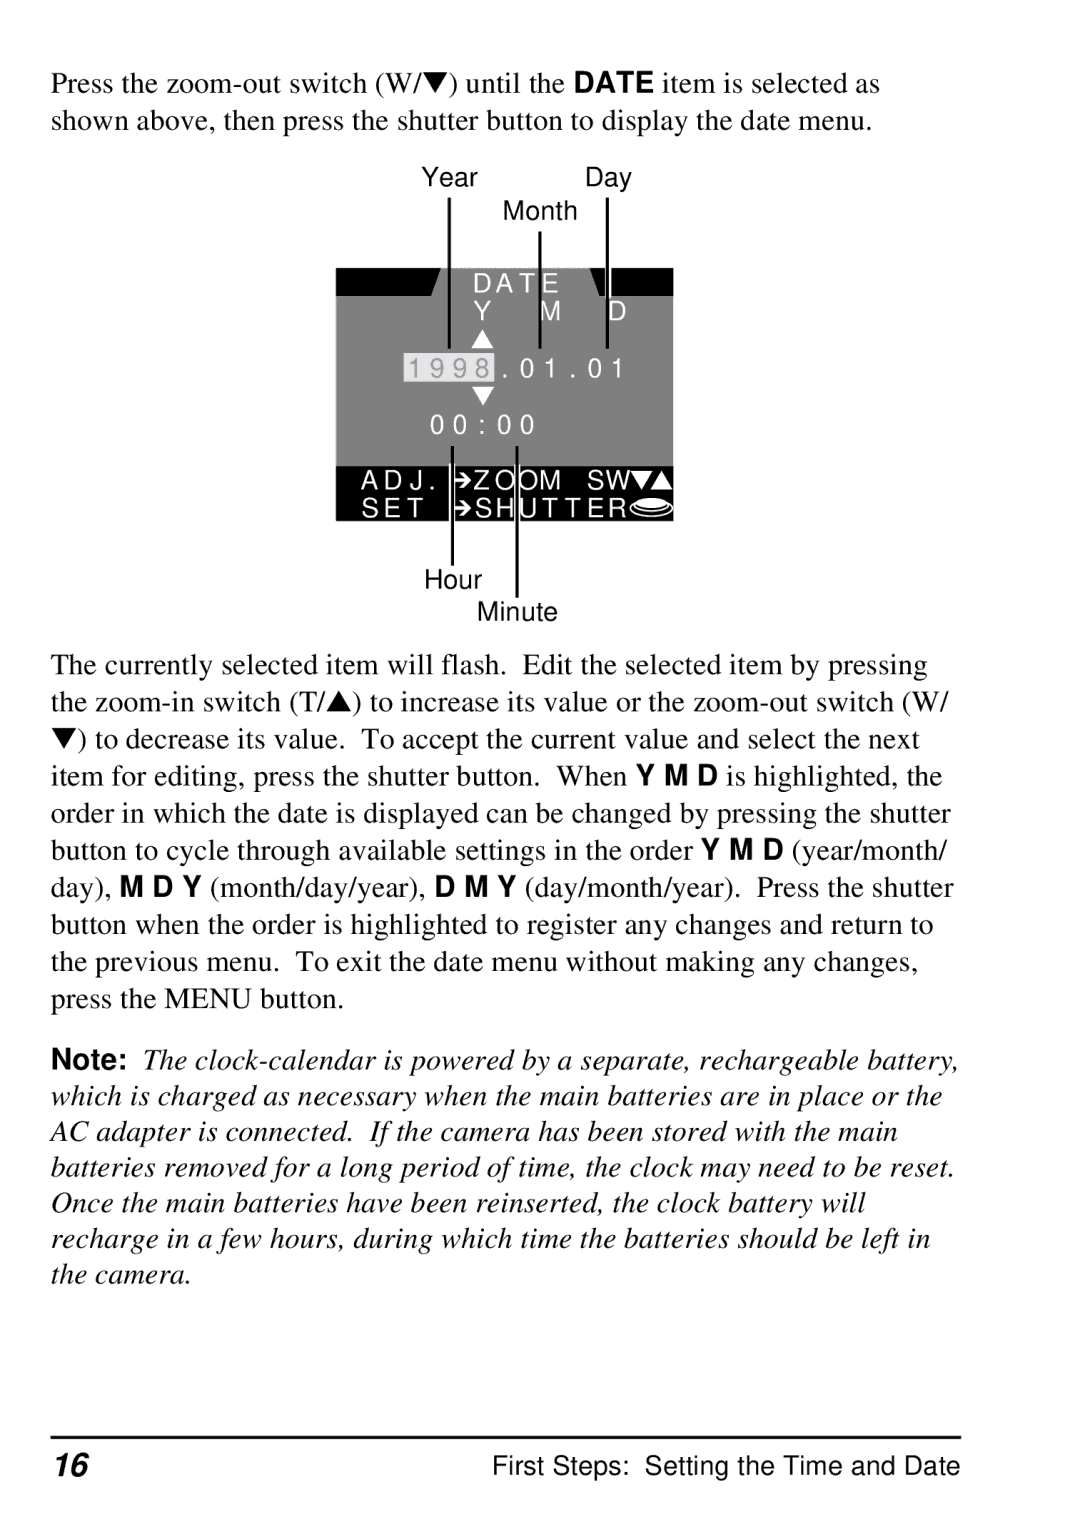
Press the zoom-out switch (W/▼) until the DATE item is selected as shown above, then press the shutter button to display the date menu.
| Year | Day |
| | | Month | | |
| | | | |
| | | | | | |
| | | | | | |
| | D A T | E | | |
| | Y | M | | D |
| | ▲ | | | |
| 1 9 9 8 | . 0 1 . 0 1 |
| | ▼ | | |
0 0 : 0 0 | | | |
| | | | | | |
A D J . | ➔Z OOM | SW▼▲ |
S E T | ➔SH U T T ER |
| | | | | | |
Hour
Minute
The currently selected item will flash. Edit the selected item by pressing the zoom-in switch (T/▲) to increase its value or the zoom-out switch (W/ ▼) to decrease its value. To accept the current value and select the next item for editing, press the shutter button. When Y M D is highlighted, the order in which the date is displayed can be changed by pressing the shutter button to cycle through available settings in the order Y M D (year/month/ day), M D Y (month/day/year), D M Y (day/month/year). Press the shutter button when the order is highlighted to register any changes and return to the previous menu. To exit the date menu without making any changes, press the MENU button.
Note: The clock-calendar is powered by a separate, rechargeable battery, which is charged as necessary when the main batteries are in place or the AC adapter is connected. If the camera has been stored with the main batteries removed for a long period of time, the clock may need to be reset. Once the main batteries have been reinserted, the clock battery will recharge in a few hours, during which time the batteries should be left in the camera.
16 | First Steps: Setting the Time and Date |