NEPTUNE 5 SB FA
3.10 Electrical connection | CAUTION! |
CAUTION!
When using a cord reel:
400V | 400V |
230 V / 400 V ?
(220 V / 440 V ?)
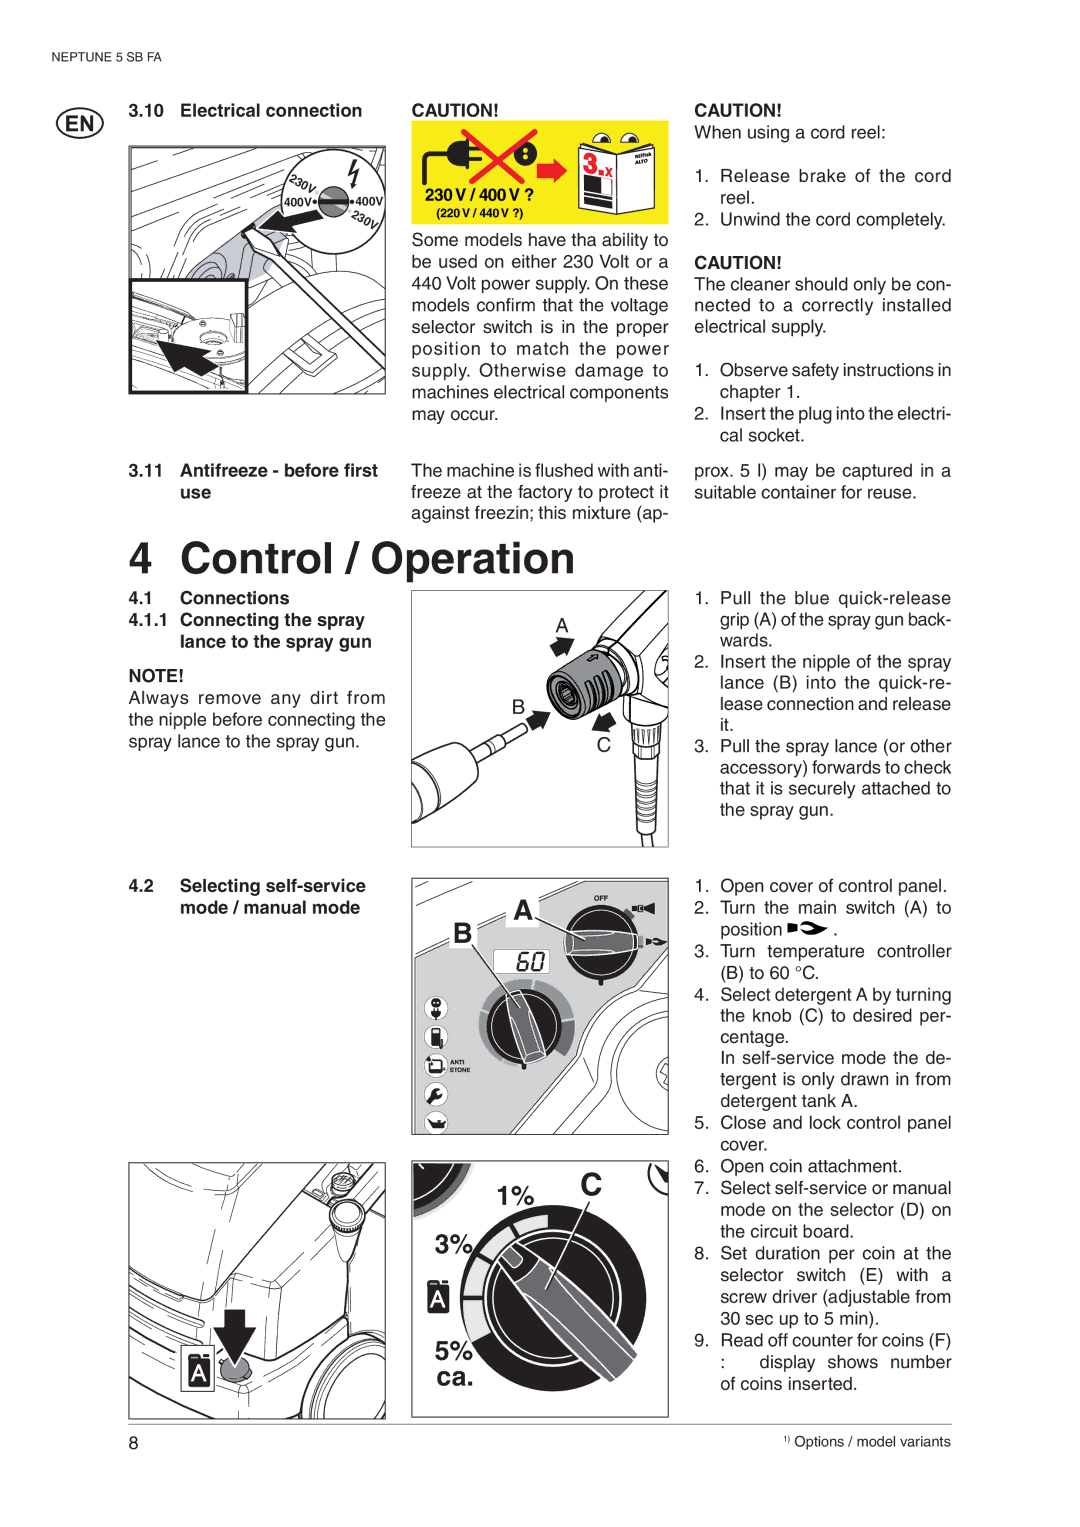
Some models have tha ability to be used on either 230 Volt or a 440 Volt power supply. On these models confi rm that the voltage selector switch is in the proper position to match the power supply. Otherwise damage to machines electrical components may occur.
1.Release brake of the cord reel.
2.Unwind the cord completely.
CAUTION!
The cleaner should only be con- nected to a correctly installed electrical supply.
1.Observe safety instructions in chapter 1.
2.Insert the plug into the electri- cal socket.
3.11Antifreeze - before first The machine is flushed with anti-
use | freeze at the factory to protect it |
| against freezin; this mixture (ap- |
prox. 5 l) may be captured in a suitable container for reuse.
4 | Control / Operation |
|
|
|
|
| |
4.1 | Connections |
|
| 1. | Pull the blue | ||
4.1.1 | Connecting the spray | A |
|
| grip (A) of the spray gun back- | ||
| lance to the spray gun |
|
|
| wards. |
| |
NOTE! |
|
| 2. Insert the nipple of the spray | ||||
|
|
| lance (B) into the | ||||
Always remove any dirt from |
|
|
| ||||
B |
|
| lease connection and release | ||||
the nipple before connecting the |
|
| |||||
|
|
| it. |
|
| ||
spray lance to the spray gun. |
| C |
|
|
| ||
| 3. | Pull the spray lance (or other | |||||
|
|
|
|
| accessory) forwards to check | ||
|
|
|
|
| that it is securely attached to | ||
|
|
|
|
| the spray gun. | ||
4.2 | Selecting | A |
| 1. | Open cover of control panel. | ||
| mode / manual mode |
| 2. | Turn the main switch (A) to | |||
|
| B |
| 3. | position | . | |
|
|
|
| Turn | temperature controller | ||
|
|
|
|
| (B) to 60 °C. |
| |
|
|
|
| 4. Select detergent A by turning | |||
|
|
|
|
| the knob (C) to desired per- | ||
|
|
|
|
| centage. |
| |
|
|
|
|
| In | ||
|
|
|
|
| tergent is only drawn in from | ||
|
|
|
|
| detergent tank A. | ||
|
|
|
| 5. Close and lock control panel | |||
|
|
|
|
| cover. |
| |
|
|
| C | 6. | Open coin attachment. | ||
|
| 1% | 7. | Select | |||
|
|
|
| mode on the selector (D) on | |||
|
|
|
|
| |||
|
| 3% |
|
| the circuit board. | ||
|
|
| 8. | Set duration per coin at the | |||
|
|
|
|
| selector switch (E) with a | ||
|
|
|
|
| screw driver (adjustable from | ||
|
|
|
|
| 30 sec up to 5 min). | ||
| A | 5% |
| 9. Read off counter for coins (F) | |||
|
|
| : | display | shows number | ||
| ca. |
|
| ||||
|
|
| of coins inserted. | ||||
|
|
|
| ||||
8 |
|
|
|
|
| 1) Options / model variants | |
