Sy s t e m S e t u p
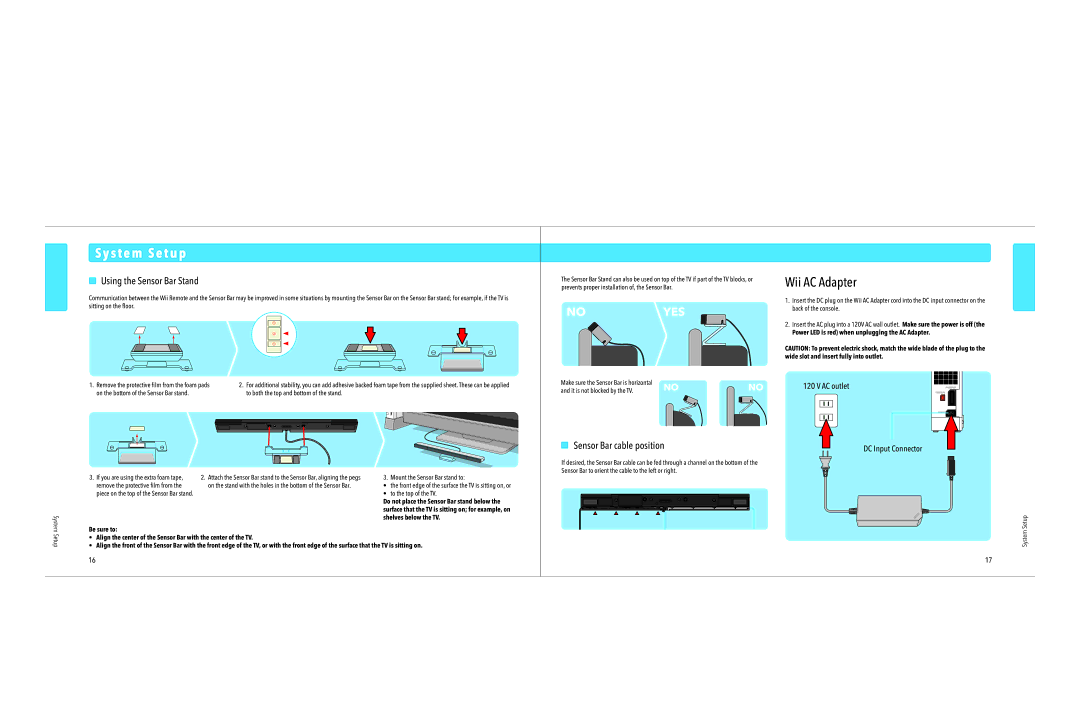
Using the Sensor Bar Stand
Communication between the Wii Remote and the Sensor Bar may be improved in some situations by mounting the Sensor Bar on the Sensor Bar stand; for example, if the TV is sitting on the floor.
1. Remove the protective film from the foam pads | 2. For additional stability, you can add adhesive backed foam tape from the supplied sheet. These can be applied |
on the bottom of the Sensor Bar stand. | to both the top and bottom of the stand. |
The Sensor Bar Stand can also be used on top of the TV if part of the TV blocks, or prevents proper installation of, the Sensor Bar.
NO YES
Make sure the Sensor Bar is horizontal | NO | NO |
and it is not blocked by the TV. |
Wii AC Adapter
1.Insert the DC plug on the Wii AC Adapter cord into the DC input connector on the back of the console.
2.Insert the AC plug into a 120V AC wall outlet. Make sure the power is off (the
Power LED is red) when unplugging the AC Adapter.
CAUTION: To prevent electric shock, match the wide blade of the plug to the wide slot and insert fully into outlet.
120 V AC outlet
| 3. If you are using the extra foam tape, | 2. Attach the Sensor Bar stand to the Sensor Bar, aligning the pegs | 3. Mount the Sensor Bar stand to: | |
| remove the protective film from the | on the stand with the holes in the bottom of the Sensor Bar. | • the front edge of the surface the TV is sitting on, or | |
| piece on the top of the Sensor Bar stand. |
| • to the top of the TV. | |
|
|
| Do not place the Sensor Bar stand below the | |
|
|
| surface that the TV is sitting on; for example, on | |
System |
|
| shelves below the TV. | |
Be sure to: |
|
| ||
Setup | • Align the center of the Sensor Bar with the center of the TV. |
| ||
• Align the front of the Sensor Bar with the front edge of the TV, or with the front edge of the surface that the TV is sitting on. | ||||
| ||||
16
Sensor Bar cable position
If desired, the Sensor Bar cable can be fed through a channel on the bottom of the Sensor Bar to orient the cable to the left or right.
DC Input Connector
System Setup
17