PROBLEM: The walking belt slows when walked on
SOLUTION: a. If an extension cord is needed, use only a
OPERATION AND ADJUSTMENT
THE PERFORMANT LUBETM WALKING BELT
b. If the walking belt is overtightened, treadmill perfor- mance may decrease and the walking belt may be- come damaged. Remove the key and UNPLUG THE POWER CORD. Using the allen wrench, turn both
b |
Your treadmill features a walking belt coated with PERFORMANT LUBETM, a
TANT: Never apply silicone spray or other substances to the walking belt or the walking platform. Such substances will deteriorate the walking belt and cause excessive wear.
rear roller adjustment bolts counterclockwise, 1/4 of a turn. When the walking belt is properly tightened, you should be able to lift each side of the walking belt
Rear Roller Adjustment Bolts |
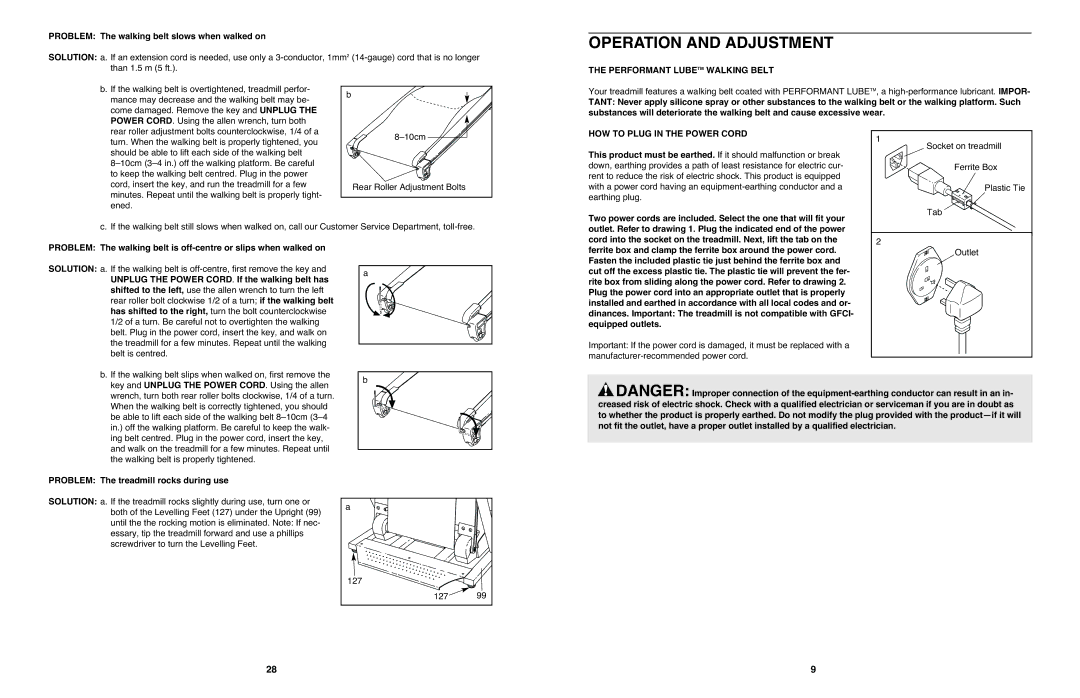
HOW TO PLUG IN THE POWER CORD
This product must be earthed. If it should malfunction or break down, earthing provides a path of least resistance for electric cur- rent to reduce the risk of electric shock. This product is equipped with a power cord having an
1 |
Socket on treadmill |
Ferrite Box |
Plastic Tie |
Tab |
c. If the walking belt still slows when walked on, call our Customer Service Department,
PROBLEM: The walking belt is
Two power cords are included. Select the one that will fit your outlet. Refer to drawing 1. Plug the indicated end of the power cord into the socket on the treadmill. Next, lift the tab on the ferrite box and clamp the ferrite box around the power cord. Fasten the included plastic tie just behind the ferrite box and
2 |
Outlet |
SOLUTION: a. If the walking belt is
b. If the walking belt slips when walked on, first remove the key and UNPLUG THE POWER CORD. Using the allen wrench, turn both rear roller bolts clockwise, 1/4 of a turn. When the walking belt is correctly tightened, you should be able to lift each side of the walking belt
a |
b |
cut off the excess plastic tie. The plastic tie will prevent the fer- rite box from sliding along the power cord. Refer to drawing 2. Plug the power cord into an appropriate outlet that is properly installed and earthed in accordance with all local codes and or- dinances. Important: The treadmill is not compatible with GFCI- equipped outlets.
Important: If the power cord is damaged, it must be replaced with a
![]() DANGER: Improper connection of the
DANGER: Improper connection of the
PROBLEM: The treadmill rocks during use
SOLUTION: a. If the treadmill rocks slightly during use, turn one or both of the Levelling Feet (127) under the Upright (99) until the the rocking motion is eliminated. Note: If nec- essary, tip the treadmill forward and use a phillips screwdriver to turn the Levelling Feet.
a |
|
127 |
|
127 | 99 |
28 | 9 |