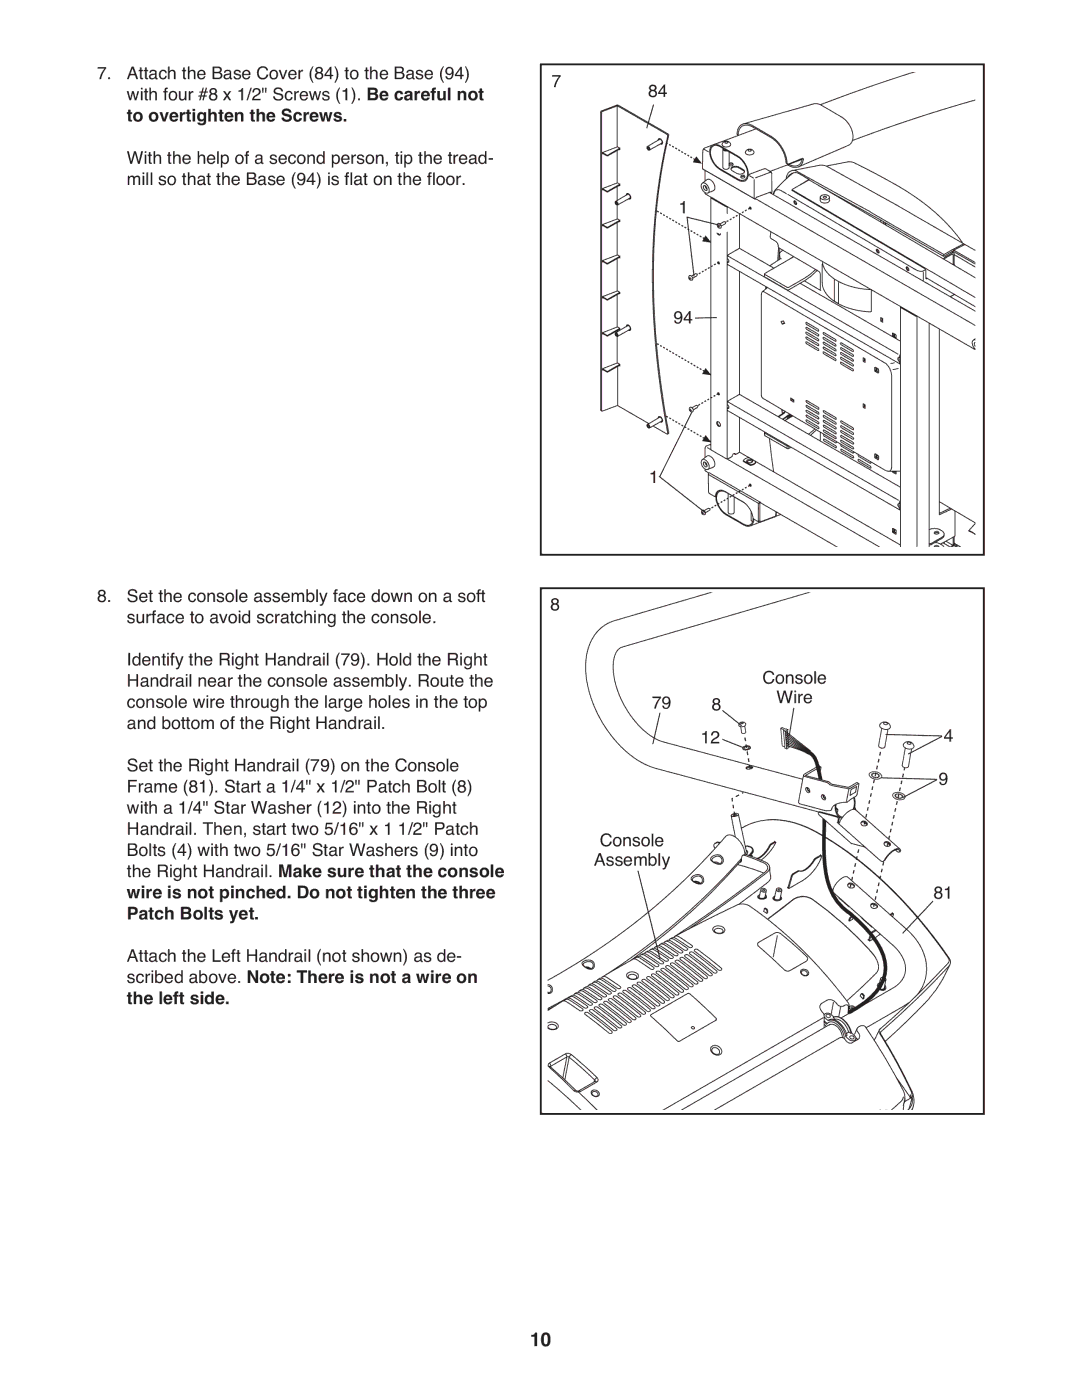
7.Attach the Base Cover (84) to the Base (94) with four #8 x 1/2" Screws (1). Be careful not to overtighten the Screws.
With the help of a second person, tip the tread- mill so that the Base (94) is flat on the floor.
8.Set the console assembly face down on a soft surface to avoid scratching the console. Identify the Right Handrail (79). Hold the Right Handrail near the console assembly. Route the console wire through the large holes in the top and bottom of the Right Handrail.
Set the Right Handrail (79) on the Console Frame (81). Start a 1/4" x 1/2" Patch Bolt (8) with a 1/4" Star Washer (12) into the Right Handrail. Then, start two 5/16" x 1 1/2" Patch Bolts (4) with two 5/16" Star Washers (9) into the Right Handrail. Make sure that the console wire is not pinched. Do not tighten the three Patch Bolts yet.
Attach the Left Handrail (not shown) as de- scribed above. Note: There is not a wire on the left side.
7 | 84 |
|
|
|
| 1 |
|
|
| 94 |
|
| 1 |
|
|
8 |
|
|
|
| 79 | 8 | Console |
| Wire | ||
|
| 12 | 4 |
|
|
| 9 |
| Console |
|
|
| Assembly |
| 81 |
|
|
|
10