Numark Industries DJ Equipment quick start manual Connections

Models: DJ Equipment

1 52
Download 52 pages 24.31 Kb
Page 5
Image 5

CONNECTIONS

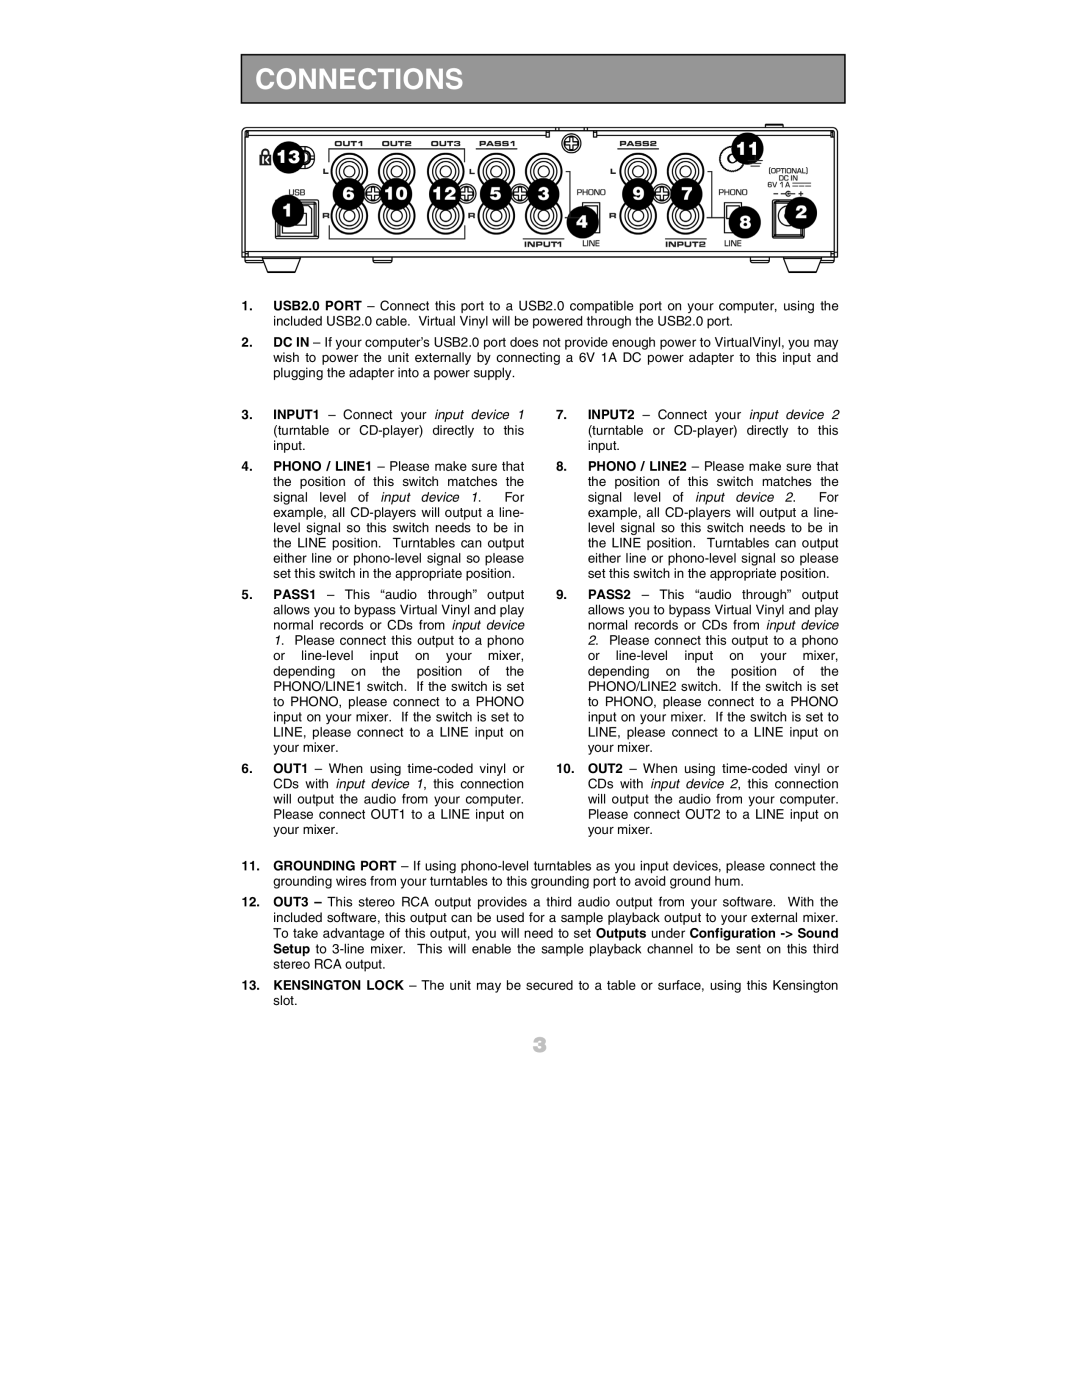
1.USB2.0 PORT – Connect this port to a USB2.0 compatible port on your computer, using the included USB2.0 cable. Virtual Vinyl will be powered through the USB2.0 port.

2.DC IN – If your computer’s USB2.0 port does not provide enough power to VirtualVinyl, you may wish to power the unit externally by connecting a 6V 1A DC power adapter to this input and plugging the adapter into a power supply.

3.INPUT1 – Connect your input device 1 (turntable or CD-player) directly to this input.

4.PHONO / LINE1 – Please make sure that the position of this switch matches the signal level of input device 1. For example, all CD-players will output a line- level signal so this switch needs to be in the LINE position. Turntables can output either line or phono-level signal so please set this switch in the appropriate position.

5.PASS1 – This “audio through” output allows you to bypass Virtual Vinyl and play normal records or CDs from input device 1. Please connect this output to a phono or line-level input on your mixer, depending on the position of the PHONO/LINE1 switch. If the switch is set to PHONO, please connect to a PHONO input on your mixer. If the switch is set to LINE, please connect to a LINE input on your mixer.

6.OUT1 – When using time-coded vinyl or CDs with input device 1, this connection will output the audio from your computer. Please connect OUT1 to a LINE input on your mixer.

7.INPUT2 – Connect your input device 2 (turntable or CD-player) directly to this input.

8.PHONO / LINE2 – Please make sure that the position of this switch matches the signal level of input device 2. For example, all CD-players will output a line- level signal so this switch needs to be in the LINE position. Turntables can output either line or phono-level signal so please set this switch in the appropriate position.

9.PASS2 – This “audio through” output allows you to bypass Virtual Vinyl and play normal records or CDs from input device 2. Please connect this output to a phono or line-level input on your mixer, depending on the position of the PHONO/LINE2 switch. If the switch is set to PHONO, please connect to a PHONO input on your mixer. If the switch is set to LINE, please connect to a LINE input on your mixer.

10.OUT2 – When using time-coded vinyl or CDs with input device 2, this connection will output the audio from your computer. Please connect OUT2 to a LINE input on your mixer.

11.GROUNDING PORT – If using phono-level turntables as you input devices, please connect the grounding wires from your turntables to this grounding port to avoid ground hum.

12.OUT3 – This stereo RCA output provides a third audio output from your software. With the included software, this output can be used for a sample playback output to your external mixer. To take advantage of this output, you will need to set Outputs under Configuration -> Sound Setup to 3-line mixer. This will enable the sample playback channel to be sent on this third stereo RCA output.

13.KENSINGTON LOCK – The unit may be secured to a table or surface, using this Kensington slot.

3

Page 5
Image 5
Numark Industries DJ Equipment quick start manual Connections