DJING WITH ONE TURNTABLE/CD PLAYER
VirtualVinyl’s flexible
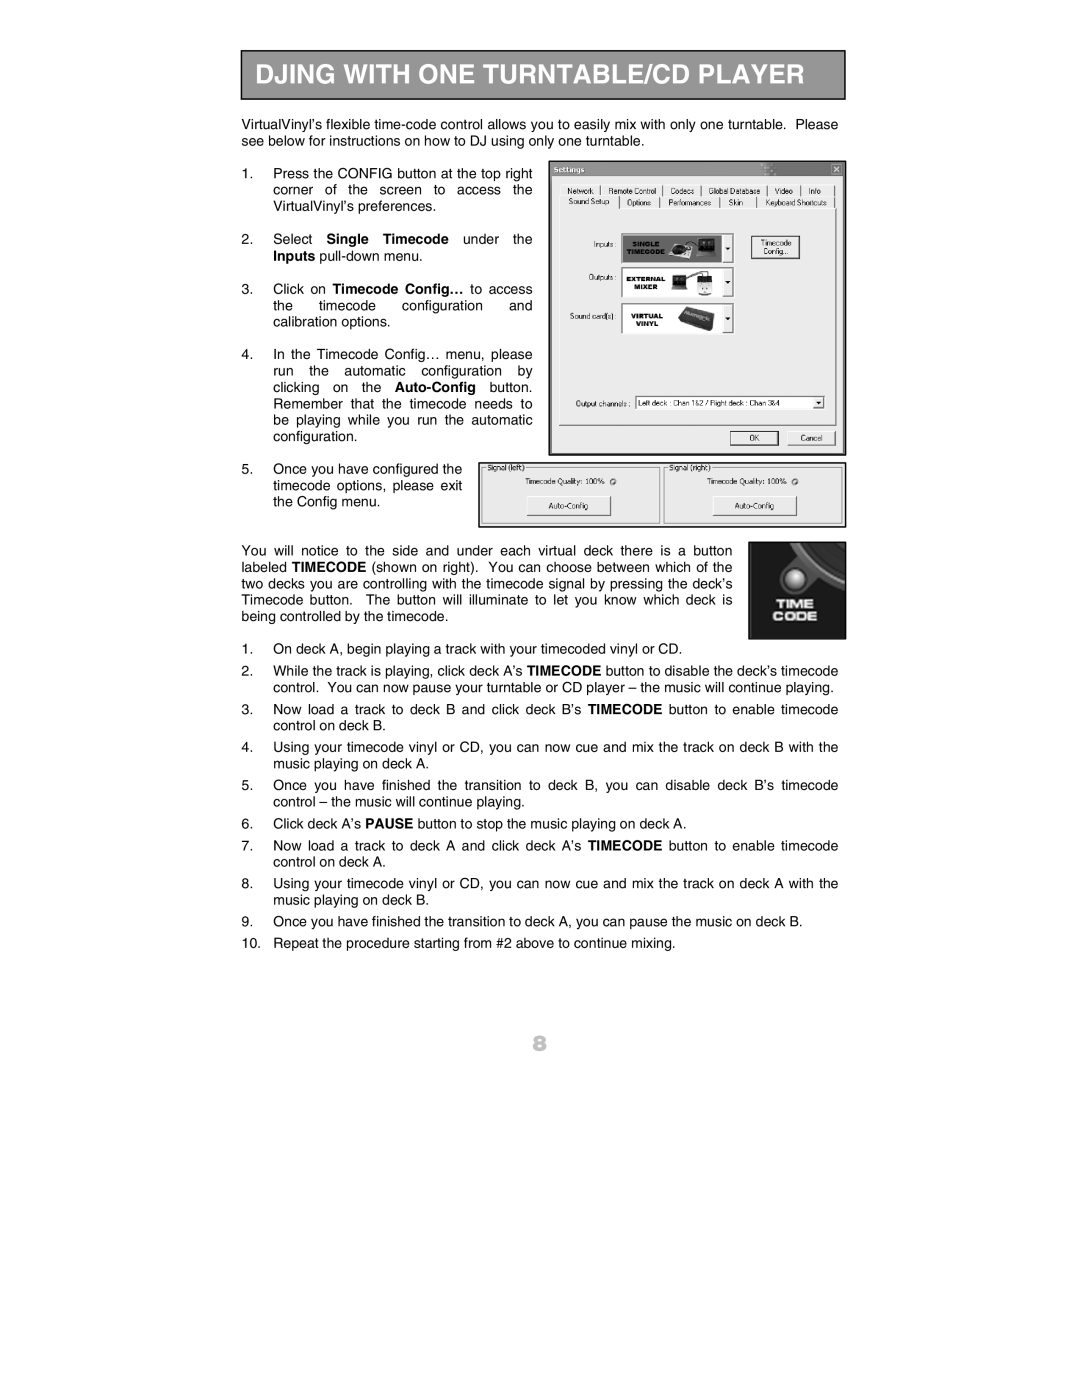
1.Press the CONFIG button at the top right corner of the screen to access the VirtualVinyl’s preferences.
2.Select Single Timecode under the Inputs
3.Click on Timecode Config… to access the timecode configuration and calibration options.
4.In the Timecode Config… menu, please run the automatic configuration by clicking on the
5.Once you have configured the timecode options, please exit the Config menu.
You will notice to the side and under each virtual deck there is a button labeled TIMECODE (shown on right). You can choose between which of the two decks you are controlling with the timecode signal by pressing the deck’s Timecode button. The button will illuminate to let you know which deck is being controlled by the timecode.
1.On deck A, begin playing a track with your timecoded vinyl or CD.
2.While the track is playing, click deck A’s TIMECODE button to disable the deck’s timecode control. You can now pause your turntable or CD player – the music will continue playing.
3.Now load a track to deck B and click deck B’s TIMECODE button to enable timecode control on deck B.
4.Using your timecode vinyl or CD, you can now cue and mix the track on deck B with the music playing on deck A.
5.Once you have finished the transition to deck B, you can disable deck B’s timecode control – the music will continue playing.
6.Click deck A’s PAUSE button to stop the music playing on deck A.
7.Now load a track to deck A and click deck A’s TIMECODE button to enable timecode control on deck A.
8.Using your timecode vinyl or CD, you can now cue and mix the track on deck A with the music playing on deck B.
9.Once you have finished the transition to deck A, you can pause the music on deck B.
10.Repeat the procedure starting from #2 above to continue mixing.
8
