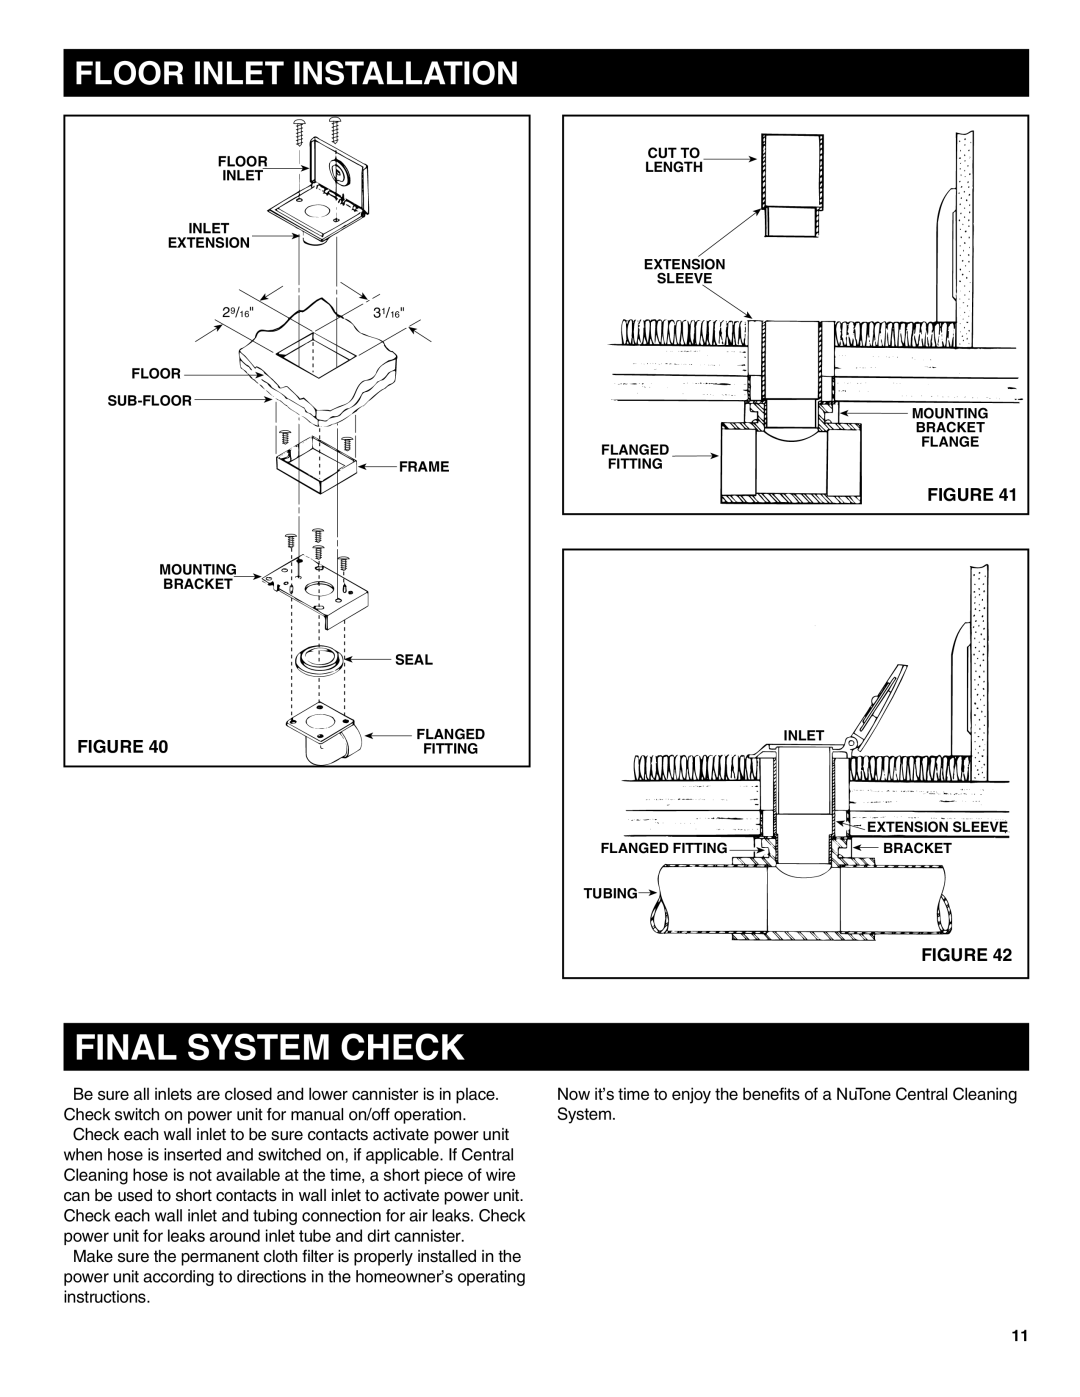
FLOOR INLET INSTALLATION
FLOOR
INLET
INLET
EXTENSION
29/16" | 31/16" |
FLOOR |
|
| |
| FRAME |
MOUNTING |
|
BRACKET |
|
| SEAL |
FIGURE 40 | FLANGED |
FITTING |
FINAL SYSTEM CHECK
CUT TO |
|
LENGTH |
|
EXTENSION |
|
SLEEVE |
|
| MOUNTING |
| BRACKET |
FLANGED | FLANGE |
| |
FITTING |
|
| FIGURE 41 |
| INLET |
| EXTENSION SLEEVE |
FLANGED FITTING | BRACKET |
TUBING |
|
| FIGURE 42 |
Be sure all inlets are closed and lower cannister is in place. Check switch on power unit for manual on/off operation.
Check each wall inlet to be sure contacts activate power unit when hose is inserted and switched on, if applicable. If Central Cleaning hose is not available at the time, a short piece of wire can be used to short contacts in wall inlet to activate power unit. Check each wall inlet and tubing connection for air leaks. Check power unit for leaks around inlet tube and dirt cannister.
Make sure the permanent cloth filter is properly installed in the power unit according to directions in the homeowner’s operating instructions.
Now it’s time to enjoy the benefits of a NuTone Central Cleaning System.
11
