INSTALLATION IN NEW CONSTRUCTION
WALL INLET ROUGH-IN
Once the locations for wall inlets have been determined, mount all inlet brackets.
1.Choose the appropriate mounting bracket for the inlet being installed. (See chart.)
NuTone Inlet |
|
330 Series | 329 |
360 Series | 361 |
CI390 Series Electrified Inlet | CI390RK |
|
|
2.To locate bracket on wall stud, measure approximately 18" up from finished floor level. (Height may vary according to individual preference.)
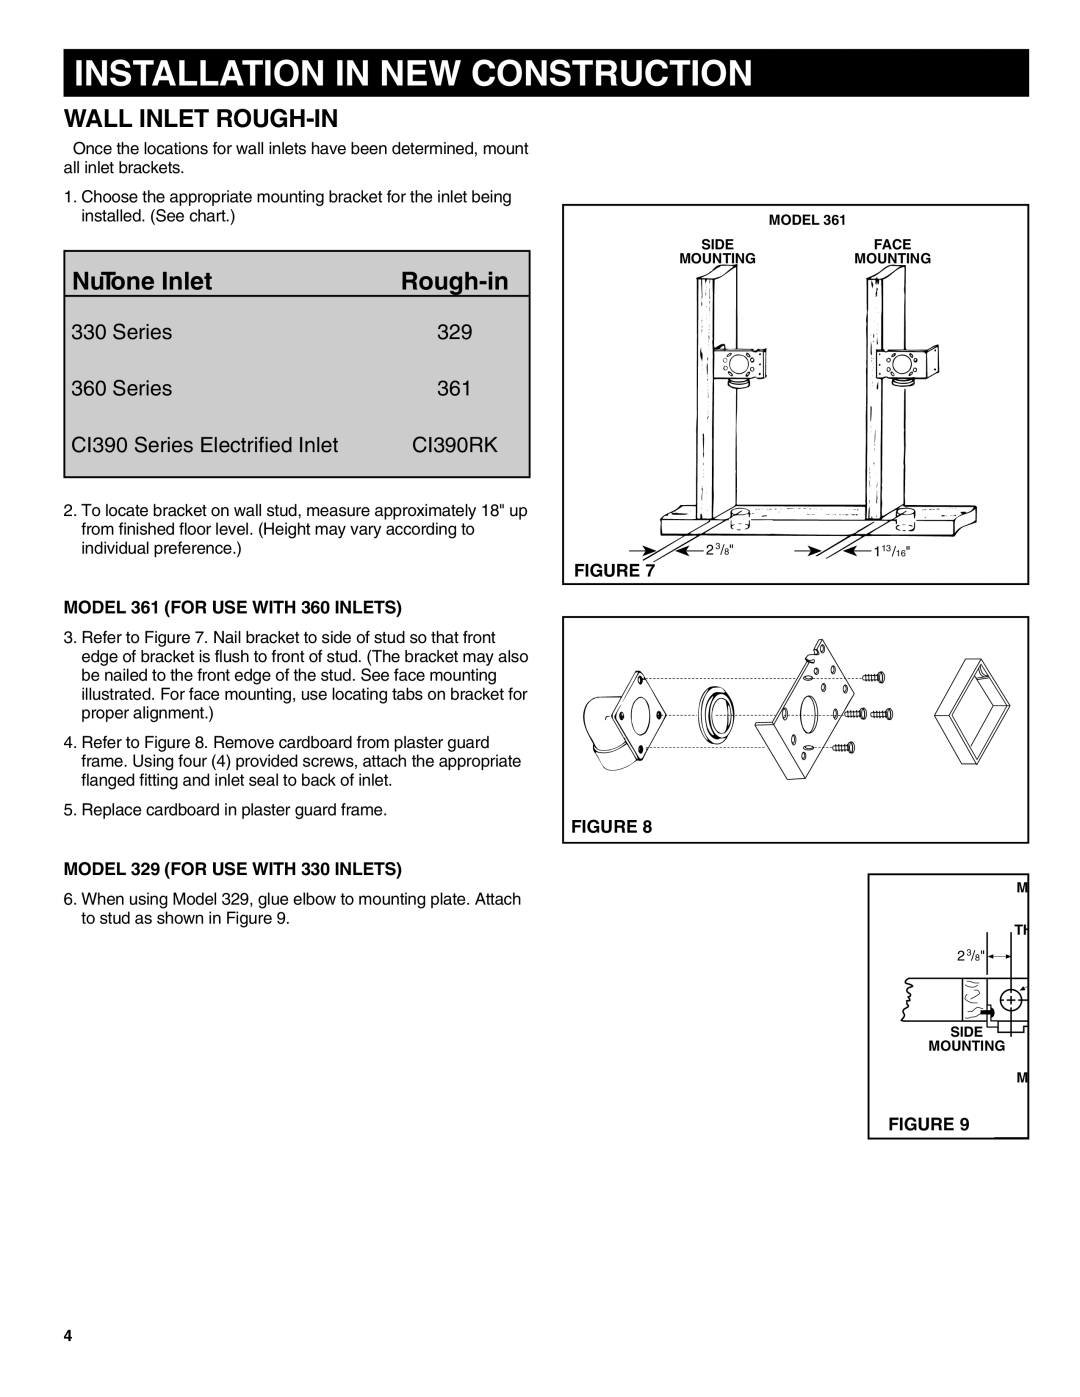
MODEL 361 (FOR USE WITH 360 INLETS)
3.Refer to Figure 7. Nail bracket to side of stud so that front edge of bracket is flush to front of stud. (The bracket may also be nailed to the front edge of the stud. See face mounting illustrated. For face mounting, use locating tabs on bracket for proper alignment.)
4.Refer to Figure 8. Remove cardboard from plaster guard frame. Using four (4) provided screws, attach the appropriate flanged fitting and inlet seal to back of inlet.
5.Replace cardboard in plaster guard frame.
MODEL 329 (FOR USE WITH 330 INLETS)
6.When using Model 329, glue elbow to mounting plate. Attach to stud as shown in Figure 9.
MODEL 361
SIDEFACE
MOUNTINGMOUNTING
2 3/8" |
|
|
| 113 /16" |
|
|
FIGURE 7
FIGURE 8 |
M |
TH |
2 3/8" |
SIDE |
MOUNTING |
M |
FIGURE 9
4