STEP 5 : COOLING UNIT INSTALLATION
1GET HELP BEFORE INSTALLING AND KEEP CHILDREN CLEAR OF CELLAR CONSTRUCTION AREA.
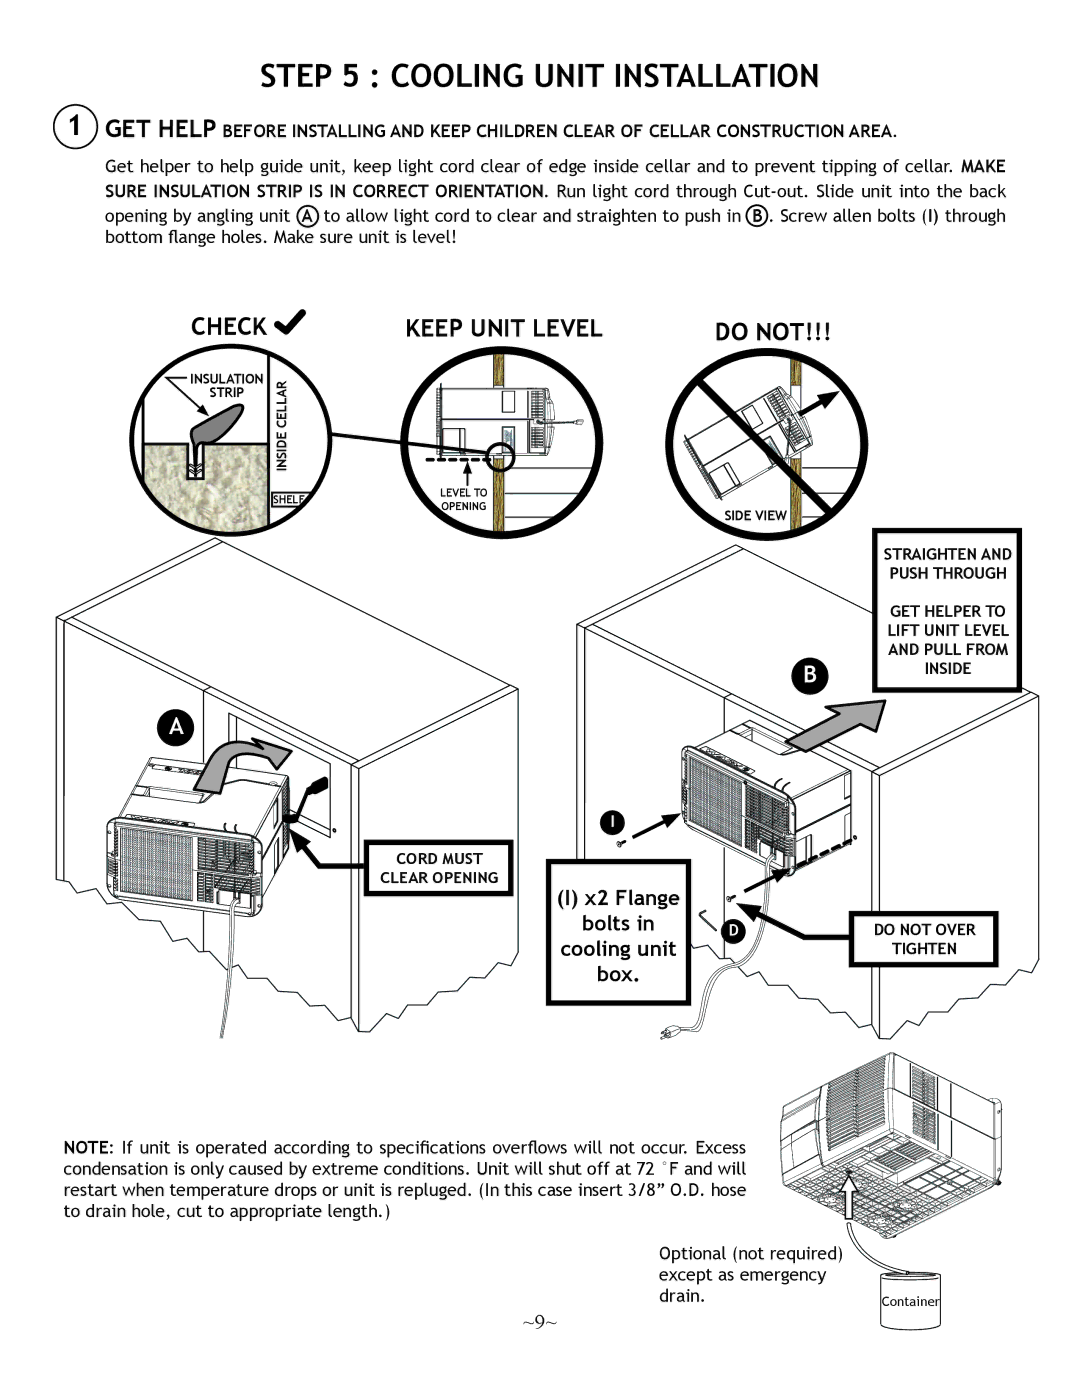
Get helper to help guide unit, keep light cord clear of edge inside cellar and to prevent tipping of cellar. MAKE SURE INSULATION STRIP IS IN CORRECT ORIENTATION. Run light cord through
opening by angling unit A to allow light cord to clear and straighten to push in B . Screw allen bolts (I) through bottom flange holes. Make sure unit is level!
CHECK ![]()
INSULATION
![]() STRIP CELLAR
STRIP CELLAR
INSIDE
SHELF
A
KEEP UNIT LEVEL
LEVEL TO
OPENING
DO NOT!!!
SIDE VIEW
B
STRAIGHTEN AND PUSH THROUGH
GET HELPER TO LIFT UNIT LEVEL AND PULL FROM INSIDE
CORD MUST
CLEAR OPENING
I
(I) x2 Flange
bolts in
cooling unit
box.
D | DO NOT OVER |
| TIGHTEN |
NOTE: If unit is operated according to specifications overflows will not occur. Excess condensation is only caused by extreme conditions. Unit will shut off at 72 °F and will restart when temperature drops or unit is repluged. (In this case insert 3/8” O.D. hose to drain hole, cut to appropriate length.)
Optional (not required) except as emergency drain.
~9~
Container
