Figure 4
Figure 5
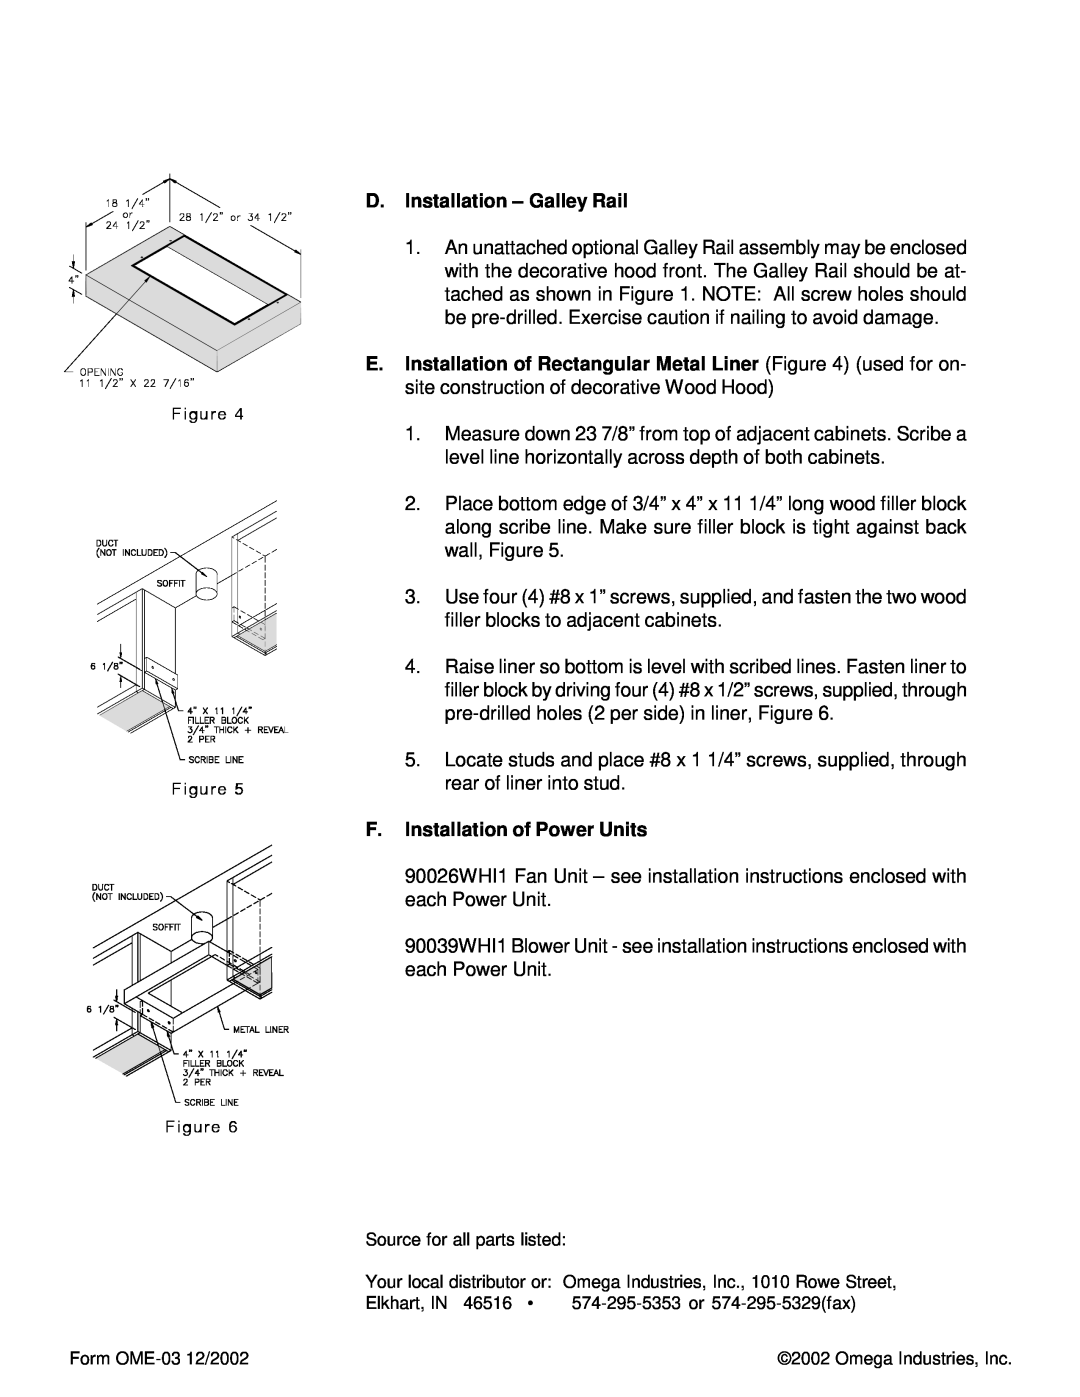
Figure 6
D.Installation – Galley Rail
1.An unattached optional Galley Rail assembly may be enclosed with the decorative hood front. The Galley Rail should be at- tached as shown in Figure 1. NOTE: All screw holes should be
E.Installation of Rectangular Metal Liner (Figure 4) (used for on- site construction of decorative Wood Hood)
1.Measure down 23 7/8”from top of adjacent cabinets. Scribe a level line horizontally across depth of both cabinets.
2.Place bottom edge of 3/4”x 4”x 11 1/4”long wood filler block along scribe line. Make sure filler block is tight against back wall, Figure 5.
3.Use four (4) #8 x 1”screws, supplied, and fasten the two wood filler blocks to adjacent cabinets.
4.Raise liner so bottom is level with scribed lines. Fasten liner to filler block by driving four (4) #8 x 1/2”screws, supplied, through
5.Locate studs and place #8 x 1 1/4”screws, supplied, through rear of liner into stud.
F.Installation of Power Units
90026WHI1 Fan Unit – see installation instructions enclosed with each Power Unit.
90039WHI1 Blower Unit - see installation instructions enclosed with each Power Unit.
Source for all parts listed:
Your local distributor or: Omega Industries, Inc., 1010 Rowe Street,
Elkhart, IN 46516 •
Form | ©2002 Omega Industries, Inc. |