Step 2 — Determine Rail Selection
Measure the vertical distance between
Mounting Holes on Display.
If distance is greater than 19” (48cm) use the supplied Extended Rails.
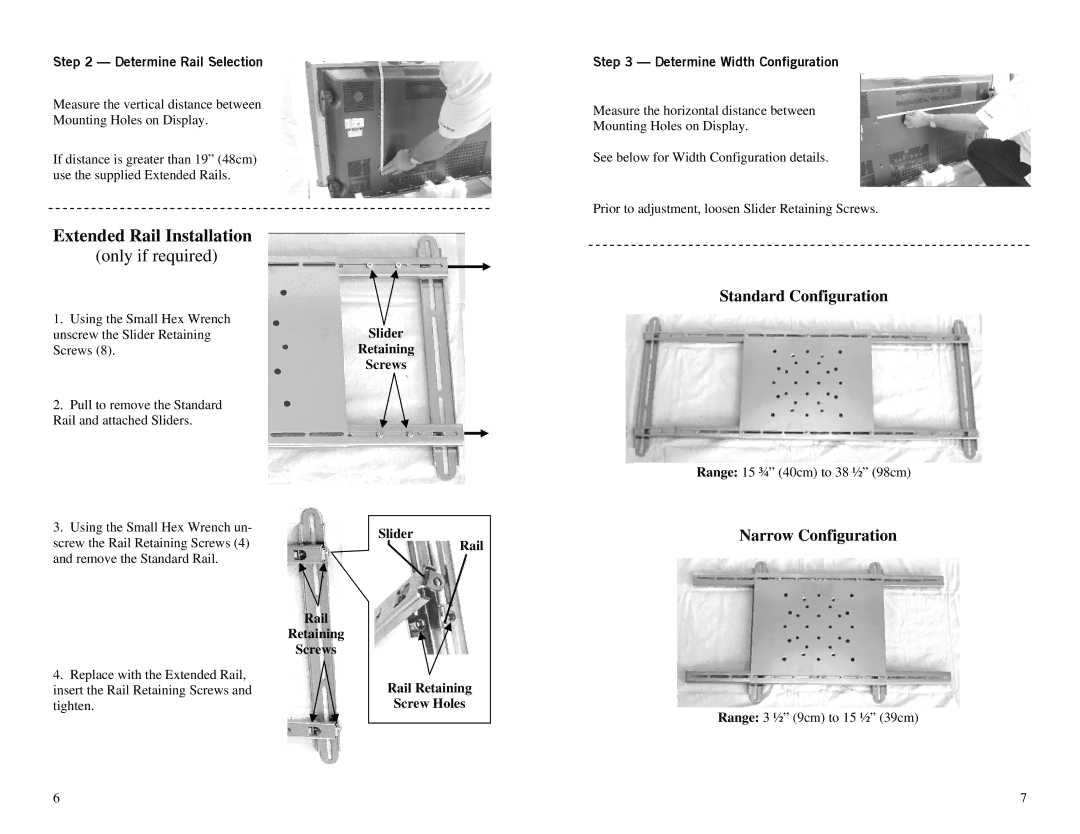
Extended Rail Installation
(only if required)
1. Using the Small Hex Wrench | Slider |
unscrew the Slider Retaining | |
Screws (8). | Retaining |
| Screws |
2. Pull to remove the Standard |
|
Rail and attached Sliders. |
|
3. Using the Small Hex Wrench un- | Slider | |
screw the Rail Retaining Screws (4) | ||
Rail | ||
and remove the Standard Rail. |
|
Rail
Retaining
Screws
4. Replace with the Extended Rail, | Rail Retaining |
insert the Rail Retaining Screws and | |
tighten. | Screw Holes |
Step 3 — Determine Width Configuration
Measure the horizontal distance between
Mounting Holes on Display.
See below for Width Configuration details.
Prior to adjustment, loosen Slider Retaining Screws.
Standard Configuration
Range: 15 ¾” (40cm) to 38 ½” (98cm)
Narrow Configuration
Range: 3 ½” (9cm) to 15 ½” (39cm)
6 | 7 |
