3.. Using the Live Mode
3.5 Manual configuration
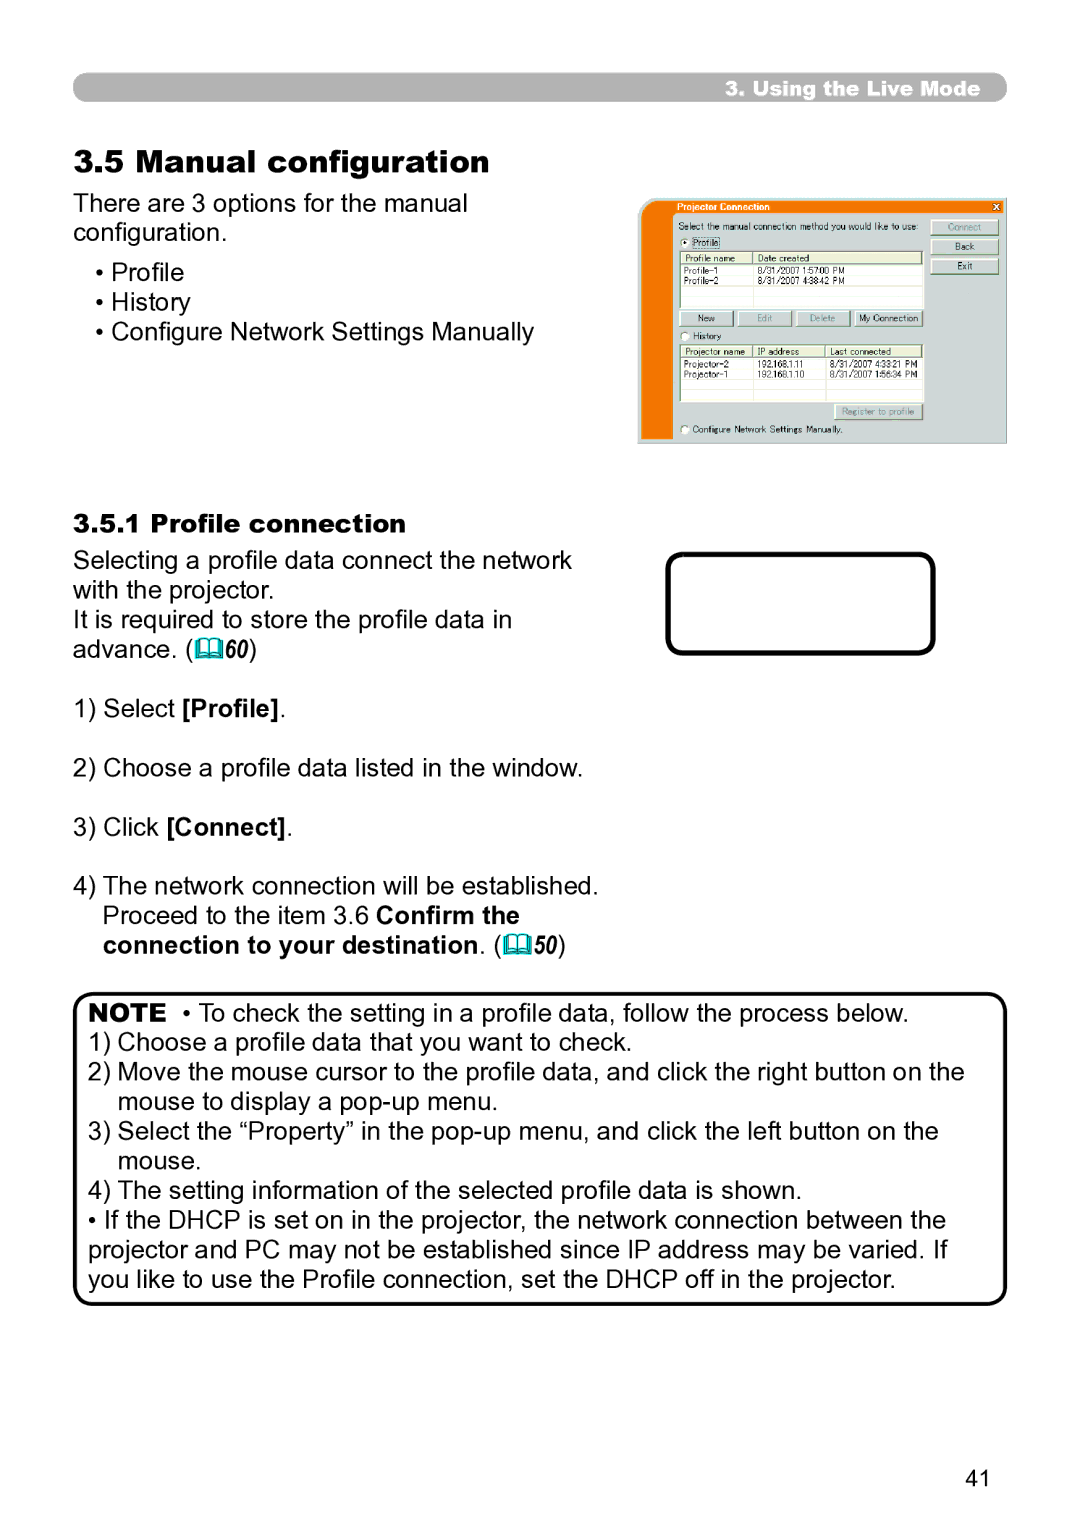
There are 3 options for the manual configuration.
•Profile
•History
•Configure Network Settings Manually
3.5.1 Profile connection
Selecting a profile data connect the network with the projector.
It is required to store the profile data in advance. (60)
1)Select [Profile].
2)Choose a profile data listed in the window.
3)Click [Connect].
4)The network connection will be established. Proceed to the item 3.6 Confirm the connection to your destination. (50)
NOTE • To check the setting in a profile data, follow the process below.
1)Choose a profile data that you want to check.
2)Move the mouse cursor to the profile data, and click the right button on the mouse to display a
3)Select the “Property” in the
4)The setting information of the selected profile data is shown.
•If the DHCP is set on in the projector, the network connection between the projector and PC may not be established since IP address may be varied. If you like to use the Profile connection, set the DHCP off in the projector.
41