3.. Using the Live Mode
3.3 Quick connection to the network (continued)
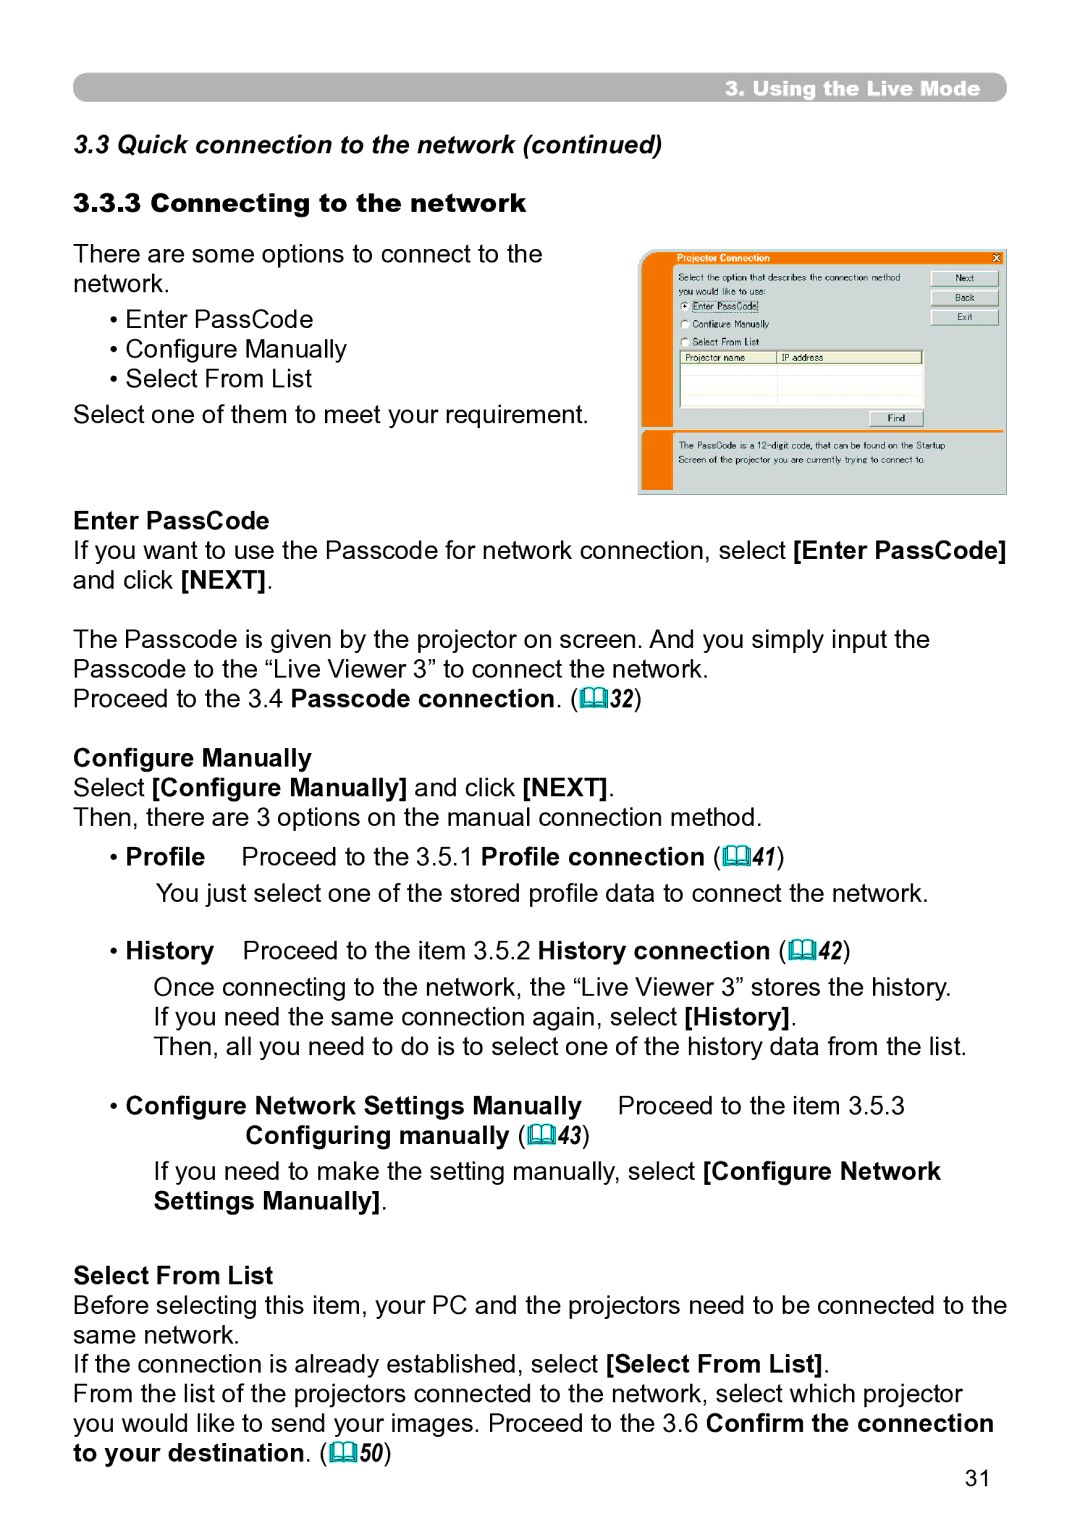
3..3..3 Connecting to the network
There are some options to connect to the network.
•Enter PassCode
•Configure Manually
•Select From List
Select one of them to meet your requirement.
Enter PassCode
If you want to use the Passcode for network connection, select [Enter PassCode] and click [NEXT].
The Passcode is given by the projector on screen. And you simply input the Passcode to the “Live Viewer 3” to connect the network.
Proceed to the 3.4 Passcode connection. (&32)
Configure Manually
Select [Configure Manually] and click [NEXT].
Then, there are 3 options on the manual connection method.
•Profile Proceed to the 3.5.1 Profile connection (&41)
You just select one of the stored profile data to connect the network.
•History Proceed to the item 3.5.2 History connection (&42)
Once connecting to the network, the “Live Viewer 3” stores the history. If you need the same connection again, select [History].
Then, all you need to do is to select one of the history data from the list.
• Configure Network Settings Manually Proceed to the item 3.5.3 Configuring manually (&43)
If you need to make the setting manually, select [Configure Network Settings Manually].
Select From List
Before selecting this item, your PC and the projectors need to be connected to the same network.
If the connection is already established, select [Select From List].
From the list of the projectors connected to the network, select which projector you would like to send your images. Proceed to the 3.6 Confirm the connection to your destination. (&50)
31