3.. Using the Live Mode
3.5 Manual configuration (continued)
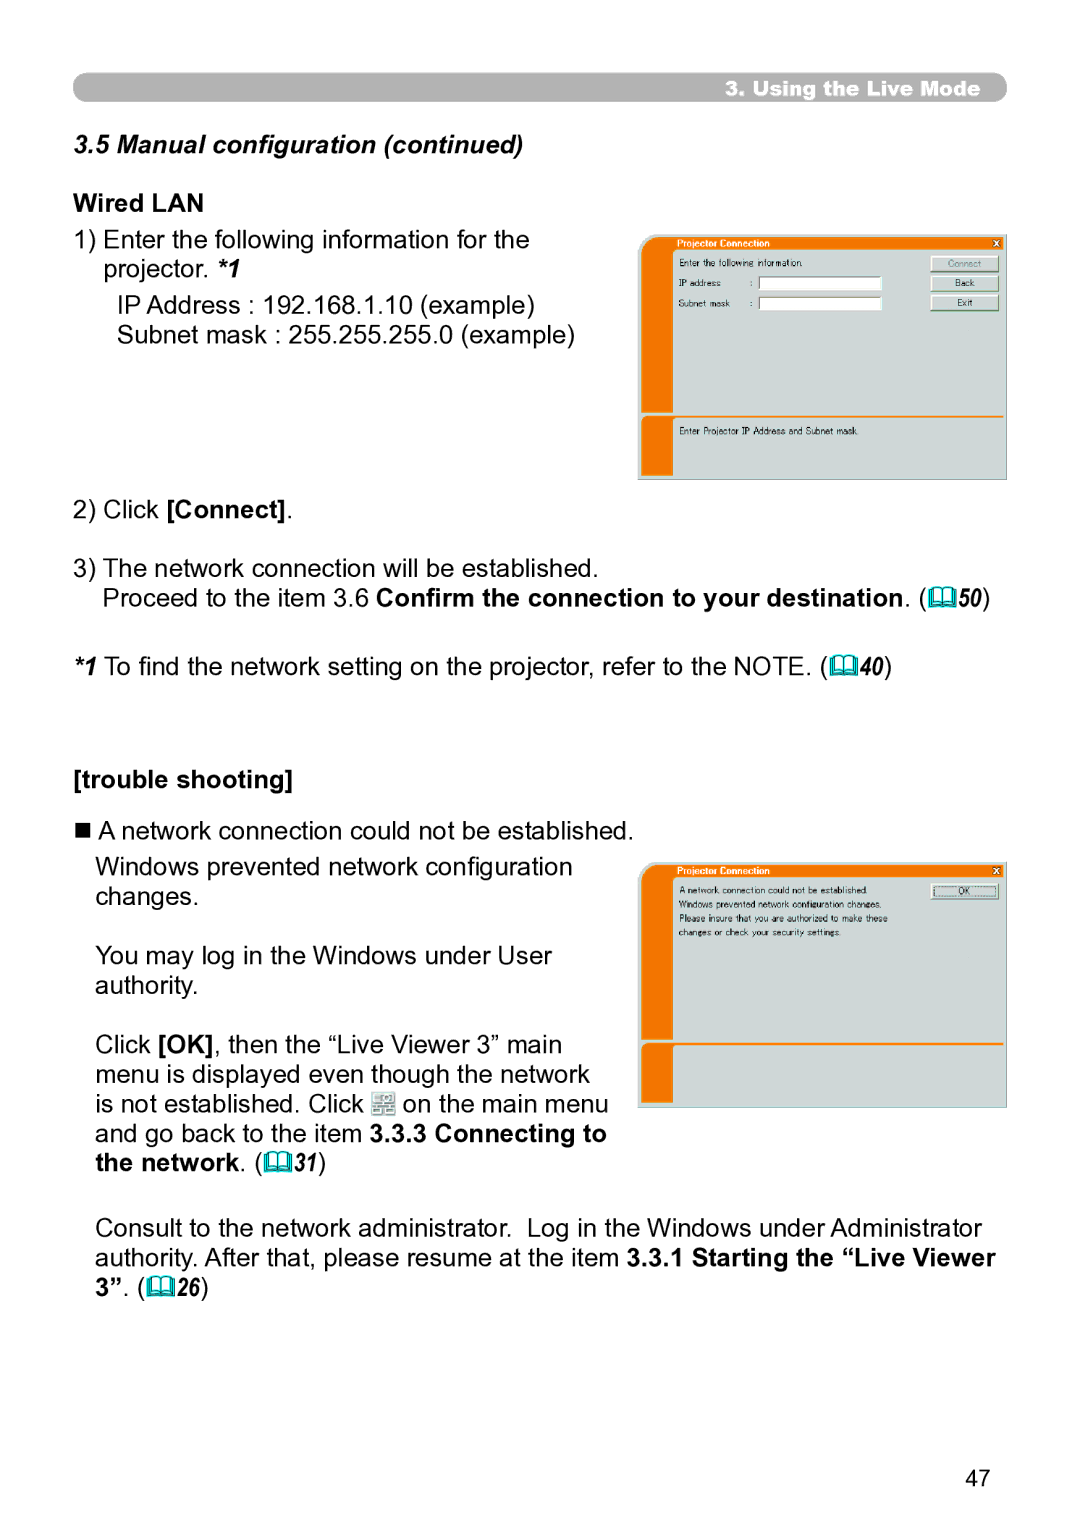
Wired LAN
1)Enter the following information for the projector. *1
IP Address : 192.168.1.10 (example)
Subnet mask : 255.255.255.0 (example)
2)Click [Connect].
3)The network connection will be established.
Proceed to the item 3.6 Confirm the connection to your destination. (50)
*1 To find the network setting on the projector, refer to the NOTE. (40)
[trouble shooting]
n A network connection could not be established.
Windows prevented network configuration changes.
You may log in the Windows under User authority.
Click [OK], then the “Live Viewer 3” main menu is displayed even though the network is not established. Click ![]() on the main menu and go back to the item 3.3.3 Connecting to the network. (&31)
on the main menu and go back to the item 3.3.3 Connecting to the network. (&31)
Consult to the network administrator. Log in the Windows under Administrator authority. After that, please resume at the item 3.3.1 Starting the “Live Viewer 3”. (26)
47