X. Filter Efficiency Gauge Mounting Instructions
Elbow Plenum
(Side View)
Air Flow to Filter
0 | 1 | 2 | 3 | 4 |
|
| |||
|
|
|
| 5 |
INCHES W.C.
Mounting Instructions
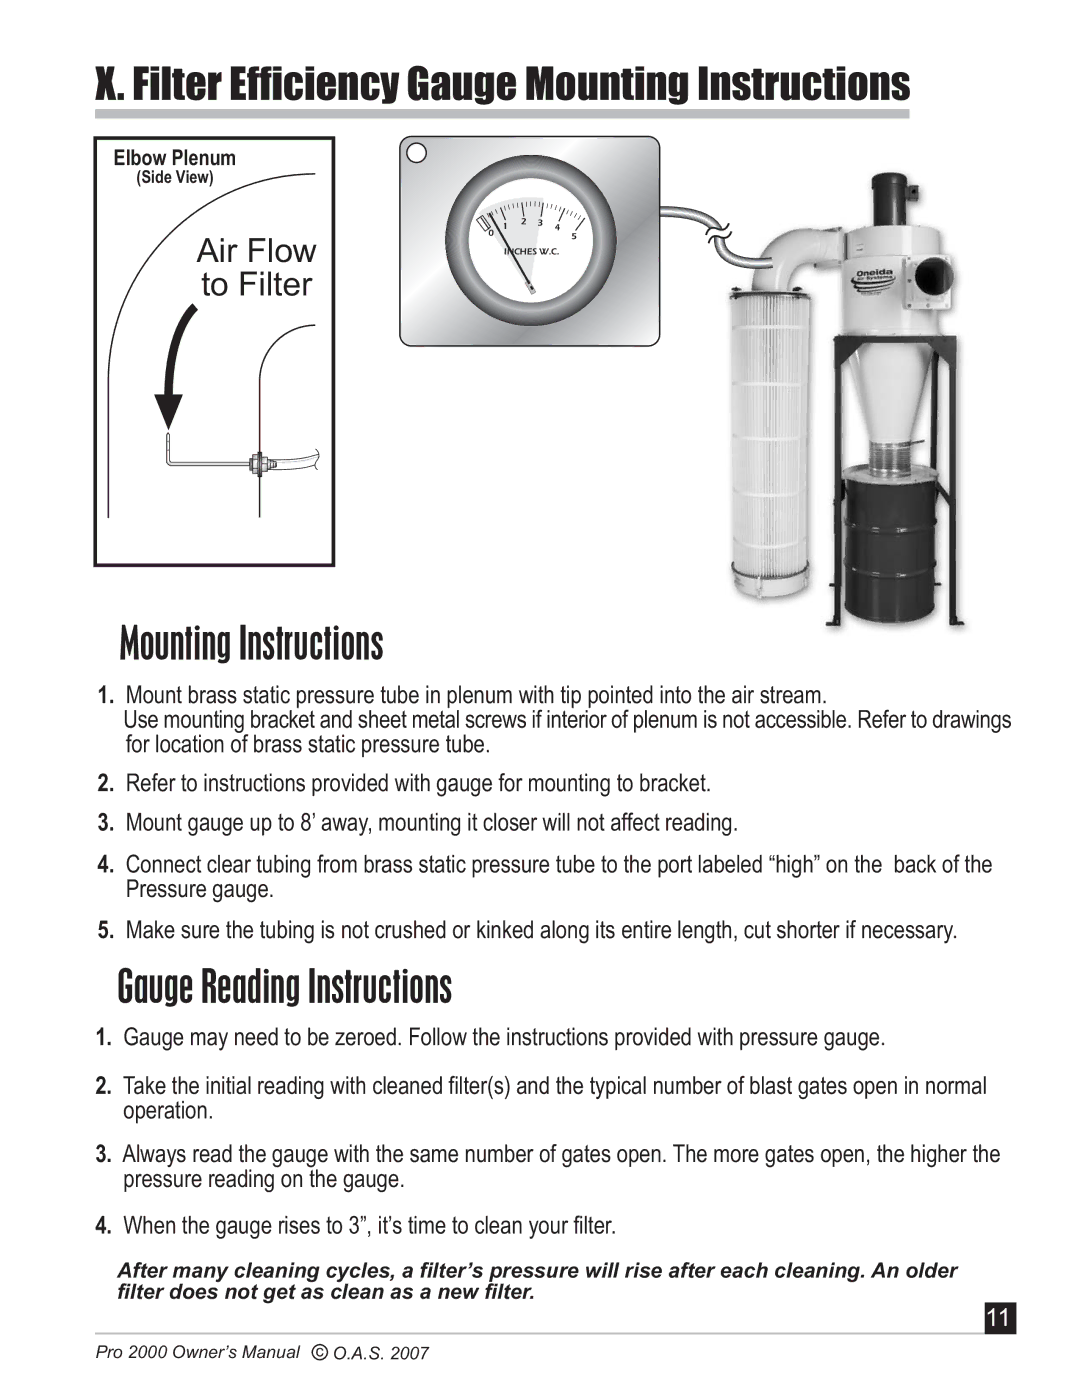
1.Mount brass static pressure tube in plenum with tip pointed into the air stream.
Use mounting bracket and sheet metal screws if interior of plenum is not accessible. Refer to drawings for location of brass static pressure tube.
2.Refer to instructions provided with gauge for mounting to bracket.
3.Mount gauge up to 8’ away, mounting it closer will not affect reading.
4.Connect clear tubing from brass static pressure tube to the port labeled “high” on the back of the Pressure gauge.
5.Make sure the tubing is not crushed or kinked along its entire length, cut shorter if necessary.
Gauge Reading Instructions
1.Gauge may need to be zeroed. Follow the instructions provided with pressure gauge.
2.Take the initial reading with cleaned filter(s) and the typical number of blast gates open in normal operation.
3.Always read the gauge with the same number of gates open. The more gates open, the higher the pressure reading on the gauge.
4.When the gauge rises to 3”, it’s time to clean your filter.
After many cleaning cycles, a filter’s pressure will rise after each cleaning. An older filter does not get as clean as a new filter.
11
Pro 2000 Owner’s Manual c O.A.S. 2007
