VIII. Filter Assembly
External 62” Filter Assembly
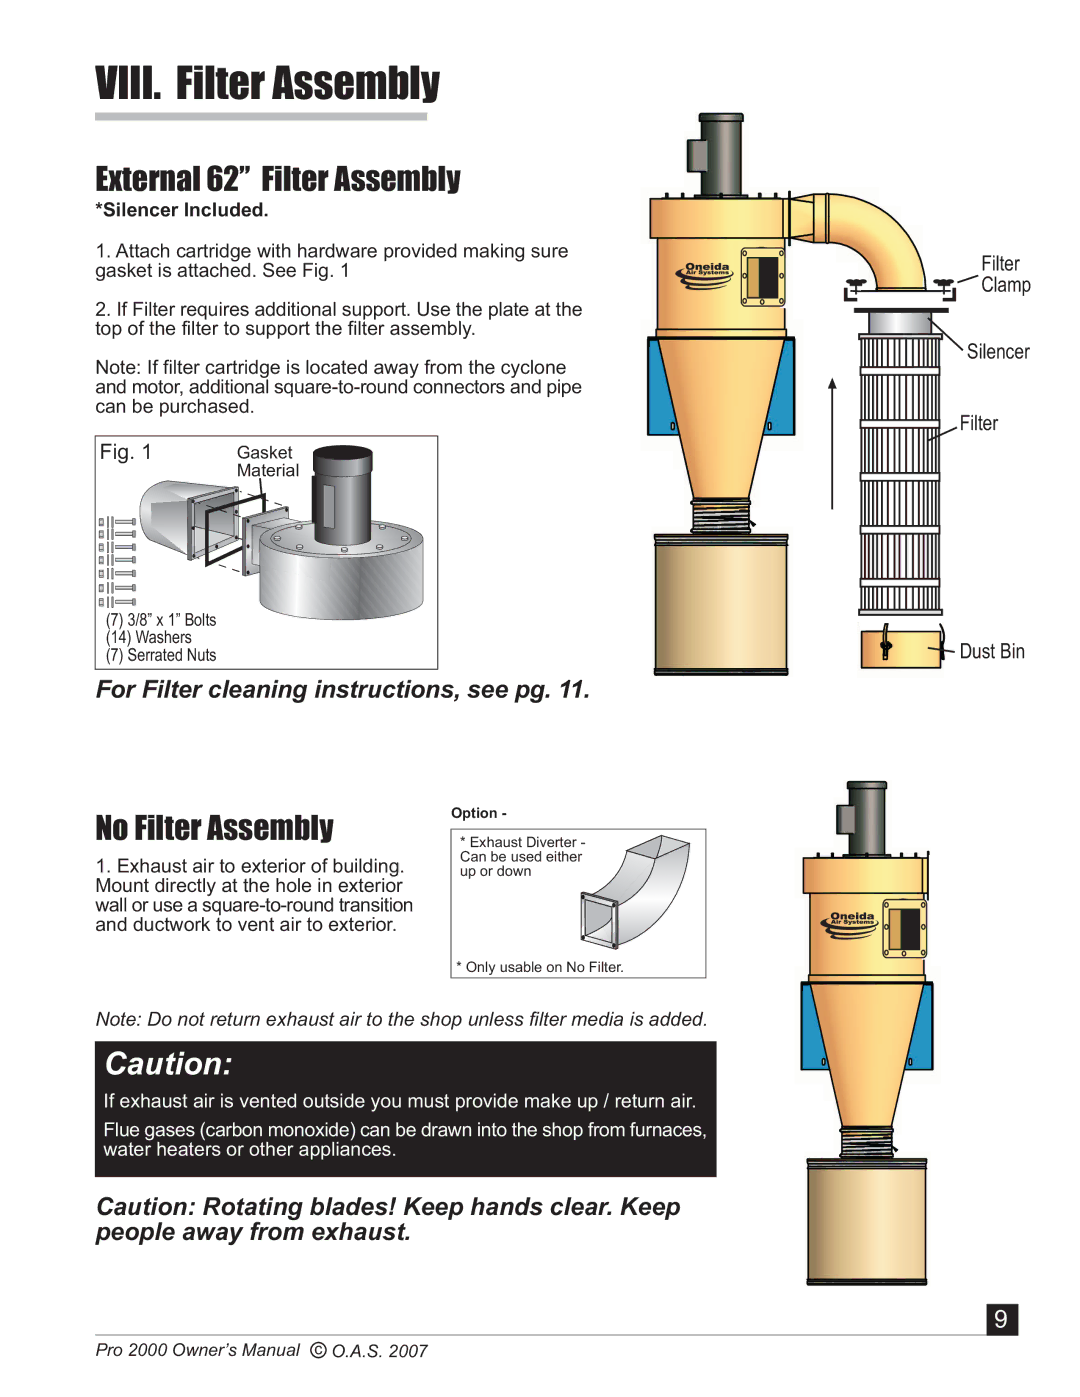
*Silencer Included.
1.Attach cartridge with hardware provided making sure gasket is attached. See Fig. 1
2.If Filter requires additional support. Use the plate at the top of the filter to support the filter assembly.
Note: If filter cartridge is located away from the cyclone and motor, additional
Fig. 1 | Gasket |
| Material |
(7) 3/8” x 1” Bolts |
|
(14) Washers |
|
(7) Serrated Nuts |
|
For Filter cleaning instructions, see pg. 11.
Filter
![]()
![]()
![]()
![]()
![]() Clamp
Clamp
Silencer
Filter
Dust Bin
No Filter Assembly
1.Exhaust air to exterior of building. Mount directly at the hole in exterior wall or use a
Option -
* Exhaust Diverter - Can be used either up or down
* Only usable on No Filter.
Note: Do not return exhaust air to the shop unless filter media is added.
Caution:
If exhaust air is vented outside you must provide make up / return air.
Flue gases (carbon monoxide) can be drawn into the shop from furnaces, water heaters or other appliances.
Caution: Rotating blades! Keep hands clear. Keep people away from exhaust.
9
Pro 2000 Owner’s Manual c O.A.S. 2007