Connecting the A-9755/A-9555—Continued
Before Making any Connections
•Always refer to the instructions that came with the component that you are connecting.
•Do not plug in the power cord until all connec- tions have been properly made.
•Do not bind audio cables with power cords and speaker cables. Doing so may adversely affect the sound quality.
•To prevent interference, keep power cords and speaker cables away from the tuner’s antenna.
Audio Components
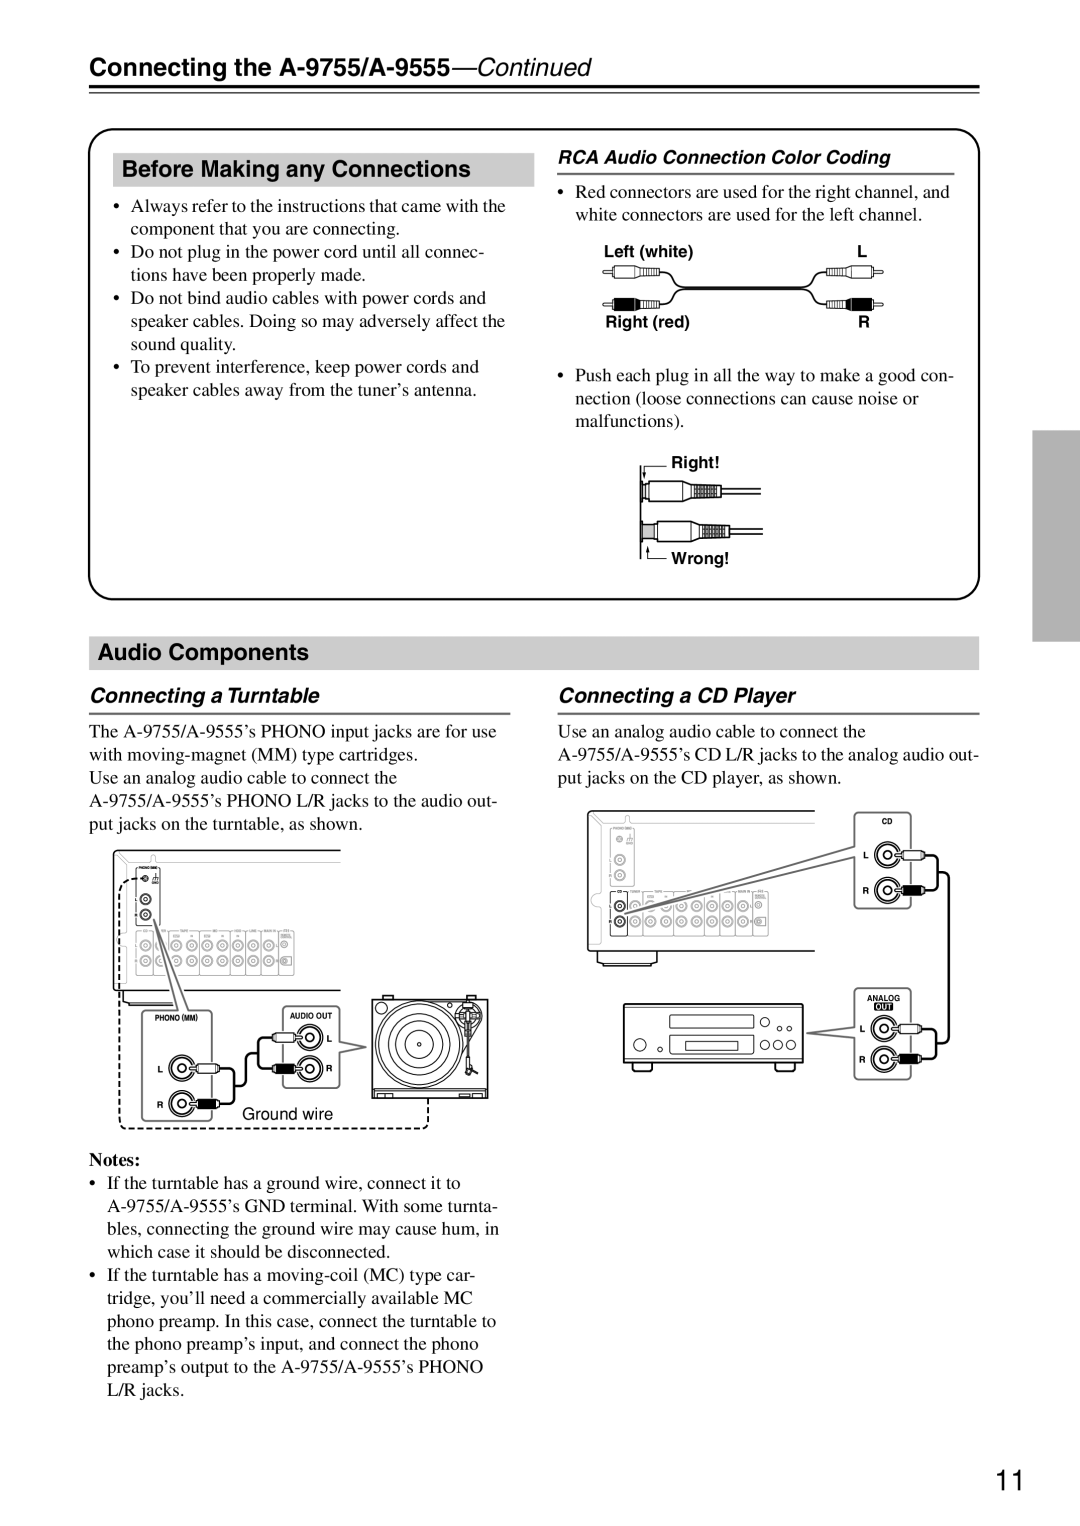
Connecting a Turntable
The
Use an analog audio cable to connect the
AUDIO OUT
Ground wire
Notes:
•If the turntable has a ground wire, connect it to
•If the turntable has a
RCA Audio Connection Color Coding
•Red connectors are used for the right channel, and white connectors are used for the left channel.
Left (white) | L |
Right (red) | R |
•Push each plug in all the way to make a good con- nection (loose connections can cause noise or malfunctions).
Right!
![]() Wrong!
Wrong!
Connecting a CD Player
Use an analog audio cable to connect the
ANALOG
OUT
11
