T-4555P specifications
The Onkyo T-4555P is a standout model in the world of high-fidelity audio systems, designed to deliver an exceptional listening experience for music lovers and audiophiles alike. This advanced tuner combines state-of-the-art technologies with practical features, making it a valuable addition to any home audio setup.One of the main features of the Onkyo T-4555P is its robust FM/AM tuner capabilities. With the ability to pick up a wide range of frequencies and stations, listeners can easily access their favorite radio shows, music, and news broadcasts. The device is equipped with advanced digital signal processing technology, which enhances tuning accuracy and ensures clear sound quality, minimizing interference and unwanted noise.
In terms of audio performance, the T-4555P boasts a high-quality digital-to-analog converter (DAC) that plays a crucial role in reproducing sound with remarkable clarity. The DAC supports various audio formats, allowing users to enjoy their music collection without compromising on fidelity. Additionally, the tuner features an exceptional signal-to-noise ratio, providing a clean, detailed soundstage that brings out the nuances in every track.
The Onkyo T-4555P also presents several connectivity options, including a line output and multiple audio outputs for versatile integration into existing audio systems. The inclusion of a headphone jack ensures private listening experiences, making it ideal for late-night music sessions without disturbing others. The device is compatible with various speakers and amplifiers, allowing users to customize their audio setup according to their preferences.
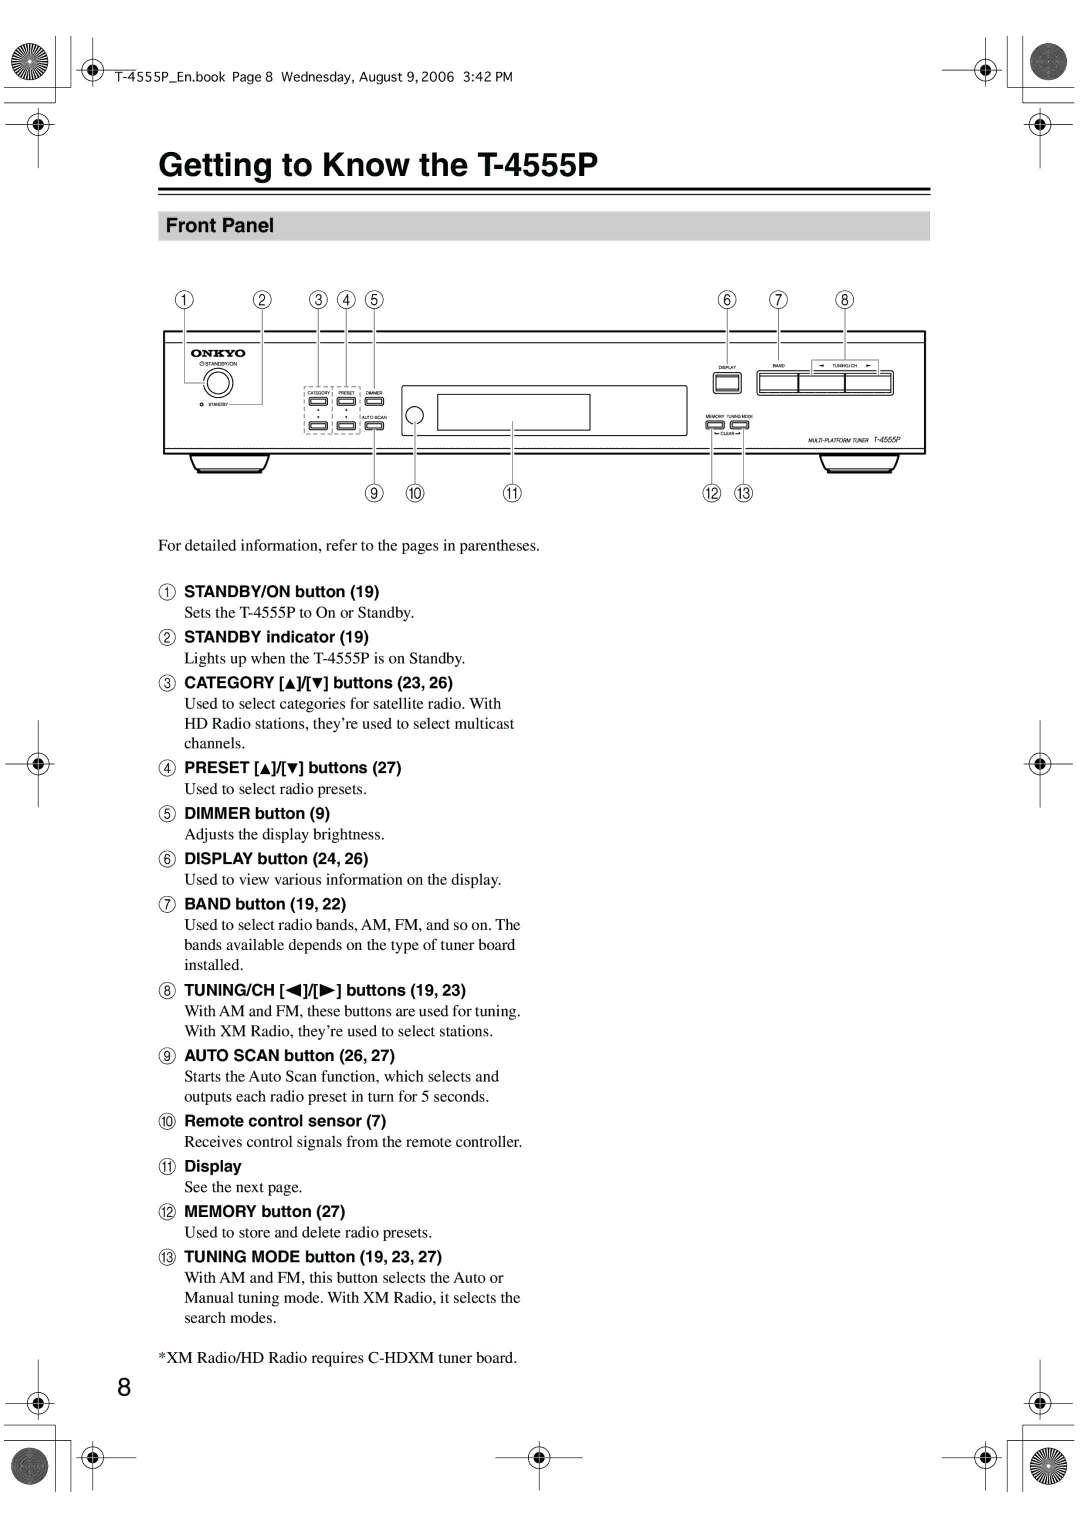
Another notable characteristic of the T-4555P is its user-friendly interface. The display provides clear information on the current frequency and station, along with other relevant data, contributing to an intuitive user experience. The tuner also offers programmable presets, enabling users to save their favorite stations for quick access.
In conclusion, the Onkyo T-4555P tuner exemplifies exceptional engineering and design within the audio market. Its combination of advanced tuner technology, high-quality audio output, and user-friendly features make it an excellent choice for anyone seeking to enhance their music listening experience. Whether used as a standalone unit or as part of a broader home audio system, the Onkyo T-4555P is poised to deliver outstanding performance and enjoyment for years to come.

