TX-SR501E specifications
The Onkyo TX-SR501E is a versatile home theater receiver that delivers quality audio performance and a range of features designed to enhance your multimedia experience. With a solid build and an array of connectivity options, it caters to both audiophiles and casual users alike.One of the standout features of the TX-SR501E is its robust amplification system. It boasts a power output of 80 watts per channel, ensuring that your home theater setup receives ample power for a dynamic listening experience. This is complemented by Onkyo’s wide-range amplifier technology, which provides clear and precise sound reproduction across a variety of audio formats. Whether you're watching movies or listening to music, the receiver’s high current capabilities contribute to improved transient response and overall sound clarity.
The TX-SR501E supports multiple audio formats, including Dolby Digital and DTS, making it a great choice for both home theater enthusiasts and music lovers. The receiver is equipped with a 5.1 channel configuration, allowing you to fully immerse yourself in surround sound, perfect for movie nights or gaming sessions. It also includes various sound modes, enabling customization based on your preferences.
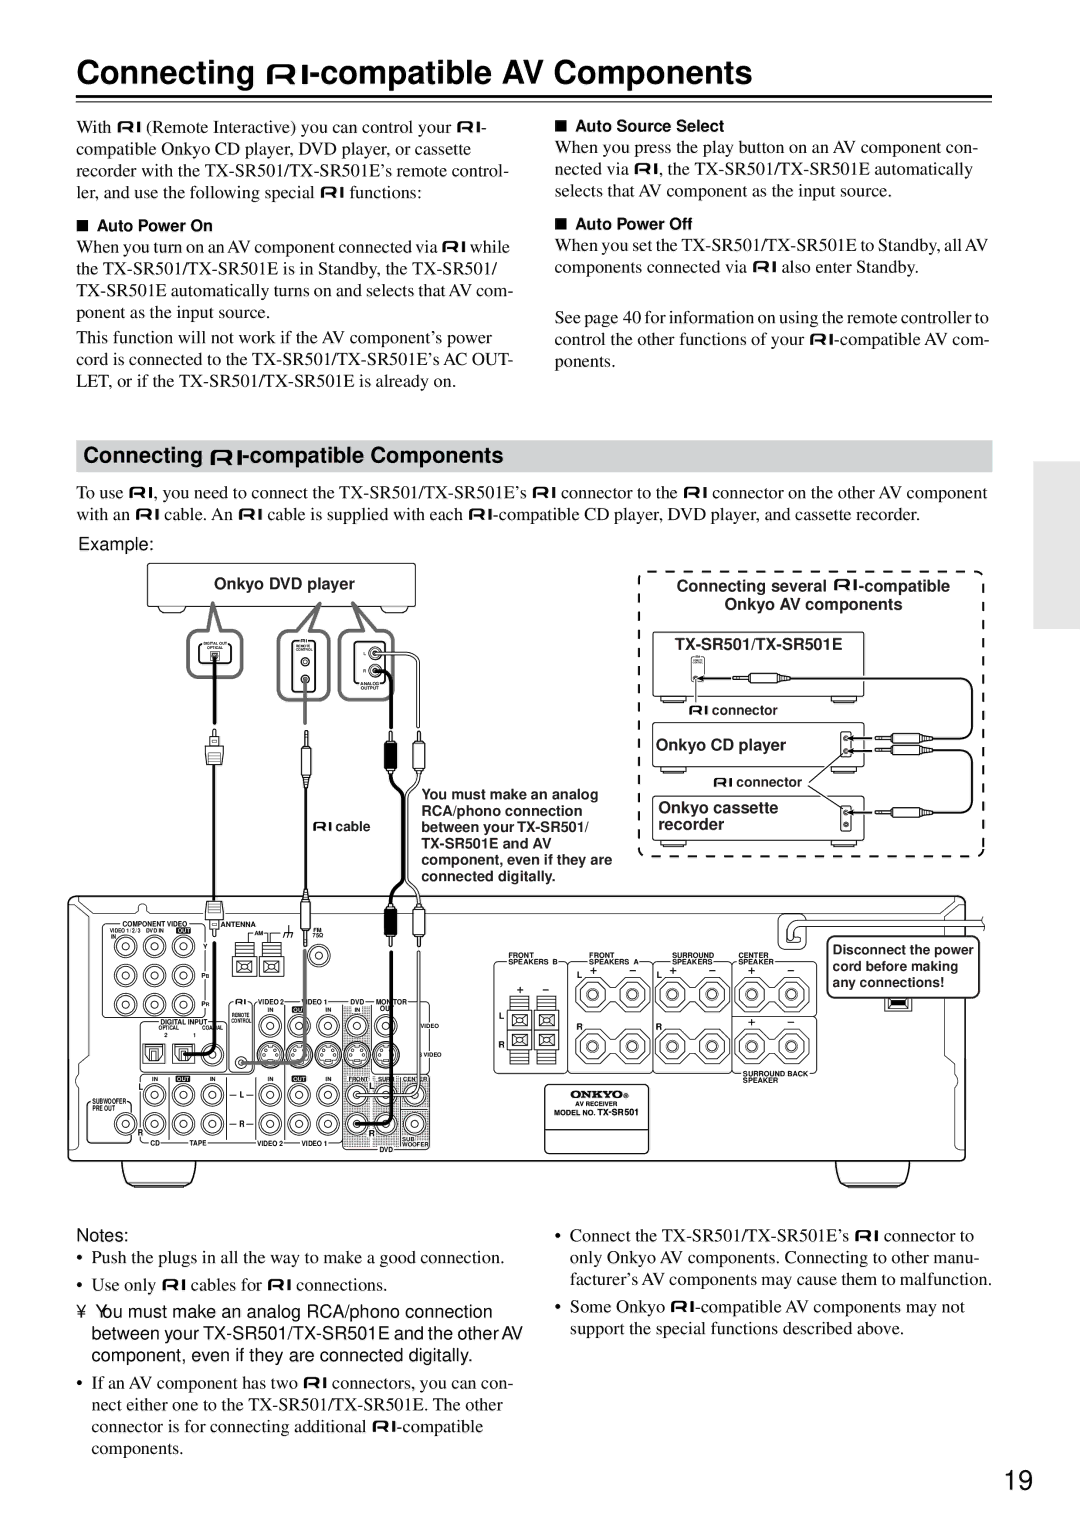
In terms of connectivity, the Onkyo TX-SR501E does not disappoint. It features multiple HDMI inputs, allowing for easy connections with modern devices, such as Blu-ray players, gaming consoles, and streaming devices. Additionally, it includes composite and component video inputs, so you can easily integrate older equipment into your setup. The receiver's outputs include a subwoofer pre-out, making it simple to connect an external subwoofer for enhanced bass response.
Another noteworthy characteristic is the inclusion of Onkyo’s own proprietary technologies, such as the Music Optimizer, which enhances the sound quality of compressed audio files. This feature works well with digital music formats, ensuring that your playlists sound as good as possible, regardless of the source.
The user interface of the TX-SR501E is intuitive, featuring an easy-to-navigate remote and an on-screen display that simplifies setup and operation. This makes it accessible for users of varying technical expertise.
Overall, the Onkyo TX-SR501E is a well-rounded home theater receiver that combines power, flexibility, and excellent sound quality, making it an ideal choice for anyone looking to elevate their audio experience. Whether you're a seasoned enthusiast or new to home theater systems, the TX-SR501E offers the performance and features you need to enjoy your favorite media to the fullest.

