INSTALLATION INSTRUCTIONS
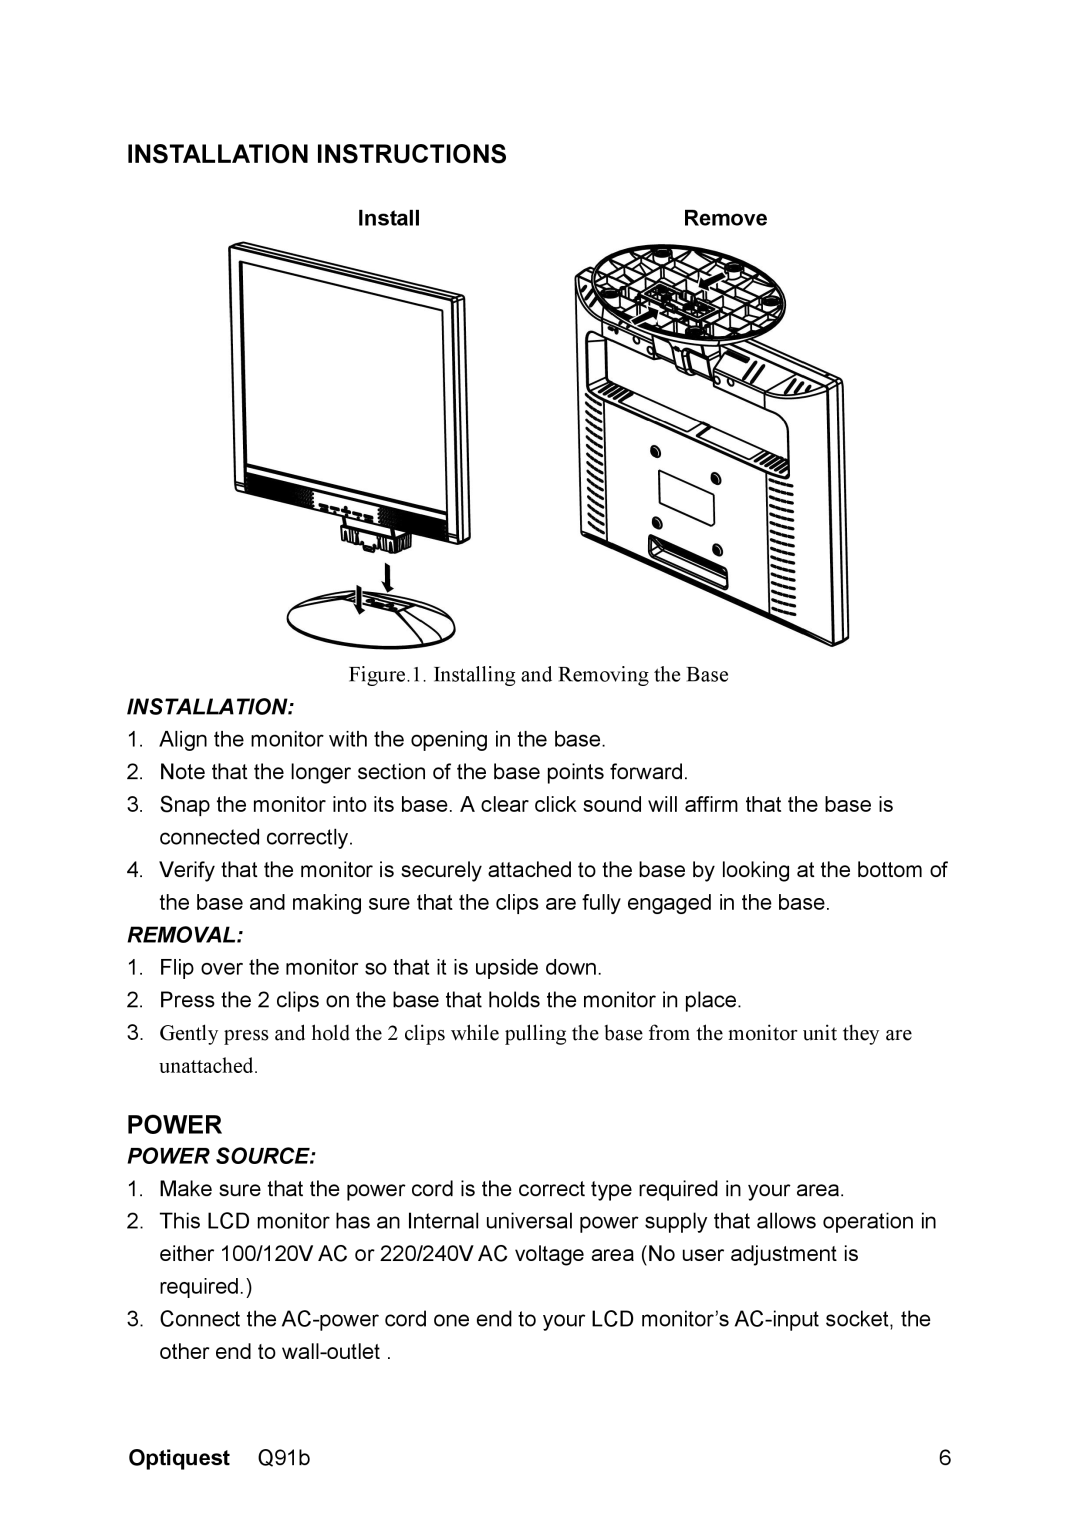
InstallRemove
Figure.1. Installing and Removing the Base
INSTALLATION:
1.Align the monitor with the opening in the base.
2.Note that the longer section of the base points forward.
3.Snap the monitor into its base. A clear click sound will affirm that the base is connected correctly.
4.Verify that the monitor is securely attached to the base by looking at the bottom of the base and making sure that the clips are fully engaged in the base.
REMOVAL:
1.Flip over the monitor so that it is upside down.
2.Press the 2 clips on the base that holds the monitor in place.
3.Gently press and hold the 2 clips while pulling the base from the monitor unit they are unattached.
POWER
POWER SOURCE:
1.Make sure that the power cord is the correct type required in your area.
2.This LCD monitor has an Internal universal power supply that allows operation in either 100/120V AC or 220/240V AC voltage area (No user adjustment is required.)
3.Connect the
Optiquest Q91b | 6 |
