NOTE: If your cabinet has glue blocks or other obstructions, cut out corresponding areas on the template to clear them. Do not cut out or cut through the screw holes in the template.
CAUTION: We recommend safety glasses be worn while drilling screw holes to prevent the possibility of eye injury.
2.Drill four 1/4" diameter holes through the underside of the cabinet.
TIP: On wooden cabinets you may want to mark and start the drill holes with a nail or an awl. Be sure to hold the drill very firmly against the cabinet.
Use masking tape above the hole locations on the inside of the cabinet shelf to reduce splintering. If installing the unit under a wood cabinet, you may want to countersink the drilled hole from the INSIDE of the cabinet. This will eliminate the use of washers and allow the screw head to be flush with the floor of your cabinet. If you cannot countersink the holes, use the supplied washers.
3.Remove the template and drill shavings from inside and underneath the cabinet.
4.If your cabinet does NOT have an overhang, go to Step 5.
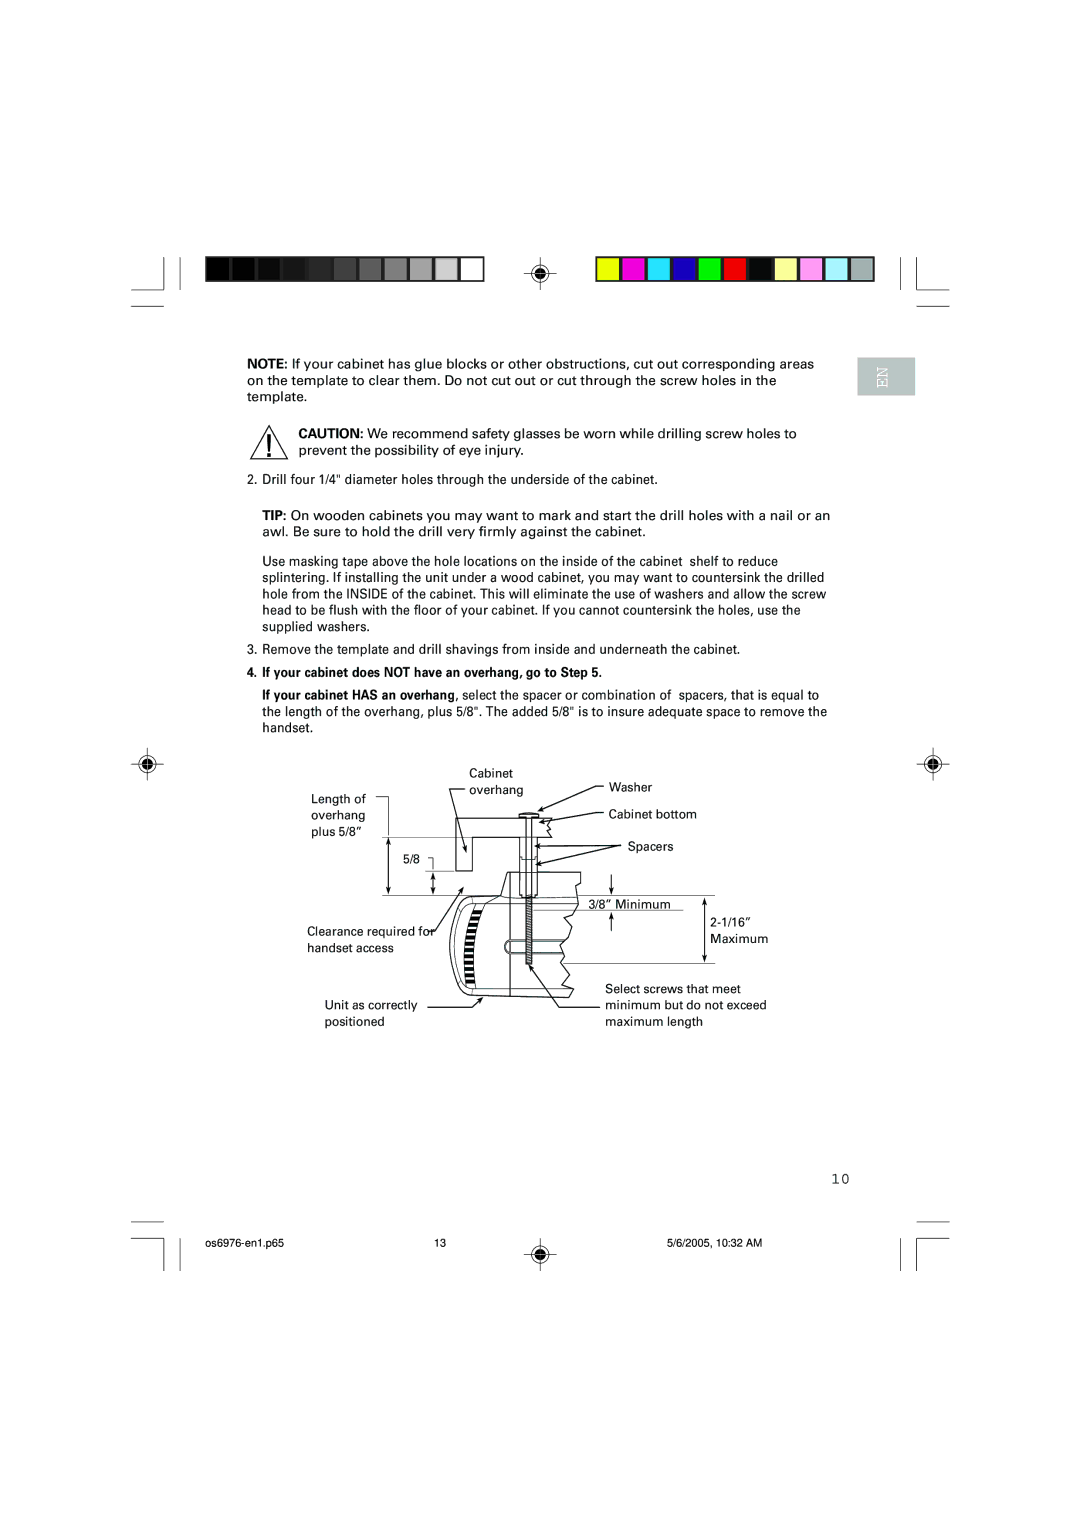
If your cabinet HAS an overhang, select the spacer or combination of spacers, that is equal to the length of the overhang, plus 5/8". The added 5/8" is to insure adequate space to remove the handset.
EN
Length of overhang plus 5/8”
Cabinet overhang
Washer
![]() Cabinet bottom
Cabinet bottom
Spacers
5/8
Clearance required for handset access
Unit as correctly positioned
3/8” Minimum
Maximum
Select screws that meet minimum but do not exceed maximum length
10
13 | 5/6/2005, 10:32 AM |