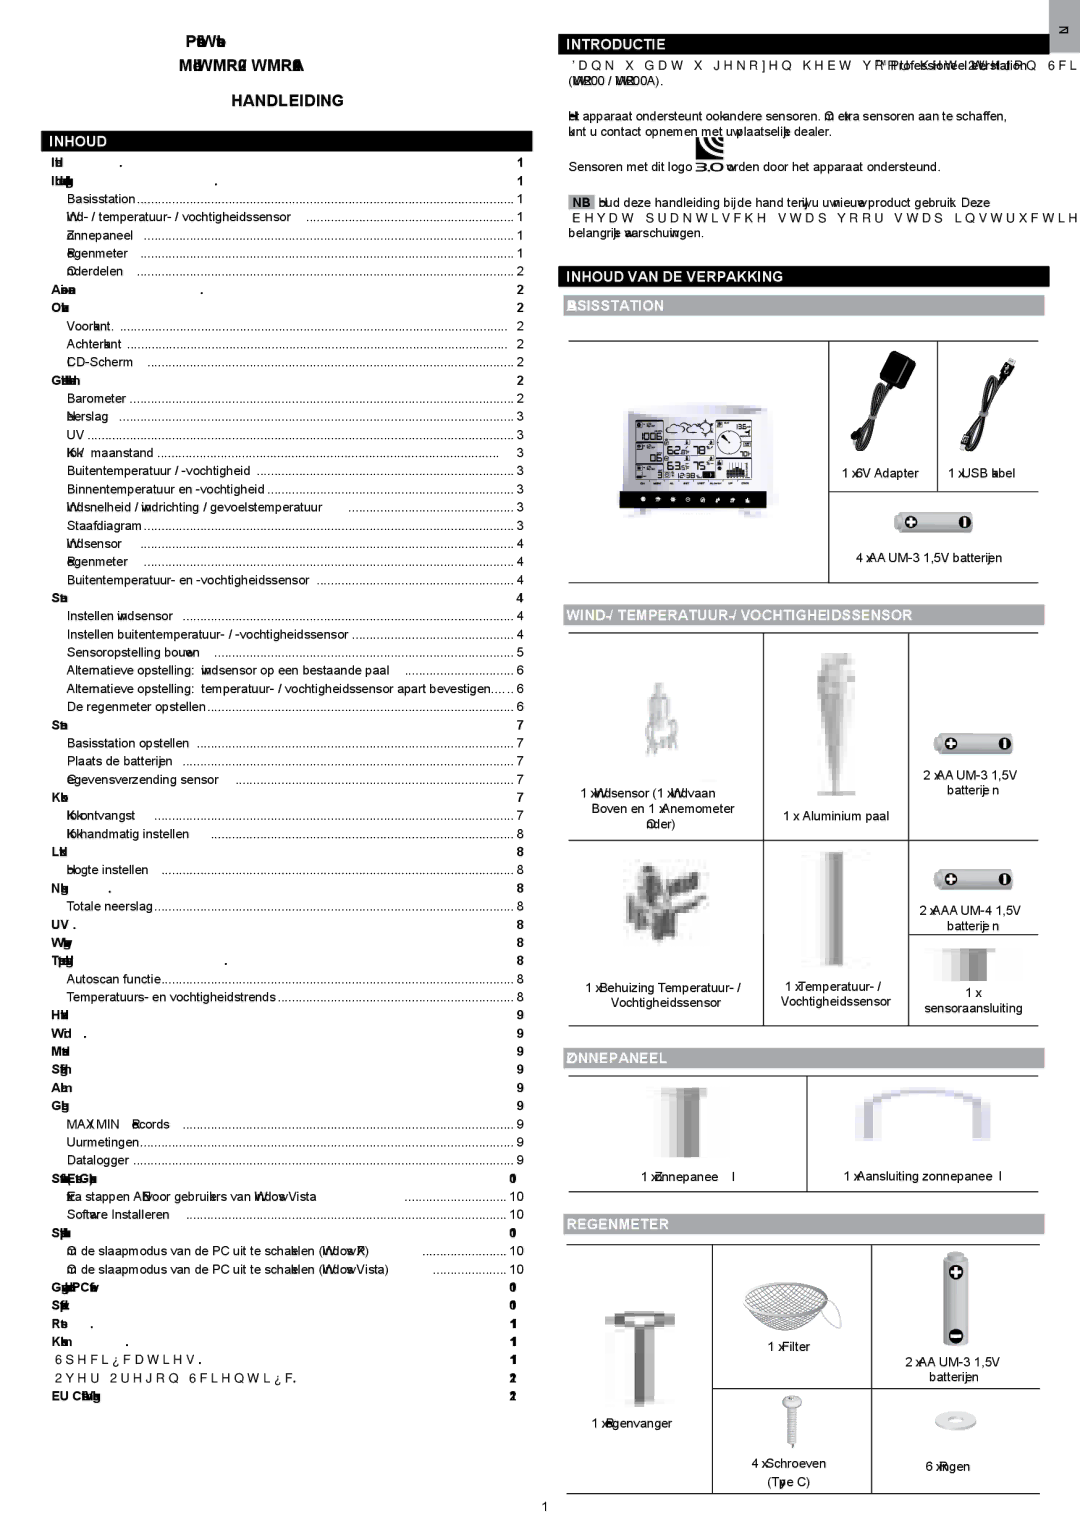
Oregon Scientific WMR200 manual Introductie, Inhoud VAN DE Verpakking, Zonnepaneel, Regenmeter

Models: WMR200

1 95
Download 95 pages 25.14 Kb
Page 61
Image 61

Professioneel Weerstation

INTRODUCTIE

Model: WMR200 / WMR200A

Dank u dat u gekozen hebt voor het Oregon ScientificTM Professioneel Weerstation


(WMR200 / WMR200A).

HANDLEIDING

NL

INHOUD

Het apparaat ondersteunt ook andere sensoren. Om extra sensoren aan te schaffen, kunt u contact opnemen met uw plaatselijke dealer.

Introductie

1


Sensoren met dit logo

worden door het apparaat ondersteund.

Inhoud van de verpakking

1


Basisstation

1


NB

Houd deze handleiding bij de hand terwijl u uw nieuwe product gebruikt. Deze


...........................................................Wind- / temperatuur- / vochtigheidssensor

1


bevat praktische stap-voor-stap instructies, evenals de technische specificaties en

Zonnepaneel

1


belangrijke waarschuwingen.

Regenmeter

1


Onderdelen

2

INHOUD VAN DE VERPAKKING


Accessoires – sensoren ......................................................................................... 2


Overzicht .................................................................................................................. 2

BASISSTATION


Voorkant. .............................................................................................................. 2


Achterkant ............................................................................................................ 2


LCD-Scherm ........................................................................................................ 2


Gedetailleerd overzicht lcd-scherm....................................................................... 2


Barometer ............................................................................................................. 2


Neerslag................................................................................................................ 3


UV ......................................................................................................................... 3


Klok / maanstand ................................................................................................. 3


Buitentemperatuur / -vochtigheid ......................................................................... 3

1 x 6V Adapter

1 x USB kabel

Binnentemperatuur en -vochtigheid ...................................................................... 3


Windsnelheid / windrichting / gevoelstemperatuur ............................................... 3


Staafdiagram......................................................................................................... 3


Windsensor

.......................................................................................................... 4


Regenmeter

......................................................................................................... 4

4 x AA UM-3 1,5V batterijen


Buitentemperatuur- en -vochtigheidssensor ........................................................ 4


Starten ...................................................................................................................... 4


Instellen windsensor

4

Instellen buitentemperatuur- / -vochtigheidssensor

4

Sensoropstelling bouwen

5

Alternatieve opstelling: windsensor op een bestaande paal

6

Alternatieve opstelling: temperatuur- / vochtigheidssensor apart bevestigen

6

De regenmeter opstellen

6

Starten

7

Basisstation opstellen

7

Plaats de batterijen

7

Gegevensverzending sensor

7

Klok

7

Klok ontvangst

7

Klok handmatig instellen

8

Luchtdruk

8

Hoogte instellen

8

Neerslag

8

Totale neerslag

8

UV

8

Weersverwachting

8

Temperatuur en vochtigheid

8

Autoscan functie

8

Temperatuurs- en vochtigheidstrends

8

Hitte-index

9

Wind

9

Maanstand

9

Staafdiagram

9

Alarm

9

Geheugen

9

MAX / MIN Records

9

Uurmetingen

9

Datalogger

9

Software instellen (Eerste Gebruik)

10

Extra stappen ALLEEN voor gebruikers van Windows Vista

10

Software Installeren

10

Slaapstand uitschakelen

10

WIND- / TEMPERATUUR- / VOCHTIGHEIDSSENSOR


2 x AA UM-3 1,5V

1 x Windsensor (1 x Windvaan


batterijen

Boven en 1 x Anemometer

1 x Aluminium paal


Onder)


2 x AAA UM-4 1,5V


batterijen

1 x Behuizing Temperatuur- /

1 x Temperatuur- /

1 x

Vochtigheidssensor

Vochtigheidssensor

sensoraansluiting


ZONNEPANEEL

1 x Zonnepaneel

1 x Aansluiting zonnepaneel


REGENMETER

Om de slaapmodus van de PC uit te schakelen (Windows XP)

10

Om de slaapmodus van de PC uit te schakelen (Windows Vista)

10

Gegevens uploaden naar PC-software

10

Software-updates

10

Reset

11

Kenmerken

11

Specificaties

11

Over Oregon Scientific

12

EU Conformiteits Verklaring

12

1 x Regenvanger

1

1 x Filter


2 x AA UM-3 1,5V


batterijen

4 x Schroeven

6 x Ringen

(Type C)


Page 61
Image 61
Oregon Scientific WMR200 Introductie, Inhoud VAN DE Verpakking, WIND- / TEMPERATUUR- / Vochtigheidssensor, Zonnepaneel

WMR200 specifications

The Oregon Scientific WMR200 is a versatile and advanced weather station designed for enthusiasts and professionals alike. Renowned for its user-friendly interface and robust functionality, the WMR200 is an excellent tool for monitoring both indoor and outdoor weather conditions.

One of the main features of the WMR200 is its array of sensors that provide comprehensive weather data. It includes an anemometer for measuring wind speed and direction, a rain gauge for precipitation measurement, and a thermo-hygrometer for tracking temperature and humidity levels. This combination allows users to analyze various weather elements, enhancing their understanding of local climate patterns.

The wireless technology embedded in the WMR200 is another key characteristic. The system utilizes advanced wireless transmission that allows sensors to communicate wirelessly with the main console, reducing the need for cumbersome cables. This feature not only simplifies setup but also enhances the overall aesthetic of the installation. The range of the wireless transmission is impressive, typically covering distances of up to 100 meters, depending on environmental factors.

The main console of the WMR200 features a clear LCD display that provides real-time readings of the collected data. Users can easily switch between various weather parameters, ensuring they have the most pertinent information at their fingertips. Additionally, the console can store historical weather data, enabling users to track changes over time and identify trends.

Another significant advantage of the WMR200 is its compatibility with online weather services. Users can sync their weather station with various online platforms, allowing them to share their data with a broader community or access specific analytical tools. This connectivity extends the utility of the WMR200 beyond individual use, fostering collaboration among amateur meteorologists and enthusiasts.

Furthermore, the WMR200 is designed with durability in mind. The sensors are built to withstand various weather conditions, ensuring accurate readings regardless of the elements. The materials used in the construction of the unit are weather-resistant, making it suitable for outdoor installation.

In summary, the Oregon Scientific WMR200 combines advanced technology with user-friendly design, catering to a diverse audience interested in weather observation. Its comprehensive sensor array, wireless features, historical data storage, and online connectivity make it an essential tool for anyone keen on understanding and monitoring weather dynamics. Whether for personal curiosity or professional applications, the WMR200 stands out as a reliable and effective weather station.