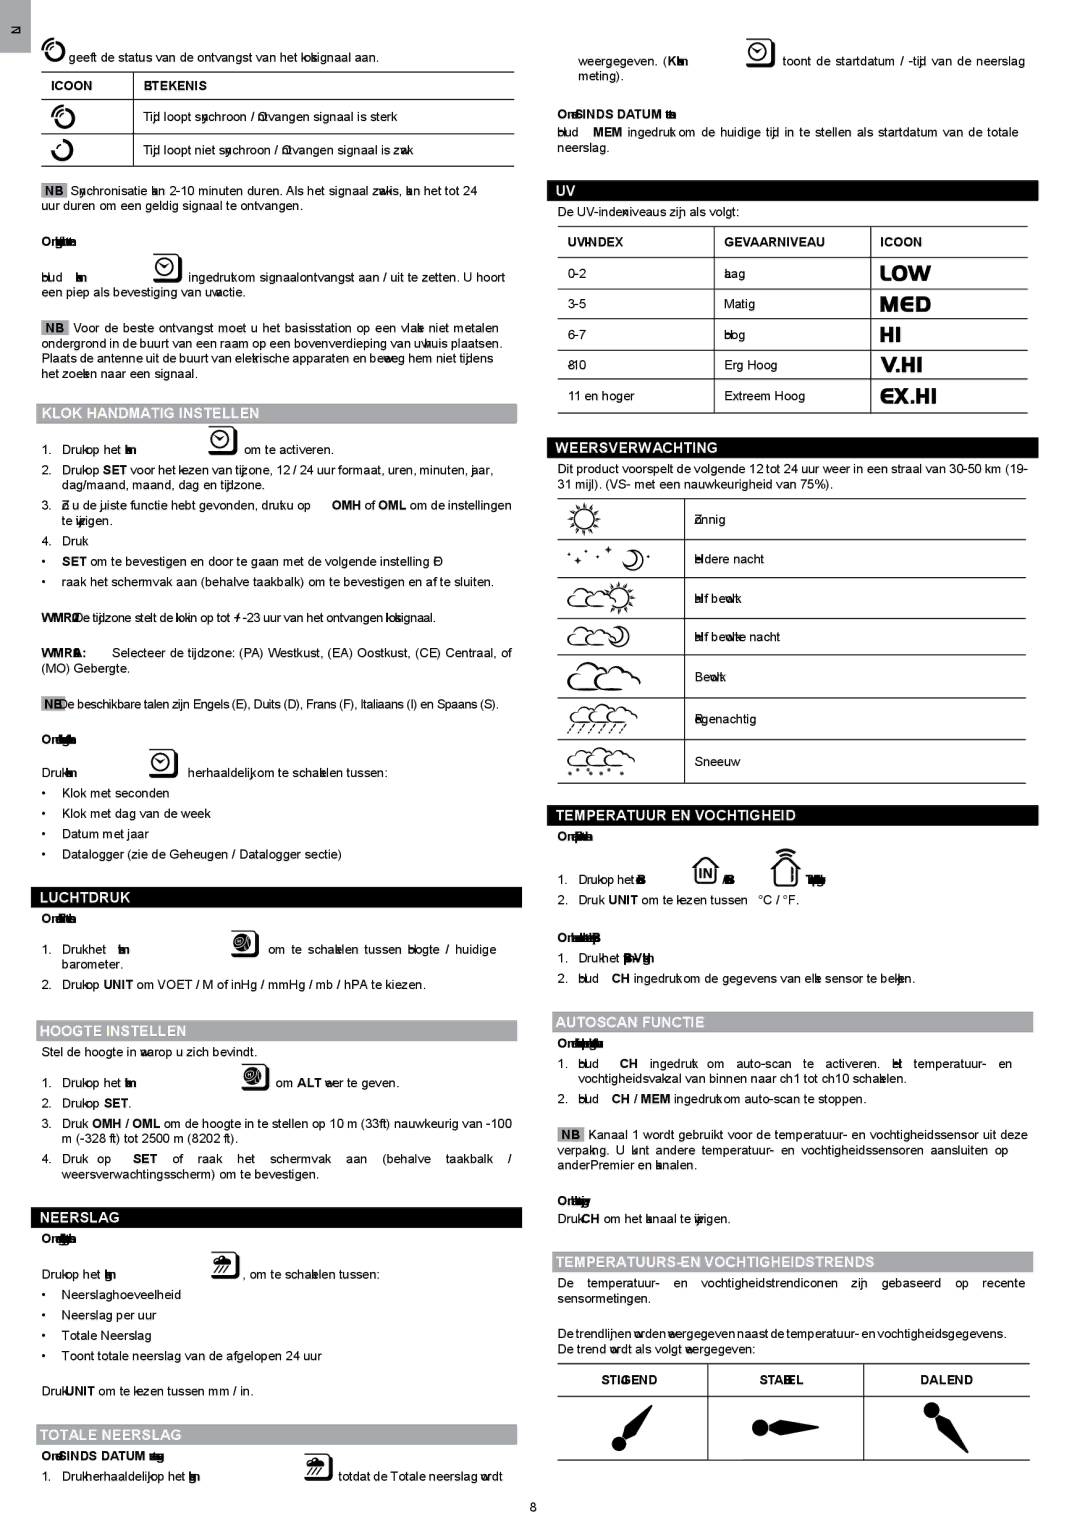
Oregon Scientific WMR200 Klok Handmatig Instellen, Luchtdruk, Hoogte Instellen, Totale Neerslag

Models: WMR200

1 95
Download 95 pages 25.14 Kb
Page 68
Image 68

NL

geeft de status van de ontvangst van het kloksignaal aan.

ICOON

BETEKENIS


Tijd loopt synchroon / Ontvangen signaal is sterk


Tijd loopt niet synchroon / Ontvangen signaal is zwak


NB Synchronisatie kan 2-10 minuten duren. Als het signaal zwak is, kan het tot 24 uur duren om een geldig signaal te ontvangen.

Om signaalontvangst aan/uit te zetten:

Houd klokscherm ingedrukt om signaalontvangst aan / uit te zetten. U hoort een piep als bevestiging van uw actie.

NB Voor de beste ontvangst moet u het basisstation op een vlakke niet metalen ondergrond in de buurt van een raam op een bovenverdieping van uw huis plaatsen. Plaats de antenne uit de buurt van elektrische apparaten en beweeg hem niet tijdens het zoeken naar een signaal.

KLOK HANDMATIG INSTELLEN

1. Druk op het klokscherm om te activeren.

2.Druk op SET voor het kiezen van tijzone, 12 / 24 uur formaat, uren, minuten, jaar, dag/maand, maand, dag en tijdzone.

3.Zo u de juiste functie hebt gevonden, drukt u op OMH of OML om de instellingen te wijzigen.

4.Druk:

SET om te bevestigen en door te gaan met de volgende instelling OF

raak het schermvak aan (behalve taakbalk) om te bevestigen en af te sluiten.

WMR200: De tijdzone stelt de klok in op tot + / -23 uur van het ontvangen kloksignaal.

WMR200A: Selecteer de tijdzone: (PA) Westkust, (EA) Oostkust, (CE) Centraal, of (MO) Gebergte.

NB De beschikbare talen zijn Engels (E), Duits (D), Frans (F), Italiaans (I) en Spaans (S).

Om de klok weergavemodus te selecteren:

Druk klokscherm herhaaldelijk, om te schakelen tussen:

Klok met seconden

Klok met dag van de week

Datum met jaar

Datalogger (zie de Geheugen / Datalogger sectie)

LUCHTDRUK

Om de luchtdrukeenheid in te stellen:

1.Druk het barometerscherm om te schakelen tussen Hoogte / huidige barometer.

2.Druk op UNIT om VOET / M of inHg / mmHg / mb / hPA te kiezen.

HOOGTE INSTELLEN

Stel de hoogte in waarop u zich bevindt.

1. Druk op het barometerscherm om ALT weer te geven.

2.Druk op SET.

3.Druk OMH / OML om de hoogte in te stellen op 10 m (33ft) nauwkeurig van -100 m (-328 ft) tot 2500 m (8202 ft).

4.Druk op SET of raak het schermvak aan (behalve taakbalk / weersverwachtingsscherm) om te bevestigen.

NEERSLAG

Om de weergavemodus neerslag te selecteren:

Druk op het neerslagscherm , om te schakelen tussen:

Neerslaghoeveelheid

Neerslag per uur

Totale Neerslag

Toont totale neerslag van de afgelopen 24 uur

Druk UNIT om te kiezen tussen mm / in.

TOTALE NEERSLAG

Om de SINDS DATUM weer te geven:


1. Druk herhaaldelijk op het neerslagscherm

totdat de Totale neerslag wordt

weergegeven. (Klokscherm toont de startdatum / -tijd van de neerslag meting).

Om de SINDS DATUM te resetten:

Houd MEM ingedrukt om de huidige tijd in te stellen als startdatum van de totale neerslag.

UV

De UV-indexniveaus zijn als volgt:

UV-INDEX

GEVAARNIVEAU

ICOON


0-2

Laag


3-5

Matig


6-7

Hoog


8-10

Erg Hoog


11 en hoger

Extreem Hoog


WEERSVERWACHTING

Dit product voorspelt de volgende 12 tot 24 uur weer in een straal van 30-50 km (19- 31 mijl). (VS- met een nauwkeurigheid van 75%).

Zonnig

Heldere nacht

Half bewolkt

Half bewolkte nacht

Bewolkt

Regenachtig

Sneeuw

TEMPERATUUR EN VOCHTIGHEID

Om de temperatuureenheid in te stellen:

1.Druk op het Binnen- /Buiten- Temperatuur- / -vochtigheidsscherm.

2.Druk UNIT om te kiezen tussen °C / °F.

Om automatisch door de sensoren te schakelen (Buiten):

1.Druk het Buitentemperatuur- / -Vochtigheidsscherm.

2.Houd CH ingedrukt om de gegevens van elke sensor te bekijken.

AUTOSCAN FUNCTIE

Om de auto-scanfunctie voor buitentemperatuur en -vochtigheid te activeren:

1.Houd CH ingedrukt om auto-scan te activeren. Het temperatuur- en vochtigheidsvak zal van binnen naar ch1 tot ch10 schakelen.

2.Houd CH / MEM ingedrukt om auto-scan te stoppen.

NB Kanaal 1 wordt gebruikt voor de temperatuur- en vochtigheidssensor uit deze verpakking. U kunt andere temperatuur- en vochtigheidssensoren aansluiten op anderPremier en kanalen.

Om het kanaal te wijzingen:

Druk CH om het kanaal te wijzigen.

TEMPERATUURS- EN VOCHTIGHEIDSTRENDS

De temperatuur- en vochtigheidstrendiconen zijn gebaseerd op recente sensormetingen.

De trendlijnen worden weergegeven naast de temperatuur- en vochtigheidsgegevens. De trend wordt als volgt weergegeven:

STIJGEND

STABIEL

DALEND


8

Page 68
Image 68
Oregon Scientific WMR200 manual Klok Handmatig Instellen, Luchtdruk, Hoogte Instellen, Totale Neerslag, Weersverwachting

WMR200 specifications

The Oregon Scientific WMR200 is a versatile and advanced weather station designed for enthusiasts and professionals alike. Renowned for its user-friendly interface and robust functionality, the WMR200 is an excellent tool for monitoring both indoor and outdoor weather conditions.

One of the main features of the WMR200 is its array of sensors that provide comprehensive weather data. It includes an anemometer for measuring wind speed and direction, a rain gauge for precipitation measurement, and a thermo-hygrometer for tracking temperature and humidity levels. This combination allows users to analyze various weather elements, enhancing their understanding of local climate patterns.

The wireless technology embedded in the WMR200 is another key characteristic. The system utilizes advanced wireless transmission that allows sensors to communicate wirelessly with the main console, reducing the need for cumbersome cables. This feature not only simplifies setup but also enhances the overall aesthetic of the installation. The range of the wireless transmission is impressive, typically covering distances of up to 100 meters, depending on environmental factors.

The main console of the WMR200 features a clear LCD display that provides real-time readings of the collected data. Users can easily switch between various weather parameters, ensuring they have the most pertinent information at their fingertips. Additionally, the console can store historical weather data, enabling users to track changes over time and identify trends.

Another significant advantage of the WMR200 is its compatibility with online weather services. Users can sync their weather station with various online platforms, allowing them to share their data with a broader community or access specific analytical tools. This connectivity extends the utility of the WMR200 beyond individual use, fostering collaboration among amateur meteorologists and enthusiasts.

Furthermore, the WMR200 is designed with durability in mind. The sensors are built to withstand various weather conditions, ensuring accurate readings regardless of the elements. The materials used in the construction of the unit are weather-resistant, making it suitable for outdoor installation.

In summary, the Oregon Scientific WMR200 combines advanced technology with user-friendly design, catering to a diverse audience interested in weather observation. Its comprehensive sensor array, wireless features, historical data storage, and online connectivity make it an essential tool for anyone keen on understanding and monitoring weather dynamics. Whether for personal curiosity or professional applications, the WMR200 stands out as a reliable and effective weather station.